
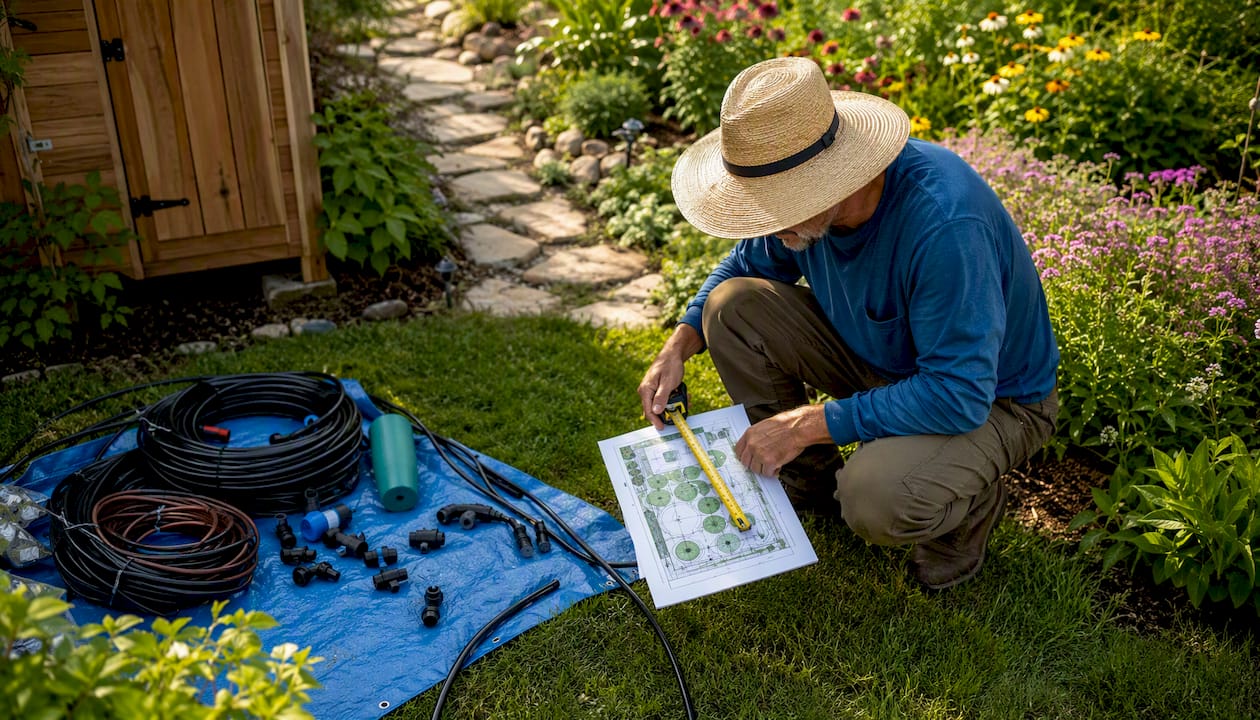
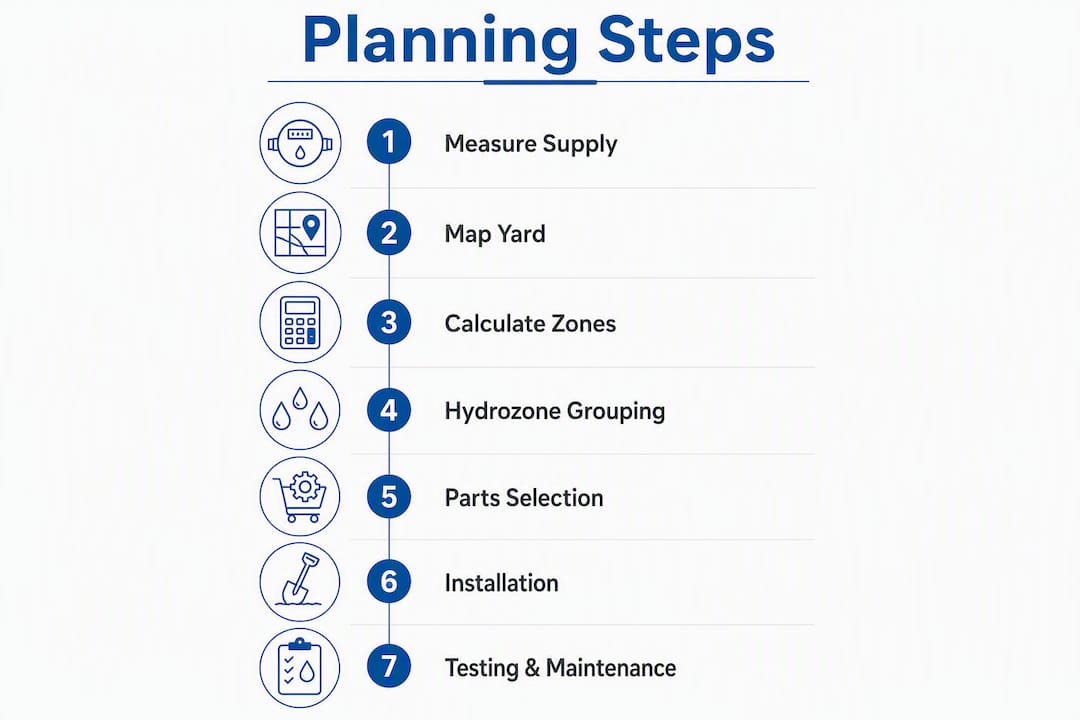
To plan a residential irrigation system, measure your static water pressure (PSI) and flow rate (GPM) at the outdoor spigot, draw your yard to scale, divide it into hydrozones, calculate how many zones your supply can support, select compatible sprinkler heads, build a parts list, and test every zone after installation. That sequence produces a ready-to-install plan whether you do the work yourself or hand it to a contractor.
Here is the quick-action checklist to get you started:
- Measure static PSI with a pressure gauge and GPM with a 5-gallon bucket test at your outdoor faucet.
- Sketch your yard to scale on graph paper or trace it in a browser planner such as the Orbit Sprinkler System Designer or Areaplane.
- Mark all hardscapes, trees, planting beds, slopes, and the point of connection (POC) to your water supply.
- Group areas into hydrozones by plant type, sun/shade exposure, and soil drainage.
- Calculate total zone GPM demand and split into as many zones as your supply requires.
- Select compatible head types (rotors, fixed sprays, or drip) within each zone.
- Build a parts list covering valves, controller, backflow assembly, pipe, fittings, wire, and heads.
- Test each zone after installation, verify head-to-head coverage, and adjust nozzles or pressure as needed.
Hunter Industries publishes a free residential design guide that walks through every measurement and calculation step. Rain Bird components are a common standard for residential parts. If your yard is large, complex, or subject to local backflow codes, Divinelandscapingllc offers professional design and installation in New Hampshire and neighboring Massachusetts.
Table of Contents
- How do you measure water pressure and flow before planning your system?
- How to map your yard and create a scaled plot plan
- How do you calculate available supply and figure out how many zones you need?
- How to divide your yard into hydrozones and choose the right head types
- What parts do you need for a residential irrigation system?
- How much does a residential irrigation system cost, and how long does installation take?
- Step-by-step installation checklist and how to test each zone
- What watering schedule should you set, and how do you maintain the system?
- Most common planning mistakes and how to fix them fast
- When should you hire a professional irrigation installer?
- Key Takeaways
- Why getting the hydraulics right matters more than getting the parts right
- Divinelandscapingllc: professional irrigation design and installation in New Hampshire
- Useful sources and manufacturer guides for further reading
How do you measure water pressure and flow before planning your system?
Getting your PSI and GPM numbers right is the single most important step in residential irrigation planning. Every zone size, every head selection, and every pipe diameter flows from those two figures.
Tools you need:
- A threaded pressure gauge (available at any hardware store for under $15)
- A stopwatch or phone timer
- A 5-gallon bucket
- A tape measure
- Graph paper or a phone with satellite view
- Marking flags or marking paint for the yard
Measuring static pressure (PSI)
Thread the pressure gauge onto an outdoor hose bib. Make sure no other water is running inside or outside the house. Open the faucet fully and read the gauge. That number is your static pressure. Most residential systems read within a typical static pressure range. Write it down.

Measuring flow rate (GPM) with the bucket test
Place the 5-gallon bucket under the same faucet. Open it fully and time how many seconds it takes to fill the bucket. Divide 300 by the number of seconds to get GPM. For example, if the bucket fills in 30 seconds: 300 ÷ 30 = 10 GPM. Hunter Industries’ residential design guide uses exactly this method to establish system design capacity before any zone calculations begin.
What those numbers mean for your design
Static pressure is not the same as working pressure. You lose pressure to friction in pipes, elevation changes, and the backflow assembly. A conservative rule is to subtract 20–25% from static PSI to estimate working pressure at the heads. Your working pressure determines which head models you can use and at what radius. Your GPM figure caps how many heads can run simultaneously in one zone.
Quick planners like Areaplane default to typical starting assumptions of moderate GPM and PSI values representative of a standard residential home. If your numbers differ significantly, adjust before you design.
Safety reminder: Call 811 before any digging to have underground utilities marked. It is free, required by law, and takes one phone call.
How to map your yard and create a scaled plot plan
A scaled yard map is not optional. Without one, you cannot accurately place heads, route pipe, or count materials. The good news is that you have two practical options: pencil and graph paper, or a browser-based planner.
Option 1: Graph paper sketch
Choose a scale that fits your yard on one sheet. Common choices are 1 inch = 10 feet for smaller yards or 1 inch = 20 feet for larger properties. Then follow these steps:
- Measure the full perimeter of your yard with a tape measure and draw the outer boundary to scale.
- Measure and mark the house footprint, driveway, sidewalks, patios, and any other impervious surfaces.
- Note trees, shrubs, and planting bed locations with a simple symbol key.
- Record slopes: a basic method is to measure the rise over a 10-foot run with a level and a tape measure.
- Mark your water meter location, service line size (typically 3/4" or 1"), and the outdoor faucet you tested.
- Note soil type if you know it. Sandy soil drains fast and needs shorter, more frequent run times. Clay holds water and benefits from cycle-and-soak scheduling.
- Label each distinct planting area as a potential hydrozone.
Option 2: Browser-based planner
The Orbit Sprinkler System Designer lets you trace a Google Maps satellite image of your property, draw zones, and place heads interactively. Areaplane works similarly and adds automatic zone splitting based on your POC GPM, plus a downloadable bill of materials. Both tools prevent you from mixing incompatible head types in the same zone, which eliminates one of the most common planning errors before it happens.
Pro Tip: Once your map is complete, mark expected head locations with colored dots and label each hydrozone with a letter (A, B, C). That simple step makes the zone-demand calculations in the next section much faster.
Soil type and slope belong on your map because they directly affect run times and emitter selection. A shaded, clay-heavy bed on a slope needs a different emitter and run time than a sunny, sandy lawn area. Capturing that on paper now prevents mismatched zones later.
How do you calculate available supply and figure out how many zones you need?
This is where your PSI and GPM measurements become a design decision. The goal is to match your water supply to the demand of each zone so no zone asks for more than your system can deliver.
Finding system design capacity
Hunter’s residential design guide defines system design capacity as the usable flow available at the point of connection after accounting for pressure losses, advising a safety margin on measured flow. This safety margin accounts for pressure fluctuations, pipe friction, and future expansion. Design your zones to use a safe portion of your measured flow rate, commonly around 75%, to allow a safety margin.
Worked example: calculating zone count
Suppose you have a 5,000-square-foot lawn area and want to use fixed spray heads rated at 1.5 GPM each. You plan to place 12 heads in that area.
| Item | Value |
|---|---|
| Heads in area | 12 |
| GPM per head | 1.5 GPM |
| Total zone demand | 18 GPM |
| Measured POC GPM | 12 GPM |
| Design capacity (75%) | 9 GPM |
| Zones required | 18 ÷ 9 = 2 zones |
The Hunter method for zone count is straightforward: write down each head’s GPM, sum them within an area, then divide by your design capacity and round up. That gives you the minimum number of valves for that area.
Pro Tip: Areaplane flags any zone that exceeds your POC GPM cap automatically and refuses to let you add more heads until you split the zone. That real-time feedback prevents the most common supply-overload mistake before you ever buy a part.
Working pressure at the head matters just as much as GPM. If your static pressure is 65 PSI and you subtract 20 PSI for losses, you have roughly 45 PSI at the head, which is within the operating range of most residential spray and rotor heads. Always check the manufacturer’s performance chart for the specific head model you plan to use.
How to divide your yard into hydrozones and choose the right head types
Hydrozoning is the practice of grouping irrigation areas by shared water needs. It is the difference between a system that keeps every plant healthy and one that drowns the shade garden while leaving the sunny lawn dry.
What goes into a hydrozone
Group areas together when they share the same plant type, sun or shade exposure, slope, and soil drainage characteristics. A shaded perennial bed, a full-sun lawn, and a sloped shrub border each have different water requirements and should never share a zone. Mixing them forces you to either overwater one or underwater another.
Head compatibility: the rule you cannot break
Never mix fixed-spray heads and rotor heads in the same zone. Toro’s sprinkler planning guide is direct on this point: fixed sprays and rotors apply water at different precipitation rates, so running them together guarantees uneven coverage. One area will be saturated while the other is still dry. Areaplane enforces this rule automatically; if you are designing by hand, mark each zone with its head type and double-check before finalizing.
Head types and where each fits
- Large-area rotors: Best for open lawn areas. Hunter’s spacing guidelines specify 25–40 feet between rotor heads to ensure head-to-head coverage.
- Fixed spray heads: Suited for smaller lawn areas and tight spaces. Spacing runs 8–17 feet for fixed spray heads to ensure head-to-head coverage.
- MP Rotator-style low-precipitation nozzles: A good middle ground for slopes and clay soils where runoff is a concern. They apply water slowly enough for the soil to absorb it.
- Drip emitters: The right choice for planting beds, vegetable gardens, and shrub borders. They deliver water directly to the root zone, reducing evaporation and fungal issues.
Common planning mistakes to avoid
Forgetting quarter-circle and half-circle heads at edges and corners is one of the most frequent errors. Without them, the perimeter of your lawn gets half the water the center does. Ignoring slope is another: heads on a downhill run can drain after the valve closes, causing low-head drainage that wastes water and erodes soil. Check that your head selection includes check valves if your yard has any grade change.
What parts do you need for a residential irrigation system?
A complete residential system has more components than most homeowners expect. Knowing the full list before you shop prevents mid-project trips back to the supply house.
Essential components
Point of connection and backflow prevention: Your system taps into the home’s water supply, typically after the meter. A backflow preventer is required by code in most U.S. jurisdictions to protect the potable water supply. Its type and installation location are governed locally, so verify requirements with your municipality before purchasing. Professionals typically handle the permit and certified installation of this assembly.
Mainline: The pipe running from the POC to the valve manifold. Typically 1" PVC or polyethylene (poly) for residential systems. Hunter’s guide provides pipe sizing and friction-loss charts to help you select the right diameter.
Valve manifold and zone valves: One electric solenoid valve per zone, grouped in a manifold box. Leave adequate clearance between valves for maintenance access and include at least one capped stub-out for future expansion.
Controller: One station per valve. A basic controller handles most small yards; larger properties may require controllers with more stations. Smart controllers with Wi-Fi and ET (evapotranspiration) sensors are worth the extra cost for water savings over time.
Lateral pipe and fittings: PVC is rigid and durable; poly is flexible and easier to work with in rocky or curved layouts. Both are standard choices for residential lateral lines.
Heads and nozzles: Matched to your hydrozones as described above.
Multi-conductor wire: One control wire per valve plus one common wire, run from the controller to each valve. Measure the distance to the farthest valve and add 20% for routing.
Valve boxes: Protect valves and wiring connections from soil and lawn equipment.
Swing joints: Flexible risers that connect lateral pipe to heads, preventing breakage from foot traffic or mowing.
Sample parts summary by yard size
| Component | Small Yard (up to 3 zones) | Medium Yard (4–6 zones) | Large Yard (7+ zones) |
|---|---|---|---|
| Zone valves | 3 | 4–6 | 7+ |
| Controller stations | 4–6 (with room to grow) | 6–8 | 12+ |
| Spray/rotor heads | 15–25 | 25–30 | 30+ |
| Lateral pipe (approx.) | 200 ft | 400 ft | 800 ft |
| Valve boxes | 1–2 | 2–3 | 3+ |
Rain Bird and Hunter components are widely available at irrigation supply houses and home improvement stores, and both brands publish compatibility charts so you can mix their nozzles and bodies with confidence. Areaplane’s planner exports a SKU-level bill of materials in PDF or CSV format, which you can hand directly to a supplier for a quote.
How much does a residential irrigation system cost, and how long does installation take?
Cost and timeline vary significantly by yard size, soil conditions, and whether you hire out or do the work yourself. Here is a realistic framework for planning your budget.
What drives cost
- Yard size and zone count: More zones mean more valves, more wire, more pipe, and more controller stations.
- Backflow and permitting: A certified backflow assembly and permit add cost but are non-negotiable in most municipalities.
- Trenching complexity: Rocky soil, tree roots, and existing hardscapes all slow trenching and raise labor costs.
- Head and controller quality: Entry-level heads and a basic timer cost less upfront but often need replacement sooner than mid-grade equipment from Rain Bird or Hunter.
- Winterization infrastructure: In New Hampshire and similar cold climates, a blow-out port and proper burial depth (following local frost-depth rules, commonly 12–18 inches or deeper) are required to prevent pipe damage.
Rough cost ranges
DIY material costs for a small 3-zone system typically run $500–$1,200, depending on head quality and controller choice. A medium 5-zone system with quality components often lands in the $1,200–$2,500 range for materials alone. Professional installation, which includes design, labor, backflow, and permitting, generally runs higher. Get at least two local quotes and ask each contractor to itemize backflow, permitting, and winterization separately so you can compare apples to apples.
Realistic timeline
| Phase | DIY Time Estimate |
|---|---|
| Planning and materials sourcing | 1–3 days |
| Utility locates (call 811) | 2–3 business days wait |
| Trenching and mainline | 1–2 days |
| Valve manifold and lateral lines | 1 day |
| Head installation and wiring | 1 day |
| Testing and commissioning | Half day |
| Buffer for adjustments | 1 day |
Budget at least one full buffer day. First-time installs almost always surface a zone that needs splitting or a head that needs repositioning once you see actual coverage.
A few budgeting tips worth keeping: prioritize correct POC measurement before you buy anything, invest in quality nozzles (cheap nozzles drift off their rated precipitation rate quickly), and factor winterization costs into your first-year budget if you are in a freeze-prone region.
Step-by-step installation checklist and how to test each zone
A careful installation sequence prevents the most common failures: pipe leaks from rushed connections, low pressure from overloaded zones, and poor coverage from misplaced heads.
- Static pressure check: — Before activating any zone, verify pressure at the POC is within your design range.
Low pressure in a zone usually means too many heads are running simultaneously. Split the zone. Overspray onto driveways or sidewalks is almost always a nozzle arc or radius adjustment.
What watering schedule should you set, and how do you maintain the system?
A well-designed system still wastes water if the controller is set incorrectly. Scheduling and maintenance are where efficiency is either gained or lost.
The 30/30 rule and cycle-and-soak
The 30/30 rule is a simple scheduling concept: run each zone for no more than 30 minutes at a time, then allow 30 minutes for the water to soak in before running again. This approach reduces runoff on slopes and clay soils where water absorption is slow. In practice, you split a 30-minute total run time into two 15-minute cycles with a 30-minute pause between them. Adjust the cycle length based on your soil type: sandy soil absorbs faster and may not need cycle-and-soak, while heavy clay almost always benefits from it.
ET sensors and smart controllers
An ET (evapotranspiration) sensor or a smart controller with local weather data adjusts run times automatically based on how much water plants actually used that day. In a dry New England summer, that can mean running every day; after a rainy week, the controller skips irrigation entirely. A rain sensor is the minimum upgrade worth adding to any new system.
Sample schedules
Lawn-dominant yard (spray zones):
- Early summer: 2 cycles of 12 minutes per zone, 4 days per week, early morning
- Late summer (peak heat): 2 cycles of 15 minutes per zone, 5 days per week
- Fall: reduce to 2 days per week as temperatures drop
Mixed lawn and planting bed yard:
- Lawn zones: as above
- Drip zones for beds: 20–30 minutes, 3 days per week (drip applies water slowly, so longer single runs are fine)
Routine maintenance tasks
- Spring startup: Open the system slowly to avoid water hammer, check each zone, inspect heads for winter damage, and clean filters.
- Monthly during season: Walk each zone while it runs, check for clogged or tilted heads, and look for wet spots that indicate a leak.
- Fall winterization: Blow out all lateral lines with a compressor before the first hard freeze. In New Hampshire, this step is not optional. Skipping it risks cracked pipe and burst heads.
- Meter checks: Read your water meter before and after a full irrigation cycle once a month. A significant discrepancy between expected and actual use often signals a leak before it becomes visible.
Catching a common maintenance oversight early, such as a slow valve leak or a clogged emitter, costs far less to fix than the water damage or dead plants that follow if it goes unnoticed for a full season.
Most common planning mistakes and how to fix them fast
Even careful planners make these errors. Knowing them in advance saves you a second round of trenching.
Mixing incompatible head types in one zone. Fixed sprays and rotors in the same zone produce uneven coverage because their precipitation rates differ. The fix is to split them into separate zones at the design stage, not after installation.
Under-measuring supply. Relying on a neighbor’s pressure estimate or a published municipal average instead of your own bucket test leads to overloaded zones. Always measure at your specific faucet.
Inadequate head-to-head coverage. Spacing heads too far apart leaves dry strips between them. The rule is simple: each head’s spray radius should reach the adjacent head. If you see a dry strip after commissioning, add a head or reduce the nozzle radius on the surrounding heads.
Incorrect pipe sizing. Undersized lateral pipe creates excessive friction loss, dropping pressure at the farthest head. Use the friction-loss charts in the Hunter or Sierra Irrigation design guides to verify pipe diameter before you buy.
Shallow burial. In freeze-prone climates, pipe buried too shallow cracks over winter. Follow local frost-depth requirements, typically 12–18 inches in New Hampshire.
Poor valve placement. Valves buried without a box, or packed too tightly together, become nearly impossible to service. The 6-inch clearance rule between valves exists for a reason.
Pro Tip: Before backfilling any trench, run every zone and measure its GPM at the POC. If a zone pulls significantly more than your design calculation, find the cause before the pipe is underground. Unbalanced zones are the single most common DIY failure, and they are trivial to fix at this stage and expensive to fix later.
Quick troubleshooting reference
- One zone has low pressure: Too many heads, undersized lateral pipe, or a partially closed valve. Check valve first, then count heads against your GPM calculation.
- Wet spot between heads: Likely a cracked fitting or a head that is not seating properly. Dig and inspect.
- Head not popping up: Clogged filter screen or insufficient pressure. Clean the screen first; if pressure is the issue, reduce the zone’s head count.
- Controller not activating a valve: Check the wire connection at both the controller terminal and the valve solenoid. A broken common wire will take down multiple zones at once.
Understanding plumbing code compliance for your backflow assembly and POC connections is worth reviewing before you finalize the installation, particularly if your municipality requires an inspection.
When should you hire a professional irrigation installer?
DIY irrigation is genuinely achievable for a straightforward yard with a clear POC, moderate soil, and no unusual code requirements. But several situations tip the balance toward hiring a professional.
Hire a pro when:
- Your yard is large enough to require more than 6 zones, because hydraulic balancing across that many zones requires friction-loss calculations that go beyond a simple bucket test.
- Your static pressure is below 40 PSI or above 80 PSI, which signals either a supply problem or a need for pressure regulation that affects every component choice.
- You have a well as your water source, where pump capacity and pressure tank sizing add complexity.
- Local code requires a certified backflow assembly installation with inspection, which is the case in most New Hampshire municipalities.
- Your property has steep slopes, because freeze-depth pipe burial on a grade requires careful planning to prevent low-head drainage and frost damage.
- You want a warranty on parts and labor and ongoing winterization service.
Hunter’s residential design guide specifically recommends contracting a professional irrigation designer for large residential projects, citing proper sizing, pressure regulation, and code compliance as the primary reasons.
What a professional delivers
A qualified irrigation contractor performs accurate hydraulic calculations using friction-loss tables, sizes pipe from the farthest head back to the POC, installs the backflow assembly per local code, buries pipe to the correct frost depth, and sets up a multi-station controller with seasonal scheduling. They also leave the system in a state that is easy to maintain and expand.
Questions to ask before hiring
- Are you licensed and insured for irrigation work in New Hampshire?
- Can you provide references or photos of comparable residential projects?
- What warranty do you offer on parts and labor?
- Does your scope include backflow installation, permitting, and a post-install walkthrough?
- Do you offer annual winterization service?
Divinelandscapingllc provides irrigation design and installation across New Hampshire and neighboring Massachusetts, including backflow assembly, controller setup, and seasonal winterization. Their team handles the permit and code compliance steps that most homeowners find the most uncertain part of the process.
Key Takeaways
A complete residential irrigation plan requires accurate supply measurements, a scaled yard map, hydrozone grouping, matched head selection, and a verified parts list before a single trench is dug.
| Point | Details |
|---|---|
| Measure first, design second | Measure flow rate and pressure before placing heads on your plan. |
| Design capacity = 75% of POC GPM | Use 75% of your measured flow rate as your zone cap to build in a safety margin. |
| Never mix sprays and rotors | Fixed spray heads and rotor heads have different precipitation rates and must run in separate zones. |
| Head-to-head spacing is non-negotiable | Rotors need 25–40 ft spacing; fixed sprays need 8–17 ft, so each head’s spray reaches the next. |
| Divinelandscapingllc handles the hard parts | For complex yards, code compliance, or backflow installation in NH, Divinelandscapingllc offers full-service design and installation. |
Why getting the hydraulics right matters more than getting the parts right
Most homeowners who plan their own irrigation system spend the most time choosing heads and the least time on hydraulic calculations. That is the wrong priority. A system with perfectly chosen heads and a poorly balanced zone count will underperform for its entire lifespan, and the fix usually requires digging.
The real determinant of system efficiency is matching available GPM and PSI to plant needs, divided by hydrozone. Head count is a downstream decision. When you get the hydraulics right first, everything else, including head selection, pipe sizing, and controller programming, becomes a straightforward lookup in a manufacturer chart rather than a guess.
There is also a long-term cost argument for correct frost-depth burial that rarely appears in DIY guides. In New Hampshire, pipe buried at the wrong depth does not fail dramatically in year one. It develops micro-cracks over two or three freeze-thaw cycles, then fails mid-season when the ground is fully planted and the repair requires removing established plants. The cost of digging deeper at installation is trivial compared to the cost of that repair.
The other thing professionals consistently get right, and first-time DIYers consistently miss, is valve accessibility and future expansion. Leaving capped stub-outs at the manifold and maintaining clearance between valves costs almost nothing at installation. Retrofitting them into a finished system costs a full day of labor. Plan for the system you will want in five years, not just the one you need today.
Divinelandscapingllc: professional irrigation design and installation in New Hampshire
Designing your own irrigation system is a real option for a straightforward yard, but the permit process, backflow compliance, and hydraulic balancing that come with a larger or more complex property are where professional experience pays for itself quickly.

Divinelandscapingllc designs and installs complete residential irrigation systems across New Hampshire and neighboring Massachusetts, handling everything from the initial supply measurement and scaled layout to backflow assembly installation, controller programming, and annual winterization. Their team knows local frost-depth requirements and municipal code, which means you avoid the permit surprises that catch many DIY installs off guard. Every installation includes a post-install walkthrough so you understand how to adjust your schedule by season.
If you are ready to stop planning and start watering, request an estimate from Divinelandscapingllc or browse their irrigation services to see what a full-service install includes.
Useful sources and manufacturer guides for further reading
These resources provide the technical depth that a planning guide can only summarize. Download the ones relevant to your project before finalizing your design.
- Toro Sprinkler Planning and Installation Guide: Covers zone grouping, head compatibility warnings, layout worksheets, and step-by-step installation. Particularly useful for its clear explanation of why mixing head types in one zone fails.
- Areaplane Irrigation System Planner: A free browser-based tool that traces your yard from a satellite image, auto-splits zones to your POC cap, prevents incompatible head mixes, and exports a SKU-level bill of materials in PDF or CSV. Useful for fast iteration and accurate parts ordering.
- Orbit Sprinkler System Designer: Another free browser planner that lets you trace a Google Maps image of your yard and generate a customized sprinkler layout. Good for visual learners who want to see head placement before committing to a design.
Before finalizing your nozzle selection, download the performance chart for the specific head model you plan to use. Manufacturer performance charts show actual GPM and radius at different operating pressures, which is the only reliable way to confirm your design assumptions. Also verify backflow preventer requirements with your local municipality before purchasing any assembly, as type and installation location requirements vary by jurisdiction.