
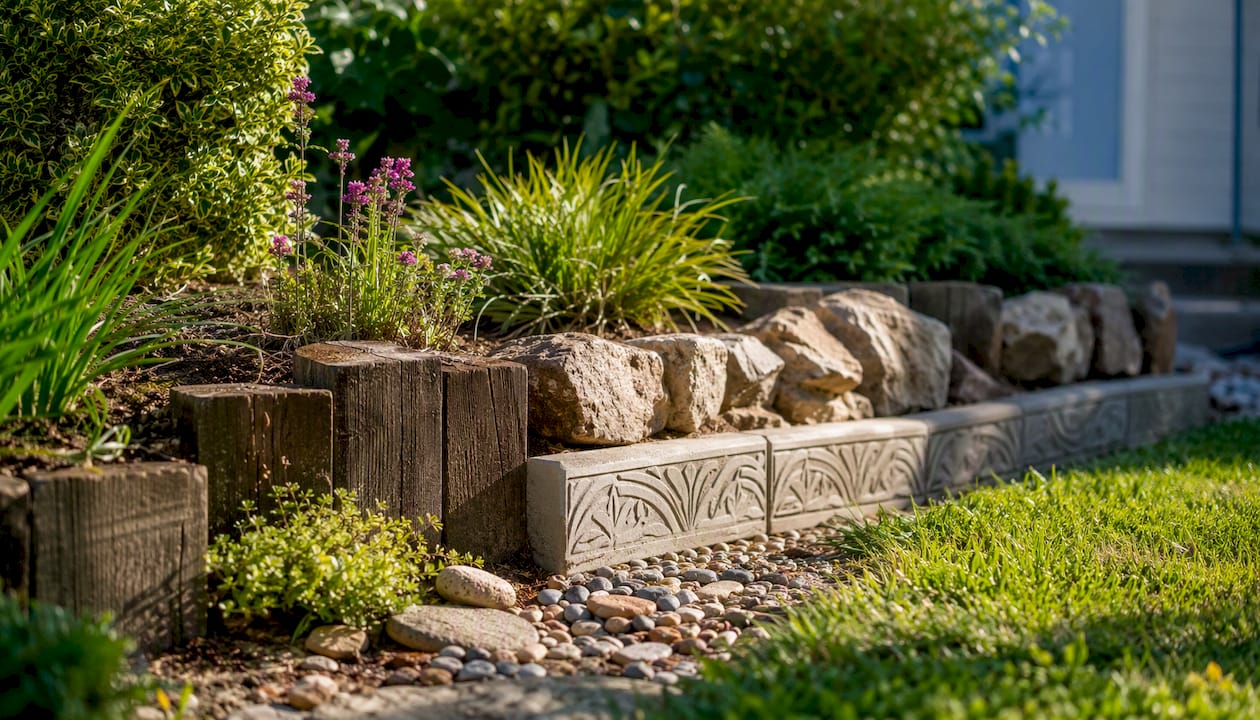
Garden borders come in nine main material groups: plastic/HDPE, rubber, steel and aluminum (including Corten), wood, brick and pavers, poured or molded concrete, natural stone, woven bamboo or willow, and living plant borders. The Spruce tested 11 edging options across these categories, measuring heights from 1.5 to 8 inches and evaluating containment, mowability, and durability. For most homeowners, the choice comes down to three goals:
- Lowest cost and easiest DIY: plastic roll edging or a spade-cut lawn edge
- Low maintenance with a clean modern look: steel strip, aluminum, or poured concrete
- Natural or soft aesthetic: natural stone, living plant borders, or woven willow
Divinelandscapingllc recommends matching your border material to your maintenance tolerance first, then your style. A border that looks great but demands weekly attention will frustrate you within a season.
Table of Contents
- How do the main border materials compare at a glance?
- A closer look at each garden border material
- How do you choose the right border for your yard?
- When should you DIY and when should you hire a pro?
- How do you match border style to your garden design?
- Key Takeaways
- What most homeowners get wrong about garden borders
- Ready to get a professional garden border installed?
- Useful sources and further reading
How do the main border materials compare at a glance?
| Material | Appearance / Style Fit | Durability / Lifespan | Ease of Install | Typical Cost Range | Maintenance | Best Uses | Typical Height |
|---|---|---|---|---|---|---|---|
| Plastic / HDPE | Neutral, utilitarian | 3–7 years | Very easy (DIY) | under $1.50 per linear foot | Low | Flower beds, vegetable gardens | 1.5–8 in |
| Pound-in plastic | Minimal | 2–5 years | Easiest (DIY) | — | Low | Temporary or budget borders | 1.5–8 in |
| Rubber | Flexible, low-profile | 5–10 years | Easy (DIY) | — | Low | Curved beds, playgrounds | 3–5 in |
| Steel / Corten | Sleek, modern | 20+ years | Moderate (DIY or pro) | $3–$8 per foot | Very low | Modern gardens, raised beds | 3–8 in |
| Aluminum | Clean, lightweight | 15–20 years | Moderate (DIY) | — | Very low | Formal or contemporary beds | 3–6 in |
| Wood / Timber | Warm, natural | 5–15 years | Moderate (DIY) | — | Moderate | Cottage, rustic, raised beds | 4–8 in |
| Brick / Pavers | Classic, decorative | 25+ years | Moderate–hard (pro) | — | Low–moderate | Formal, cottage, pathways | 3–6 in |
| Poured concrete | Precise, seamless | 20–30 years | Hard (pro) | $8–$20+ per foot installed | Very low | Driveways, formal beds | 4–8 in |
| Natural stone | Organic, textured | 30+ years | Hard (pro for boulders) | — | Low | Naturalistic, woodland, slopes | 4–24 in |
| Bamboo / Willow | Rustic, eco-friendly | 3–8 years | Easy–moderate (DIY) | — | Moderate | Cottage, zen, informal beds | 6–8 in |
| Living / Plant | Soft, seasonal | Ongoing | Moderate (DIY) | — | High | Naturalistic, cottage, wildlife | 4–18 in |
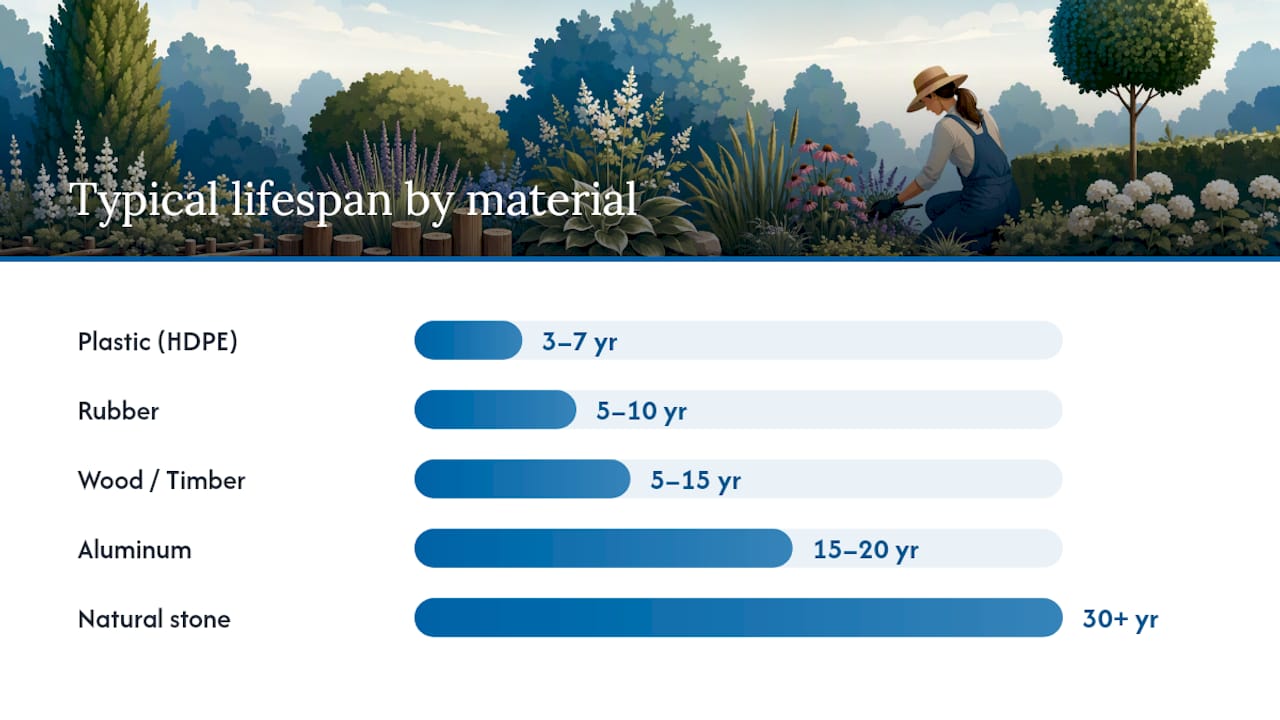
Lifespan snapshot: plastic lasts 3–7 years; rubber 5–10 years; wood 5–15 years; aluminum 15–20 years; steel 20+ years; brick and concrete 25–30+ years; natural stone 30+ years.
A closer look at each garden border material
Plastic and HDPE roll edging
Plastic edging is the most accessible starting point for any homeowner. It bends easily around curves, costs under $1.50 per linear foot, and installs in an afternoon with a spade and U-stakes. The trade-off is longevity: standard plastic can become brittle after a few seasons, especially in climates with hard freeze-thaw cycles like New Hampshire. According to Business Insider’s roundup, landscape architect Michael Clarke notes that plastic edging lacks the long-term structural integrity of masonry or steel, making it better suited to temporary or budget-conscious installs.
Pros: inexpensive, flexible, widely available
Cons: can heave in freeze-thaw, fades and cracks over time
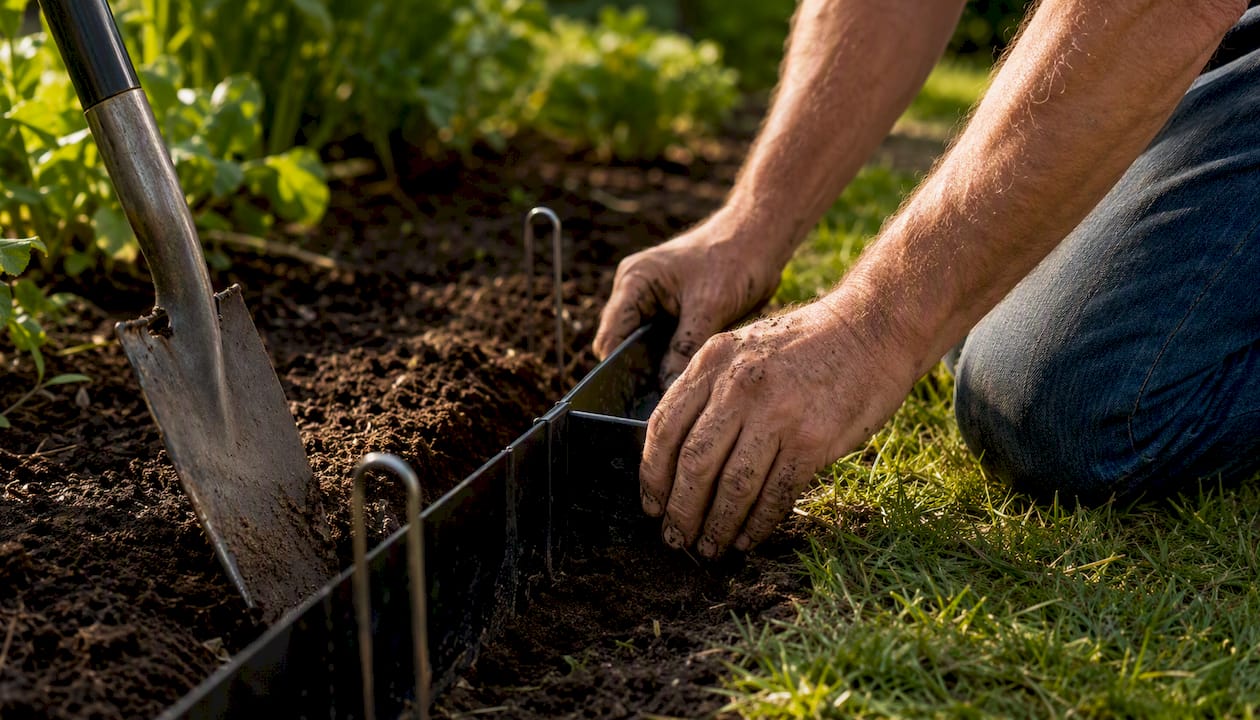
Installation note: Dig a shallow trench 3–4 inches deep, set the edging vertically, and secure with U-stakes every 18–24 inches. Total install time for a 50-foot bed: roughly 1–2 hours.
Pound-in plastic panels
These are the simplest border option available. Individual panels drive directly into the ground with a rubber mallet, no trench required. They work well for a quick weekend project but are the least stable option in heavy clay or rocky soil. Expect to reset panels after a hard winter.
Pros: zero tools needed, extremely low cost
Cons: shortest lifespan of any material, poor in rocky or clay-heavy soil
Rubber edging
Recycled rubber edging offers more flexibility than plastic and holds up better through freeze-thaw cycles. It sits low to the ground, which makes mowing along the edge straightforward. Heights typically range from 1.5 to 8 inches, with lower profiles suited to mowing and higher profiles needed to contain mulch or gravel. It suits curved beds particularly well.
Pros: flexible, durable than standard plastic, eco-friendly (recycled content)
Cons: can look utilitarian; limited height for heavy containment
Steel, Corten, and aluminum edging
Metal edging is where durability and design converge. Fine Gardening’s design guidance highlights that powder-coated steel and Corten deliver a crisp, modern line that holds its shape for decades. Corten develops a warm rust patina over 1–2 seasons, which pairs well with ornamental grasses and native plantings. Aluminum is lighter, easier to cut, and resists corrosion without a coating.
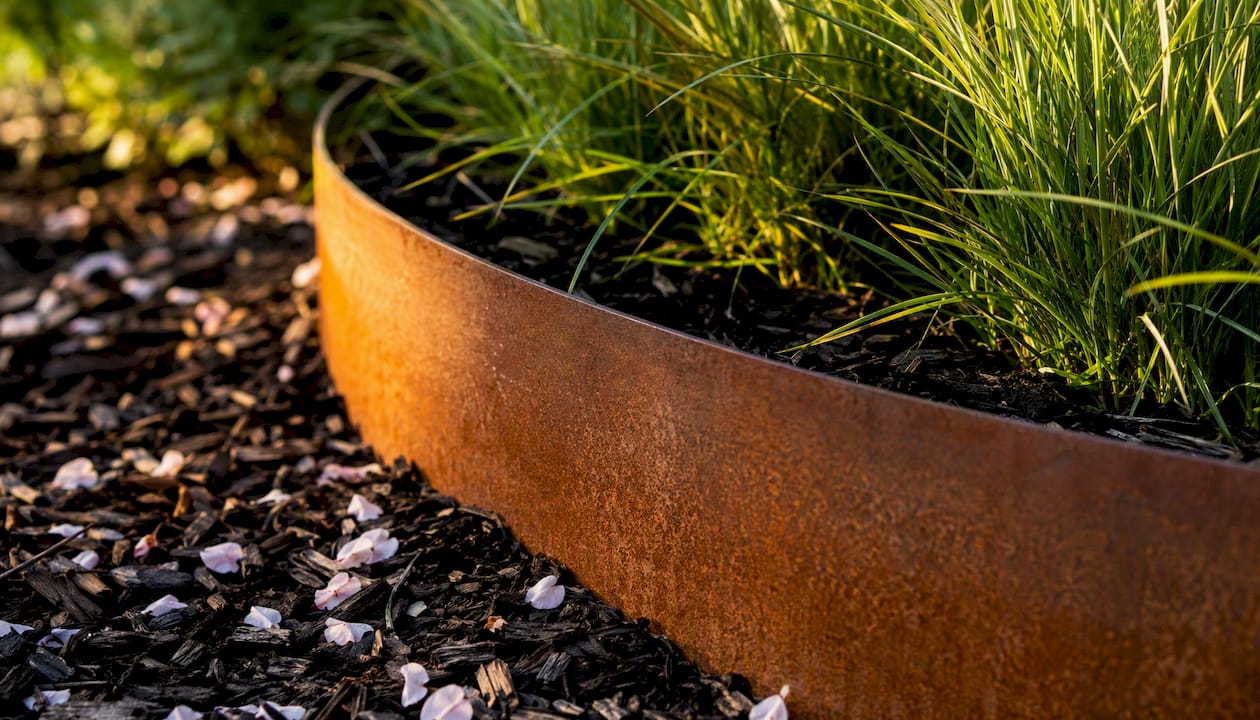
Pros: 15–20+ year lifespan, minimal maintenance, clean aesthetic
Cons: higher upfront cost; steel requires a level, compacted base to prevent warping
Installation note: Steel strip edging typically needs a 4–6 inch trench and anchor stakes every 24–36 inches. For Corten or heavy-gauge steel on a slope, a compacted gravel sub-base is strongly recommended. This is where many DIY installs fail.
Pro Tip: When installing steel edging on uneven ground, compact a 2-inch gravel sub-base before setting the strip. Without it, the edge will shift or bow within a season or two, per Permaloc’s technical guidance.
Wood and timber edging
Treated lumber, cedar, or composite wood edging brings warmth to cottage and rustic gardens. Untreated wood rots within 3–5 years in wet climates; pressure-treated pine extends that to 10–15 years. Composite wood (wood-plastic blend) pushes closer to 20 years with minimal maintenance. Log rolls and half-round timbers are popular for raised vegetable beds.
Pros: natural look, easy to cut and shape, good for raised beds
Cons: rots over time, requires sealing or staining to extend life
Maintenance: Apply a wood sealant every 2–3 years. Check for soft spots or insect damage annually.
Brick and paver edging
Brick borders are among the most classic garden edging ideas available. Set flat, on-edge, or at an angle (“soldier course”), brick creates a formal or cottage look that ages gracefully. Pavers offer similar durability with more shape and color options. Lifespan exceeds 25 years when properly set on a sand bed.
Pros: extremely durable, timeless appearance, adds property value
Cons: labor-intensive to install correctly; shifting occurs without a proper sand or mortar base
Installation note: Dig a trench 4–6 inches deep, add 1–2 inches of compacted sand, set bricks tightly, and fill joints with polymeric sand. Mortar-set brick requires more skill and is best left to a mason.
Pro Tip: For curved brick borders, use smaller paver units (4×4 inch) rather than standard bricks. Smaller modules follow tighter radii without gaps, as Fine Gardening’s installation notes confirm.
Poured and molded concrete edging
Poured concrete curbing delivers the most precise, seamless line of any border material. It is also the least forgiving: once cured, it cannot be adjusted without breaking it out. House Beautiful’s edging guide notes that poured concrete is time-consuming and typically requires professional formwork. Molded concrete blocks are more DIY-accessible but still heavy and require a stable base.
Pros: 20–30 year lifespan, zero flex, extremely low maintenance once set
Cons: not DIY-friendly for poured work; cracking possible in freeze-thaw without proper sub-base
Natural stone, river rock, and boulders
Stone borders range from a simple row of river rocks to large boulders used as retaining edges on slopes. The look is organic and timeless. Flat fieldstone stacked 2–3 courses high contains mulch well and doubles as a low retaining wall on gentle grades. For decorative stone applications, the key is selecting stone that complements your home’s exterior color and texture.
Pros: 30+ year lifespan, no maintenance beyond occasional resetting, naturalistic look
Cons: heavy to move; boulder work requires equipment and a professional for anything over 200 lbs
Installation note: Small stone borders can be set by hand in a shallow trench. Boulder work requires a skid steer or mini excavator.
Bamboo and willow woven edging
Woven bamboo and willow panels add a rustic, eco-friendly texture that suits cottage, zen, and informal gardens. They are lightweight and easy to install with simple stakes. The downside is lifespan: even treated bamboo typically lasts 3–8 years before weathering significantly. These borders work best as decorative accents rather than primary containment.
Pros: attractive natural texture, easy to install, biodegradable
Cons: shorter lifespan, requires replacement every few years
Living and plant borders
A living border uses low-growing plants, such as lavender, mondo grass, dwarf boxwood, or chives, to define a bed edge. Martha Stewart’s edging guidance emphasizes that well-placed borders reduce weekly lawn-care time and protect plants from trimmer damage. Living borders do both while adding seasonal color. The risk is plant selection: aggressive spreaders like mint or creeping Jenny can overtake a bed within two seasons.
Pros: beautiful, wildlife-friendly, adds seasonal interest
Cons: highest maintenance of any option; requires pruning, division, and careful plant selection
Pro Tip: Choose non-invasive, clump-forming plants for living borders. Lavender, liriope, and dwarf boxwood stay in bounds reliably. Avoid any plant listed as a spreader in your USDA hardiness zone.
How do you choose the right border for your yard?
The right border depends on four factors: containment needs, traffic, climate, and budget. Work through this checklist before purchasing materials.
- What are you containing? Mulch and soil need at least 3 inches of height. Gravel or river rock needs 4–6 inches. Grass roots require a deep, rigid barrier (steel or concrete).
- How much mower or trimmer traffic will the edge see? Low-profile edging (1.5–3 inches) is easiest to mow over; taller profiles (6–8 inches) require trimming along the edge.
- What is your soil type? Rocky or clay-heavy soil makes pound-in plastic unreliable. Sandy or loamy soil suits most materials.
- Do you have freeze-thaw cycles? New Hampshire and much of the Northeast experience hard winters. Plastic and bamboo heave; steel, concrete, and stone with proper sub-bases hold.
- What is your style goal? Formal beds suit brick or concrete. Modern gardens suit steel. Cottage gardens suit stone or living borders. Natural or woodland beds suit stone or woven materials.
- What is your budget? Plastic and spade-cut edges cost almost nothing. Steel runs $3–$8 per foot. Professional masonry or poured concrete runs $8–$20+ per foot installed.
Red flags that suggest you need a professional:
- The border is on a slope greater than 10 degrees
- You need the border to function as a retaining edge (holding soil back, not just defining a bed)
- The install involves heavy stone, poured concrete, or mortar-set brick
- Your soil has drainage issues that need to be addressed before edging
For a broader view of how edging fits into landscape maintenance, Divinelandscapingllc’s homeowner guide covers the full picture of protecting your plantings long-term.
When should you DIY and when should you hire a pro?
| Factor | DIY-Friendly Options | Pro-Recommended Options |
|---|---|---|
| Skill required | Low to moderate | Moderate to high |
| Best materials | Plastic, rubber, pound-in, simple paver rows | Masonry brick, poured concrete, heavy stone, steel with deep anchoring |
| Typical time | Half-day to full day (50 ft) | 1–3 days depending on scope |
| Tools needed | Spade, rubber mallet, U-stakes | Plate tamper, concrete forms, skid steer (for boulders) |
| Durability outcome | Good for 3–10 years | 20–30+ years with proper install |
Plastic roll edging, rubber edging, and simple paver rows are realistic weekend projects for most homeowners. Lowe’s edging buying guide walks through the trench method, U-stake placement, and how to overlap pavers on curves. For a sharp, low-maintenance result, consistent depth and straight trench walls matter more than the material itself.
Steel strip edging sits in the middle: a confident DIYer can install it, but the base prep is where most homeowners cut corners. Permaloc’s technical guidance is clear that rigid borders need a compacted gravel sub-base to avoid shifting within 1–2 seasons. Poured concrete, mortar-set brick, and boulder work belong with a licensed contractor.
Pro Tip: Before any rigid border install, check your grade. A 2-foot level and a tape measure are all you need. If the ground drops more than 2 inches over 10 feet, address drainage and leveling before setting any edging, or you will be resetting it after the first hard rain.
How do you match border style to your garden design?
The material you choose reads differently depending on the garden style around it. Getting the pairing right is what separates a border that looks intentional from one that looks like an afterthought.
- Modern or contemporary gardens: Steel strip or aluminum edging creates the clean geometry these styles demand. Keep the profile low (1.5–3 inches) for mowing, or use taller profiles (up to 8 inches) if you need to contain mulch or gravel. Pair with ornamental grasses, agave, or low-growing perennials.
- Cottage or traditional gardens: Brick set in a soldier course, or natural fieldstone, suits the relaxed formality of cottage planting. Mortar the joints for a tidier look; leave them open for a softer, more aged appearance.
- Naturalistic or woodland gardens: River rock, boulders, or a living border of liriope or mondo grass blends into the planting rather than framing it. The goal is a border you notice only when you look for it.
- Formal gardens: Poured concrete curbing or precision-cut stone gives the crisp, symmetrical lines formal designs require. These are almost always pro installs.
Finishing details that make a difference:
- Apply a penetrating sealant to wood edging at installation and every 2–3 years after
- Use polymeric sand in brick joints to prevent weed germination and ant tunneling
- Add a gravel stop (a thin metal lip) behind paver borders to keep decorative stone from migrating under the edge
- For powder-coated metal, touch up any scratches with matching paint to prevent rust at exposed spots
Pro Tip: To curve rigid materials like steel strip or aluminum, score the back face lightly with a utility knife at the bend point, then flex slowly. For modular materials like brick or pavers, use smaller units on curves. Tighter radii need units no longer than 4 inches to avoid visible gaps, per Fine Gardening’s installation notes.
For more ideas on how borders contribute to curb appeal landscaping, Divinelandscapingllc’s guide covers design pairings and visual examples across property types.
Key Takeaways
The most durable, low-maintenance garden borders are steel, concrete, and natural stone, while plastic and rubber offer the lowest cost and easiest DIY install for homeowners on a budget.
| Point | Details |
|---|---|
| Match material to your goal | Plastic and rubber for budget DIY; steel or concrete for longevity and low maintenance. |
| Height determines function | Profiles of 1.5–3 inches suit mowing; 4–8 inches are needed to contain mulch or gravel. |
| Sub-base is non-negotiable | Rigid borders (steel, concrete, stone) need a compacted gravel base to avoid shifting in freeze-thaw climates. |
| Living borders need plant discipline | Choose clump-forming, non-invasive species like lavender or liriope to avoid bed takeover. |
| Divinelandscapingllc for complex installs | For masonry, poured concrete, heavy stone, or retaining-edge work in New Hampshire and Massachusetts, Divinelandscapingllc provides site assessment, design, and professional installation. |
What most homeowners get wrong about garden borders
The conventional wisdom says pick the material that looks best in the photo. That advice skips the most important variable: what the border has to do physically, not just visually.
The most common mistake is underestimating height. A low-profile edge (1.5–3 inches) is sufficient for mowing lines, but containing mulch or stone requires at least 4–6 inches in height, according to The Spruce’s tested data.
The second mistake is skipping base prep on rigid materials. A steel edge set directly into unprepared soil looks perfect in September and bows out of alignment by April. This is not a material failure. It is an installation failure, and it happens on DIY and contractor jobs alike when the compaction step gets skipped.
The third mistake is choosing living borders without a plant management plan. Lavender and dwarf boxwood stay tidy for years. Mint and creeping thyme spread into the bed, the lawn, and eventually the neighbor’s yard. The plant choice matters as much as the border type.
Ready to get a professional garden border installed?
Divinelandscapingllc handles the full range of border and edging work that goes beyond a weekend DIY project: masonry brick borders, poured concrete curbing, natural stone and boulder placement, and steel edging with proper sub-base preparation. For homeowners in New Hampshire and neighboring Massachusetts, that means a site visit, a clear scope of work, a realistic timeline, and a budget range before any digging starts.

The team’s hardscape services cover everything from single-bed edging to full property border systems integrated with patios, walkways, and retaining walls. If your project involves a slope, drainage concerns, or heavy stone, those are exactly the conditions where professional installation pays for itself in avoided repairs. For masonry-specific work, Divinelandscapingllc’s masonry and hardscape services in New Hampshire and Massachusetts include mortar-set brick, natural stone, and poured concrete borders built to last through New England winters. Contact Divinelandscapingllc to request a site assessment and estimate.
Useful sources and further reading
- 15 Easy Garden Edging Ideas You Can Do Yourself – Business Insider
- Best Landscape Edging The Spruce Has Tested
- Garden edging ideas and how edging helps maintenance – Martha Stewart
- Design School: Breaking Down Borders in Your Garden – Fine Gardening
- Best ways to edge your garden – HouseBeautiful
- Best landscaping edging material options – Permaloc blog
- Landscape edging ideas and buying guide – Lowe’s
- Edging Buyer’s Guide – Gardeners