
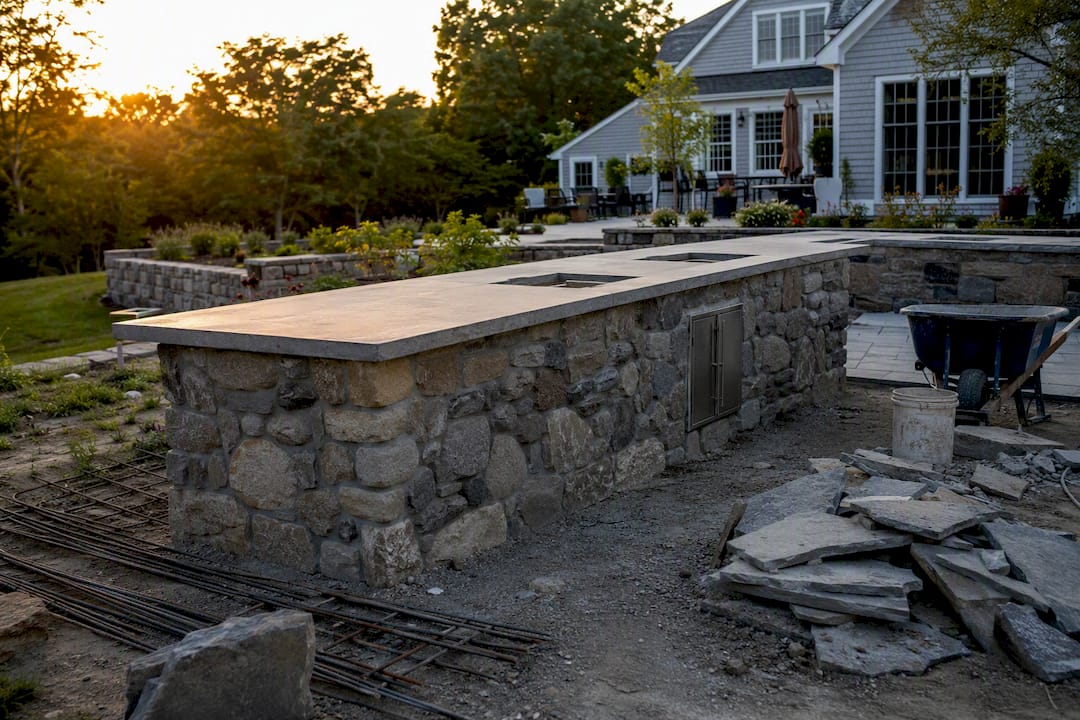
Most outdoor kitchens cost between $5,000 and $50,000, with a typical midrange build landing around $12,000 to $18,000 installed. Where your project falls depends on three things: the build path you choose (DIY, prefab, or custom), your appliance and material selections, and how much labor and site work the installation demands. Before you get quotes, ask each contractor for a per-linear-foot price and an itemized breakdown, not a single lump number.
TL;DR:
- Most outdoor kitchens cost between $5,000 and $50,000, with midrange builds typically around $12,000 to $18,000 installed, depending on scope and finishes.
- The primary cost drivers are the structure (per-linear-foot pricing), grills ($1,500 to $5,000), countertops ($30 to $120 per square foot), and utility hookups ($500 to $2,000 for gas, water, and electrical connections).
- Building on a slope or in cold climates like New England requires extra planning for freeze-thaw resistant materials, permits, site prep, and weatherproof shelter, raising overall costs.
- Most projects take six to ten weeks for standard builds, with custom or premium designs extending to fourteen weeks, plus additional planning and permit approval time.
Table of Contents
- What Are the Outdoor Kitchen Budget Tiers?
- What Drives the Cost of Each Outdoor Kitchen Component?
- How Much Does an Outdoor Kitchen Cost Per Linear Foot?
- DIY, Prefab Kits, or Custom Built-In: Which Build Path Fits?
- What Hidden Costs Should You Budget For?
- How Do You Budget and Phase an Outdoor Kitchen Build?
- Divine Landscaping’s Take on New England Outdoor Kitchen Costs
- How Long Does an Outdoor Kitchen Take to Build?
- An Editorial Take on Getting Outdoor Kitchen Pricing Right
- How Divine Landscaping Helps You Build the Right Outdoor Kitchen
- Sources
What Are the Outdoor Kitchen Budget Tiers?
Outdoor kitchen pricing splits into four practical tiers, and knowing which one you’re aiming for before you call a contractor saves you from scope creep halfway through the project. Each tier reflects a different combination of materials, appliances, and construction complexity.
Tier 1: Basic/DIY, an entry-level budget. This covers a simple grill station, often a freestanding cart or a small masonry surround you build yourself over a weekend. You’re looking at a grill, maybe a side table, and minimal or no plumbing. It’s the entry point for homeowners who want an upgrade from a portable grill without committing to a full build.
Tier 2: Modular mid-range, moderate budget range. Prefabricated modular units fall here. You get factory-built cabinet frames, a built-in grill, and often a small counter run, assembled on-site rather than framed from scratch. Utility hookups are usually limited to a gas line for the grill.
Tier 3: Built-in mid-range, higher mid-level budget range. This is where most custom L-shaped or U-shaped islands land. Expect a masonry or steel-frame structure, stone or concrete countertops, a full grill with side burner, and at least one utility hookup beyond gas, often a water line or an outdoor-rated electrical circuit.
Tier 4: Premium and custom, top budget range. These builds add a second cooking appliance (pizza oven, smoker, or griddle), a bar or beverage center, a refrigerator, premium stone cladding, and often a roof structure or pergola for shade. Custom layouts exceeding 20 feet with multiple zones push toward the top of this range and beyond, according to Grills.
Three real-world scenarios illustrate how these tiers play out:
- 8-foot modular island: A prefab frame with a 30-inch built-in grill, laminate countertop, and a single storage cabinet typically lands in the $9,000 to $13,000 range once delivery and gas hookup are included.
- 12-foot mid-range L-shape: A masonry-clad island with a grill, side burner, granite or concrete counters, and a small bar fridge usually runs $20,000 to $28,000, largely driven by the corner framing and added countertop square footage.
- 20-foot premium/custom layout: Add a pizza oven, a full refrigerator, a roofed pergola, and stone veneer matching your patio, and you’re commonly in the $40,000 to $55,000 territory, sometimes higher depending on the shelter structure.
If you entertain occasionally and want a functional grilling station, Tier 1 or 2 gets you there without overbuilding. If you host regularly and want the island to double as a durable outdoor living centerpiece that supports your home’s resale value, Tier 3 or 4 makes more sense. The mistake we see most often is skipping tiers, jumping from a bare-bones shell straight to premium finishes without upgrading the underlying gas, electrical, and drainage infrastructure to match. That gap almost always turns into a costly mid-project change order.
What Drives the Cost of Each Outdoor Kitchen Component?
Once you know your target tier, the next question is where the money actually goes. Breaking the project into components helps you see which choices move the needle most and which ones you can scale back without sacrificing function.
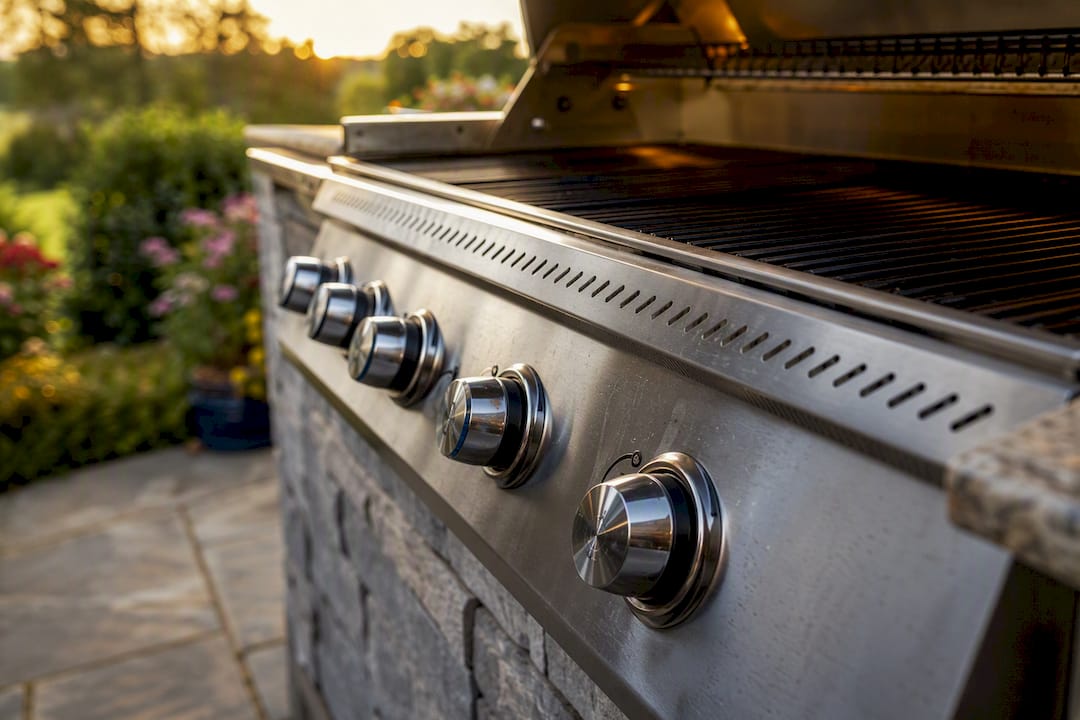
Grills are usually the single biggest line item after the structure itself. A quality built-in grill typically costs $1,500 to $5,000, with the spread driven by BTU output, stainless steel grade, and whether it includes rotisserie or infrared burners. Entry-level built-ins with basic stainless burners sit at the low end; commercial-grade units with ceramic sear zones push toward the top.
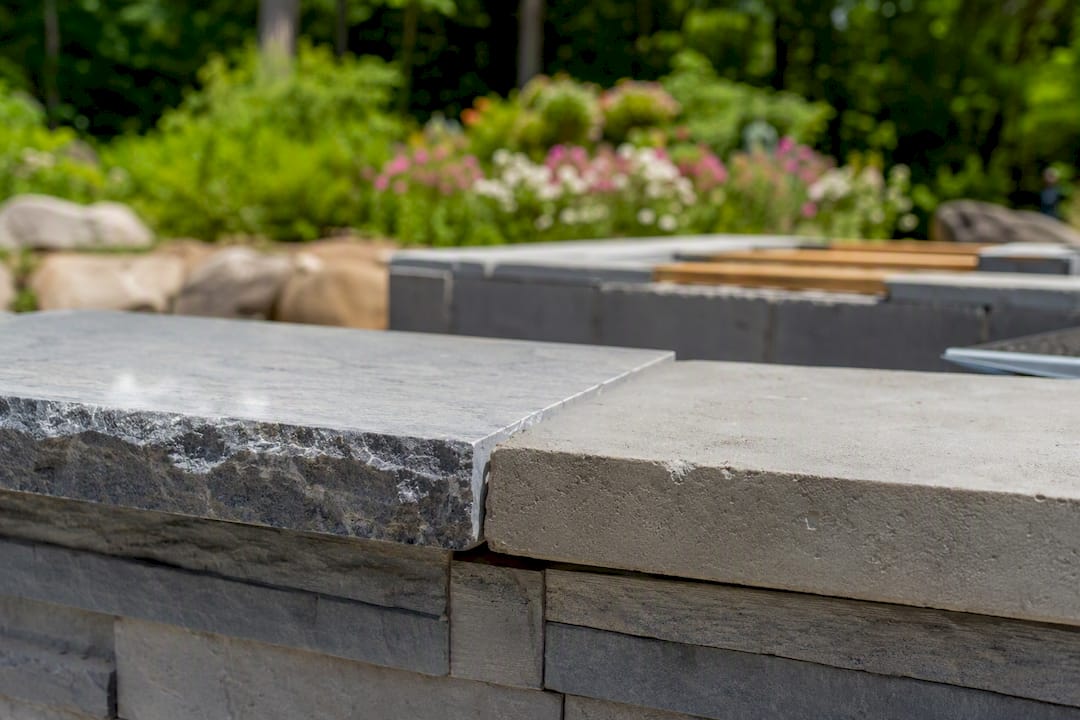
Countertops vary enormously by material. Concrete and tile run on the lower end, granite and natural stone sit in the middle, and quartzite or specialty porcelain slabs command premium pricing. Across the board, expect $30 to $120 per square foot installed, with the gap largely explained by slab sourcing, edge detailing, and whether the material is rated for freeze-thaw cycles, a real concern for New England winters.
Cabinet frames come in three common materials: powder-coated steel, marine-grade polymer, and traditional masonry block with veneer. Steel and polymer frames tend to run cheaper per linear foot but offer less design flexibility than a masonry base you can clad in stone or brick to match your home’s exterior.
Appliances beyond the grill add up fast:
- Outdoor refrigerators typically cost $800 to $2,500
- Built-in pizza ovens generally run $2,000 to $6,000 depending on fuel type
- Smokers add another $1,000 to $3,500
- Side burners and warming drawers usually fall between $400 and $1,200 each
Utility hookups are where licensed trades come in, and where costs are easy to underestimate. A gas line extension from your home’s existing service typically runs $500 to $1,500 depending on distance and whether trenching is required. A dedicated GFCI electrical circuit for a fridge or lighting adds roughly $300 to $800. Water and drain lines for an outdoor sink, if you want one, often cost $600 to $2,000 once you account for backflow prevention and freeze protection.
Pro Tip: Ask your contractor to quote utility hookups separately from the structure. Homeowners who bundle everything into one number often can’t tell whether they’re overpaying for the gas run or the countertop, which makes it much harder to negotiate or trim the budget later.
Licensed plumbing, electrical, and gas trades cost more upfront than a handyman rate, but the premium typically provides code compliance and insurance protection. An improperly sized gas line or an ungrounded outdoor circuit isn’t just a fire hazard, it’s often the exact thing that voids a homeowner’s insurance claim after the fact. Industry guidance from Angi consistently points to licensed installation as the difference between a durable outdoor kitchen and one that needs rework within a few seasons.
How Much Does an Outdoor Kitchen Cost Per Linear Foot?
Contractors rarely quote a flat number for an outdoor kitchen; understanding the outdoor kitchen cost in Kansas City can help illustrate how local labor and access affect pricing. Instead, most price the shell, meaning the frame, countertop, and basic structure, on a per-linear-foot basis, then add appliances and utilities on top. This is the fastest way to compare two bids that look wildly different at first glance.
According to contractor benchmarks compiled by Outdoor Kitchen Setup, installed shell pricing (materials and labor, no appliances) breaks down into basic, mid-range, and premium tiers with distinctly increasing per-linear-foot costs.
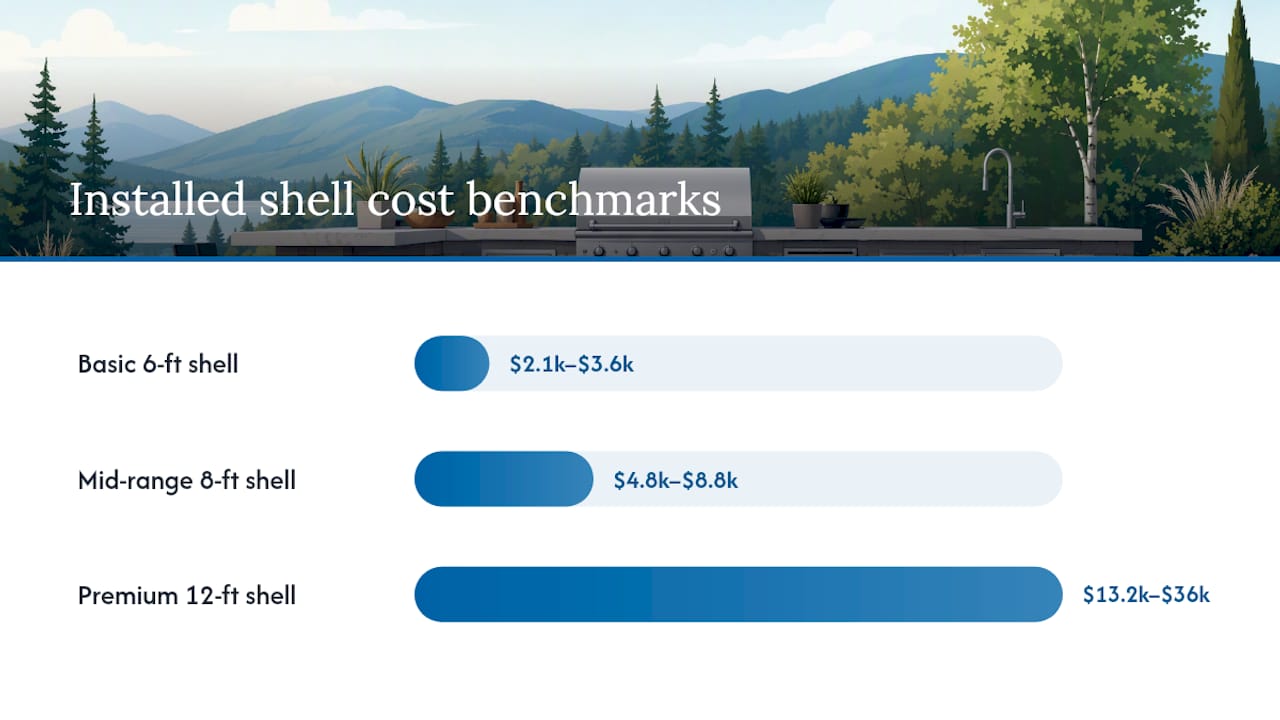
Here’s how that translates into real sizes. A 6-foot basic island shell runs roughly $2,100 to $3,600 before you add a grill. An 8-foot mid-range shell lands between $4,800 and $8,800. A 12-foot premium shell can run $13,200 to $36,000 on the structure alone, which is why premium builds so often exceed $40,000 once appliances go in.
That’s the detail that trips up a lot of homeowners comparing a straight island quote against an L-shape quote for what they assumed was the same size.
Appliances and utilities shift these numbers considerably. A basic shell with just a grill cutout stays near the low end of its per-foot range. A roof or pergola shelter adds further cost that doesn’t show up in shell pricing at all. When you’re comparing bids, always ask whether the per-foot number includes appliances or just the structure.
DIY, Prefab Kits, or Custom Built-In: Which Build Path Fits?
Your build path affects cost more than almost any single material choice, so it’s worth settling this before you request quotes.
- DIY or hybrid builds save the most money, often 30% to 50% compared to a full custom install, but the savings come from your own labor on framing and tile work. Gas, electrical, and plumbing connections should still go to licensed trades regardless of how much of the rest you handle yourself.
- Prefab modular kits arrive as pre-built cabinet frames you assemble on a prepared pad. They include the frame, sometimes a countertop template, and cutouts for standard appliances, but delivery fees, pad prep, and utility hookups are almost always separate line items homeowners forget to budget for.
- Full custom built-ins cost the most but deliver the best fit for irregular yards, matching masonry, and long-term durability. If resale value or a lifetime of heavy entertaining is the goal, a custom structure built to match your patio and home exterior tends to hold up better through New England freeze-thaw cycles than a modular unit.
Whichever path you choose, gas lines, 240V or GFCI circuits, and water hookups belong to licensed trades every time. It’s the one place where cutting cost creates real safety and insurance risk.
What Hidden Costs Should You Budget For?
The quoted price for materials and labor rarely captures everything you’ll actually spend. Permits are a commonly overlooked cost. Many local jurisdictions require building or electrical permits for structures with gas or electrical hookups, generally involving fees plus inspections.
Site prep is the next surprise. Grading a sloped yard, removing an old patio slab, or adding drainage away from the foundation can add anywhere from a few hundred dollars to several thousand, depending on how much excavation is involved.
- Delivery and crane or hoist fees for prefab units, typically $150 to $600, higher if a deck or second-story patio limits truck access
- Winterization supplies like appliance covers or insulated jackets, usually $100 to $400 depending on unit size
- Annual maintenance: resealing stone, checking gas connections, and draining water lines before winter
Pro Tip: Build a contingency of 10% to 20% into your budget from day one, a figure Family Handyman recommends for exactly this reason. Outdoor kitchens routinely uncover surprises once demo starts, an unexpected drainage issue or a gas line that needs rerouting, and having that buffer means you’re not choosing between finishing the project and paying for it properly.
If you’re building on an existing deck, permit and structural requirements shift again, since decks weren’t originally engineered for the added weight of stone and appliances.
How Do You Budget and Phase an Outdoor Kitchen Build?
You don’t have to build everything at once, and honestly, most homeowners shouldn’t. A phased approach gets you a usable space sooner while spreading cost over time.
- Phase one: Build the frame, countertop, and grill cutout with the grill installed. This gets you a functional cooking station.
- Phase two: Add the gas line, electrical circuit, and any water hookup, ideally sized for future appliances even if you’re not installing them yet.
- Phase three: Add the refrigerator, second cooking appliance, and finish materials like stone veneer.
- Phase four: Add shelter, lighting, and bar seating once the core kitchen is proven and used.
For larger builds, home equity financing is commonly used since it typically carries lower interest than a personal loan. On a $25,000 project financed at a moderate rate over five years, total interest paid can easily add several thousand dollars to the project’s real cost, which is a strong argument for phasing rather than financing the whole build upfront.
When comparing bids, check that each contractor breaks out per-linear-foot shell cost separately from appliances and utilities, then negotiate trade scope (who’s running the gas line, who’s doing electrical) before you negotiate finish materials, since labor scope changes are far more expensive to renegotiate mid-project than a countertop upgrade.
Divine Landscaping’s Take on New England Outdoor Kitchen Costs
Every New England outdoor kitchen we’ve scoped carries one shared challenge: building for a climate with real winters. A recent 12-foot mid-range L-shape project we priced came in around $24,500, with masonry cladding, the refrigerator, and the gas line run accounting for most of that total. Freeze-thaw cycles make countertop and cladding material choices matter more here than in warmer states.
One habit worth adopting from experienced installers: always frame appliance openings to standard 24-inch or 36-inch widths. It costs nothing extra upfront and means a future grill or fridge upgrade slides into the existing cutout instead of triggering a structural rebuild five years down the road.
For homeowners weighing a roofed structure, our modern outdoor living space guide for New England homes covers how shelter choices extend the usable season here well past what most kitchen guides assume.
How Long Does an Outdoor Kitchen Take to Build?
Timeline depends heavily on build path, but most contractor-installed projects follow a similar arc. Planning and design, including material selection and permit applications, typically takes two to four weeks. Permit approval itself can add another two to six weeks depending on your town’s review schedule, longer if your project requires an electrical or plumbing permit on top of a building permit.
Once permits clear, site prep and foundation work usually take three to seven days for a standard patio-level install. Framing and masonry construction for a mid-range island runs another one to two weeks. Countertop templating and installation add a few more days, since slab countertops often require a template visit followed by a separate fabrication and installation trip, sometimes a one to two week gap.
Utility hookups, gas, electrical, and water, are typically scheduled once the frame is set and usually take one to three days total for licensed trades to complete. Final touches like appliance installation, sealing, and cleanup wrap up the project.
All told, a mid-range built-in project commonly runs six to ten weeks from signed contract to completion, not counting the planning and permit phase before construction starts. Premium or custom builds with pizza ovens, roofs, or bar structures often extend to ten to fourteen weeks. DIY and hybrid projects can move faster on the construction side but often stretch longer overall since homeowners work around weekends and other commitments.
An Editorial Take on Getting Outdoor Kitchen Pricing Right
The biggest gap in how homeowners approach outdoor kitchen budgets isn’t the number itself, it’s treating the quote like a single price instead of a stack of separable decisions. Per-linear-foot shell pricing exists precisely so you can hold contractors to a comparable standard, yet most homeowners still shop on one bottom-line figure and wonder later why two bids for “the same kitchen” landed $15,000 apart.
Conventional advice tells you to get three quotes and pick the middle one. That’s not wrong, but it skips the harder question: does the quote separate shell, appliances, and utilities, or is it one number hiding where the money actually goes? A contractor unwilling to itemize that breakdown is telling you something.
If there’s one place to spend your planning energy, it’s sizing the utility rough-in correctly the first time, gas, electrical, and water sized for the kitchen you’ll want in five years, not just the one you can afford today. Everything else, countertop material, cladding, even the grill brand, can be upgraded later without touching the structure.
— Damian
How Divine Landscaping Helps You Build the Right Outdoor Kitchen
Divine Landscaping LLC is the local alternative to guessing at a national average, we build your quote around your actual yard, your actual layout, and per-linear-foot pricing you can compare line by line. A typical project starts with an on-site visit where we assess grading, gas and electrical access, and drainage, then deliver an itemized estimate with phased options if you’d rather build the fridge and shelter later.

Because our licensed trades handle every gas, electrical, and water connection directly, you avoid the long-term risk that comes with unpermitted work, the leaks, code violations, and insurance headaches that show up years after a rushed install. We serve homeowners across New Hampshire and Massachusetts, and every quote reflects real New England site conditions, not a generic template.
Browse our outdoor living project gallery to see finished builds at different budget tiers, then request a quote to get an itemized estimate for your yard.
Sources
- Outdoor Kitchen Cost Calculator | Price Estimates by Size & Materials 2026
- Grills
- Outdoor Kitchen Cost Calculator — CalcFi
- How Much Does an Outdoor Kitchen Cost? — Family Handyman