
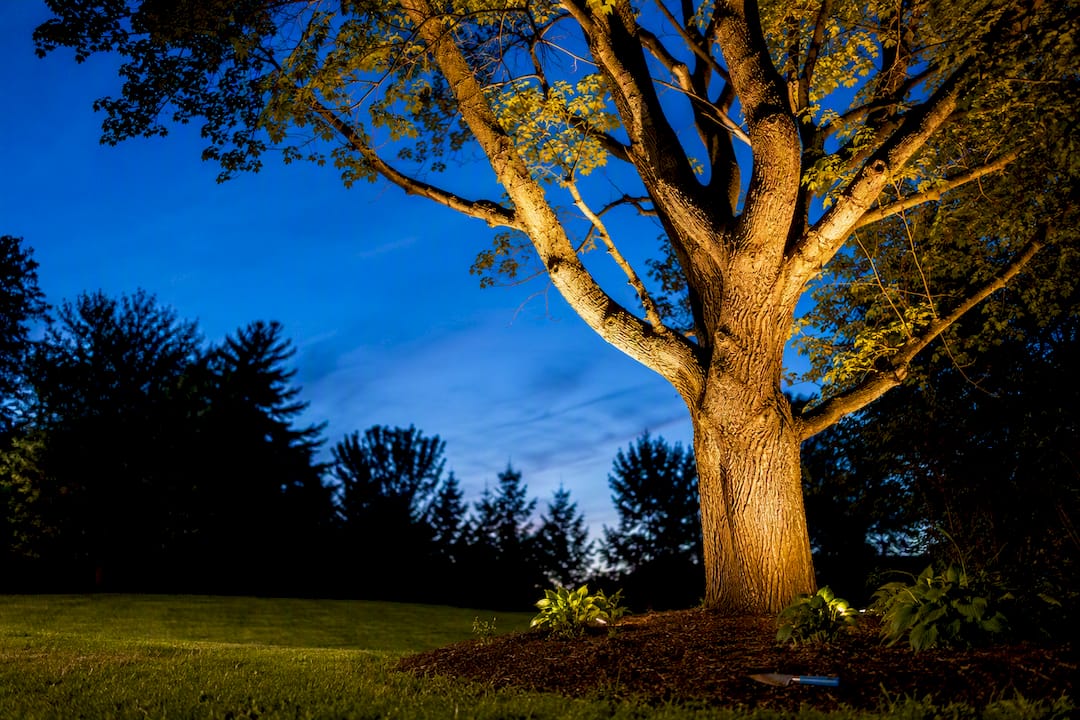
The best starting setup for most homes is a warm-white LED spotlight, 2700K to 3000K, placed 1 to 4 feet from the trunk depending on the tree’s size, using a narrow-to-medium beam. Start with one fixture on a small tree, two on a medium one. Simple trees with easy ground access are a fine DIY project; tall or structurally complex trees are better left to a professional to ensure quality and safety with permanent Christmas lights. Whatever you choose, test the placement at night before you bury a single wire.
TL;DR:
- Proper fixture placement is critical, with small trees needing one fixture 1 to 3 feet from the trunk, and larger trees requiring up to three fixtures spaced around the canopy.
- Warm white LED lights in the 2700K to 3000K range offer the best color rendering and longevity, while higher color temperatures wash out natural hues.
- Accurate aiming between 0 and 35 degrees from vertical enhances texture, depth, and prevents glare or hot spots, especially when combining multiple techniques.
- DIY installation suits small and medium trees with simple ground access, but large trees or canopy-mounted fixtures should be handled by professionals for safety and quality.
- Regular maintenance such as cleaning lenses, checking aim, and replacing aging fixtures ensures consistent performance and appearance over time.
Table of Contents
- What Tree Uplighting Actually Does for Your Landscape
- LED vs. Halogen, and What Your Fixtures Should Actually Do
- How Far From the Trunk, and How Many Fixtures Do You Need
- Installing Tree Uplighting Step by Step
- What Power System and Controls Do You Actually Need
- Design Techniques That Separate Good Uplighting From Great Uplighting
- Keeping Your Tree Lighting Looking Good Year After Year
- How Divine Landscaping LLC Approaches Tree Uplighting Projects
- What Does Tree Uplighting Cost in a Typical Project
- How Energy-Efficient Is a Tree Uplighting Setup
- What Safety Precautions Matter Most Outdoors
- When to DIY Your Tree Uplighting and When to Call a Pro
- Let professionals handle your tree uplighting design
- Sources
- FAQ
What Tree Uplighting Actually Does for Your Landscape
Tree uplighting means placing a fixture at or near ground level and aiming it upward into the branches, trunk, or canopy. That’s different from moonlighting, which mounts fixtures high in the tree to cast light downward like natural moonlight, and different from downlighting fixtures mounted on your house or a pole. Each technique creates a distinct effect, and many well-designed landscapes use more than one.
Done right, uplighting reveals bark texture, models the branch structure against the dark sky, and turns a tree you walk past every day into a genuine focal point after sunset. It also does something more practical: it adds a layer of nighttime visibility near walkways, driveways, and entry paths, which matters more than most homeowners realize until they’re the ones stepping over a root in the dark.
Before you buy a single fixture, figure out where people will actually see the tree from. Lighting professionals consistently point to this as the step homeowners skip. Plan around the viewing vantage points first, whether that’s your patio, the street, or the window over your kitchen sink. A tree lit beautifully from an angle nobody uses is wasted money. A tree lit from the one spot where your family gathers every evening is a design win.
LED vs. Halogen, and What Your Fixtures Should Actually Do
LED has replaced halogen as the default choice for residential landscape lighting, and the reasoning holds up under scrutiny. LED fixtures use less wattage for equivalent brightness and last dramatically longer than halogen bulbs, which matters a lot once you’re running six or eight fixtures on timers every night for years. Halogen still shows up in budget kits, but the bulb-replacement cycle alone makes LED the better long-term buy.
Color temperature is where a lot of otherwise good installations go wrong. Warm white in the 2700K to 3000K range flatters bark, green foliage, and stone the way candlelight or a porch bulb does. Push past 4000K and you get a blue-white cast that washes out natural color and makes a maple look like it’s under a parking-lot light. Stick to warm white unless you have a specific design reason not to.
Lumen output should scale with tree height, though these figures are starting points, not fixed rules:
- Small trees (under 15 ft): roughly 150 to 300 lumens per fixture
- Medium trees (15 to 30 ft): roughly 300 to 700 lumens per fixture
- Large trees (30 ft and up): 700 lumens and higher, often split across multiple fixtures rather than one bright source
Fixture type matters as much as brightness. A narrow spotlight is the right call for trunks, palms, and columnar trees where you want a tight beam that washes a straight line upward. Flood or wash lights spread wider and suit broad canopies where you want soft, even coverage rather than a single hot column. In-grade well lights sit flush with the soil, which keeps the fixture invisible during the day and is a smart choice for front-yard specimens where you don’t want hardware showing.
Materials matter more outdoors than most people expect. Cheap plastic housings degrade fast in freeze-thaw climates. Brass, copper, or marine-grade stainless housings cost more upfront but shrug off corrosion for years, and a solid IP65 or higher weather rating is worth checking before you buy anything meant to sit in wet mulch through a New England winter.
How Far From the Trunk, and How Many Fixtures Do You Need
Distance and beam angle work together, and getting one wrong throws off the other. Move a fixture too close and you get a tight, harsh hotspot at the base; move it too far and the beam spreads thin before it reaches the canopy.
- Small trees: place fixtures roughly 1 to 3 feet from the trunk, using one narrow-to-medium beam fixture. A single well-aimed light is usually enough.
- Medium trees: place fixtures 2 to 4 feet out, and step up to two fixtures for balanced coverage. Two lights let you avoid the single-source flatness that makes a tree look like it’s lit from one flashlight.
- Large trees: place fixtures 3 to 6 feet from the trunk, and plan for two to three or more fixtures depending on canopy width. For a genuinely wide canopy, a triangulation setup spacing three fixtures roughly 120 degrees apart around the base produces three-dimensional depth that reads well from multiple angles, not just one.
Beam angle follows the same logic as fixture count. Narrow beams suit trunks and palms where you want a tight vertical wash. Medium beams work for a balanced look on mid-size canopies. Wide beams are for broad washes across large trees or when a single fixture needs to cover more ground than a narrow beam allows.
The two mistakes homeowners make most often are placing a fixture too close, which creates a blinding hotspot at eye level near the trunk, and using too few fixtures on a big canopy, which flattens the whole tree into a one-dimensional silhouette instead of a sculpted, dimensional shape. Both are fixable by simply moving the fixture back a foot or adding a second light on the opposite side of the trunk.
Installing Tree Uplighting Step by Step
Getting from idea to finished install goes smoother when you follow a set sequence rather than digging first and adjusting later.
- Mark your viewing angles. Stand where you’ll actually see the tree, then walk the yard with a flashlight to find rough fixture positions that read well from that spot.
- Test with temporary bulbs. Set fixtures loosely on the ground, plug into an outdoor outlet or a portable low-voltage kit, and watch the effect after dark for at least one night before committing to anything permanent.
- Locate what’s underground. Call your local utility marking service before you dig anywhere near the tree, and note the location of irrigation lines and major surface roots.
- Size your transformer and wiring. Add up the wattage of every fixture on the run, then build in a 20 to 25 percent buffer for future additions. Use GFCI-protected circuits for every outdoor run, no exceptions.
- Mount fixtures with the tree’s growth in mind. If you’re placing anything in the canopy rather than at ground level, use a tree-mount junction box and leave slack in the wire so the trunk can keep expanding without straining the connection.
- Aim and shield before burying anything. Adjust each fixture so the beam hits the tree, not a neighbor’s window, and add a shield or louver if you see glare from the main viewing angle.
- Bury and backfill properly. Run cable at the depth your transformer manufacturer recommends, use conduit anywhere the line crosses a walkway, and pack soil firmly without compacting it against fixture housings.
Pro Tip: Leave temporary fixtures out for at least a week of real-world nights, not one, before finalizing anything. Frost, fog, and a full moon all change how a beam reads, and you want to see the tree in more than one kind of weather.
For homeowners who want the wiring fundamentals explained in more depth, our low-voltage landscape lighting guide covers transformer sizing and circuit planning in detail.
What Power System and Controls Do You Actually Need
Low-voltage 12-volt systems are the standard for residential tree uplighting, and for good reason. They’re safer to install yourself than line-voltage wiring, more forgiving of minor mistakes, and simpler to expand later without hiring an electrician for every change.
Transformer sizing follows one rule: add the wattage of every fixture on that transformer, then add 20 to 25 percent headroom for fixtures you’ll inevitably add later. Some LED drivers pull a brief inrush current at startup, so don’t size a transformer right at the wire. Give yourself margin.
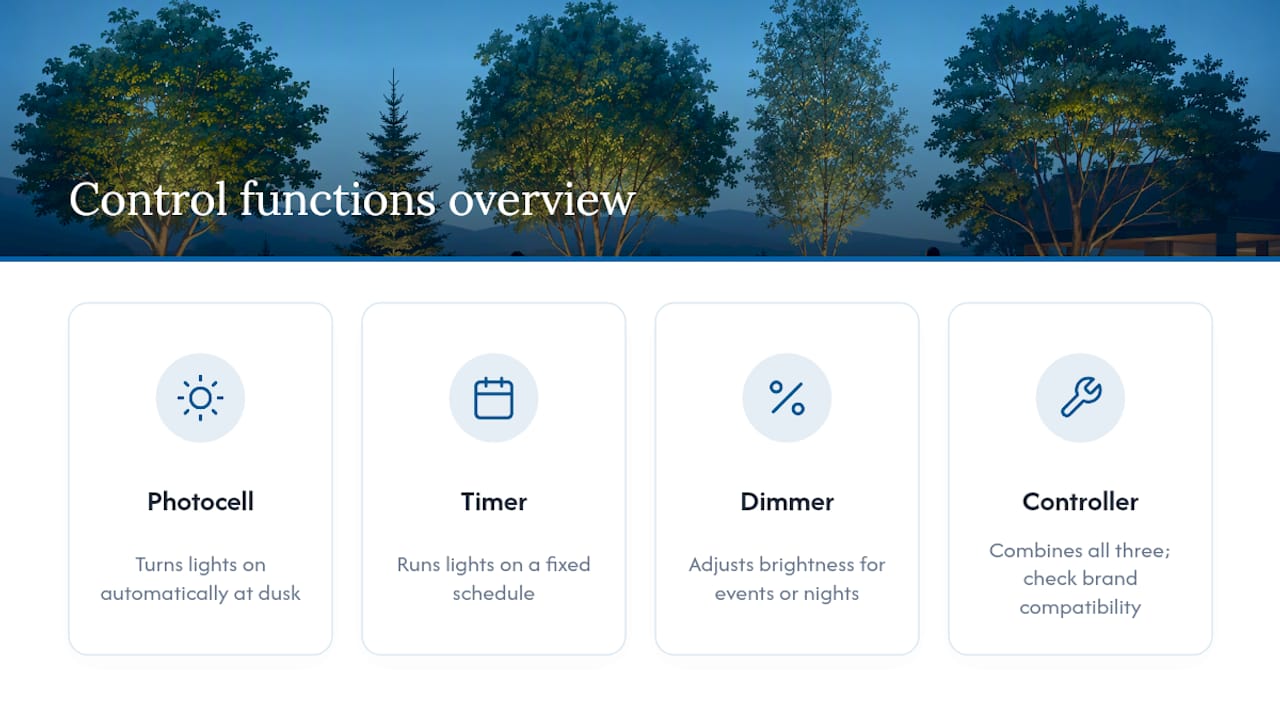
Controls are where a basic install becomes a genuinely convenient one. A photocell turns lights on automatically at dusk. A timer gives you a fixed schedule. A dimmer lets you soften the effect on a quiet Tuesday and brighten it for a party. Landscape lighting controllers combine all three, though compatibility varies by brand, so check before mixing components from different manufacturers.
Bury cable at the depth your transformer’s documentation specifies, and run conduit anywhere the line crosses under a walkway or driveway. For anything beyond a simple low-voltage run, especially permanent line-voltage work, bring in a licensed electrician.
Design Techniques That Separate Good Uplighting From Great Uplighting
Brightness alone doesn’t make a tree look good at night. The techniques that actually create depth and dimension are about placement and contrast, not wattage.
- Grazing places a fixture close to the trunk with a narrow beam angled to skim upward along the bark, which pulls out texture and ridges that a straight-on beam flattens.
- Cross-lighting uses two or three fixtures aimed from different points around the base, avoiding the single hard shadow one light always throws and giving a canopy real depth.
- Moonlighting mounts a fixture high in the branches aimed downward, producing a soft, dappled effect that mimics real moonlight; this requires secure, tree-safe mounting and should go on your maintenance checklist since it’s harder to access than a ground fixture.
- Silhouetting back-washes a wall, fence, or the sky behind a dense evergreen so the tree reads as a dark shape against a lit background, useful for trees with striking form but plain bark.
The best architectural results often combine techniques rather than relying on one. Pairing uplighting with downlighting shows a tree in three dimensions instead of the flatter look you get from ground fixtures alone, and keeping every fixture aimed between 0 and 35 degrees from vertical minimizes visible glare and hot spots from the fixture itself. Across every technique, stick with warm white. Cool temperatures at 4000K or above almost never suit a residential setting, no matter how dramatic they look in a showroom display.
Keeping Your Tree Lighting Looking Good Year After Year
A landscape lighting system isn’t a set-it-and-forget-it purchase. Seasonal checks matter, especially after a hard freeze-thaw cycle that can shift soil and knock fixtures out of alignment. Clean lenses at least twice a year since dirt and pollen dull output faster than most people expect, and check for water intrusion around any fixture that’s been submerged by snowmelt or heavy rain.
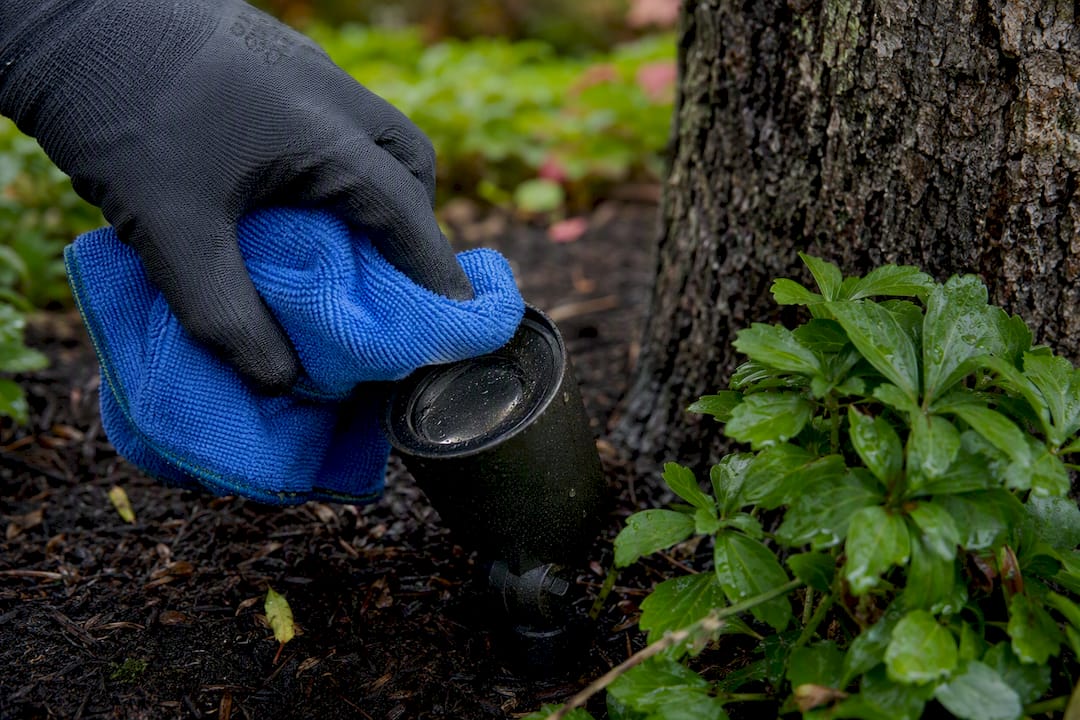
When something looks off, work through the problem in order: check the aim first, then the optic or lens for grime, then whether the lamp itself has dimmed with age, and only then suspect the wiring. Most “broken” fixtures turn out to be a beam that drifted or a dirty lens, not a wiring failure.
Bulbs and drivers have a limited service life even with LED, so expect periodic replacement over the years, and watch for corrosion on housings and connectors as your cue that a fixture, not just a bulb, needs swapping out. If you mounted anything in the canopy, revisit that slack in the wire every couple of seasons. Trees keep growing, and a wire that had plenty of give three years ago can pull tight faster than you’d think.
How Divine Landscaping LLC Approaches Tree Uplighting Projects
Our process starts with a site assessment: walking the property, identifying the trees worth highlighting, and standing where you’ll actually view them from before a single fixture goes in the ground. From there, we set up temporary placements and test them after dark, adjust based on what the beam actually does against your specific bark and canopy, then move to low-voltage wiring, tuning, and final mounting.
We integrate lighting with existing irrigation systems whenever a property has both, since running both trades through one plan avoids conflicts underground later. You can see examples of finished lighting work in our project gallery.
What Does Tree Uplighting Cost in a Typical Project
A single-fixture DIY setup on a small tree, using an entry-level LED spotlight and a basic transformer, often runs somewhere in the low hundreds of dollars once you account for cable, connectors, and a timer. That’s the realistic floor for a homeowner handling one tree with simple ground access.
Costs climb from there based on tree count, canopy size, and how much wiring and trenching the site needs. A property with several medium trees, each running two fixtures on a shared low-voltage system with photocell and dimmer control, involves meaningfully more material and labor than a single well light tucked into mulch. Larger trees requiring three-fixture triangulation setups, or canopy-mounted moonlighting fixtures that need secure tree-safe hardware, push costs higher still.
A few practical budgeting habits keep a project from running away from you. Buy fixtures in matched sets from one manufacturer rather than mixing brands, since compatibility issues between transformers and drivers are a common source of wasted money. Size your transformer with room for future fixtures now, since adding a second transformer later almost always costs more than buying slightly larger the first time. And test with cheap, temporary bulbs before buying your final fixtures. If a placement plan doesn’t read well at night, you’ve saved yourself the cost of fixtures you’d otherwise have to relocate or return.
For homeowners planning a full landscape overhaul that includes lighting as one piece of a larger design, our landscape design guide for New Hampshire homeowners breaks down how lighting typically fits into a broader project budget.
How Energy-Efficient Is a Tree Uplighting Setup
LED fixtures draw a fraction of the power halogen equivalents need for the same brightness, and that gap compounds fast once a system runs several hours every night, all year. A handful of LED spotlights on timers costs noticeably less to operate over a season than the same layout in halogen, and the bulbs themselves last long enough that you’re not opening the electric bill and a box of replacement bulbs on the same afternoon.
Controls add another layer of savings. A photocell means lights only run once it’s actually dark, instead of coming on at a fixed clock time regardless of season. A timer paired with a dimmer lets you drop output during late-night hours when nobody’s outside to see the full effect anyway, cutting draw without losing the security benefit of some light staying on.
Sustainability isn’t only about the electric meter. Reducing glare and unnecessary upward light spill is good practice for keeping night skies dark and for being a considerate neighbor, and it happens to align with good lighting design anyway. A beam aimed precisely at the tree, shielded so it doesn’t wash into a neighboring yard or scatter into the sky, is both more attractive and more efficient than a poorly aimed floodlight throwing light in every direction. Choosing durable, corrosion-resistant fixtures also matters for sustainability in a less obvious way: a fixture that lasts fifteen years instead of three means far less hardware ending up in a landfill over the life of your landscape.
What Safety Precautions Matter Most Outdoors
Outdoor electrical work carries real risk, and tree uplighting sits right at the intersection of water, soil, and power. Every outdoor circuit should run through GFCI protection, full stop. That single safeguard is what shuts power off in a fraction of a second if a connection gets wet or damaged, and it’s cheap insurance against a serious hazard.
Before any digging starts, call your local utility marking service to find buried gas, electric, or communication lines. Hitting a buried utility line is a bigger and more expensive problem than almost any lighting mistake you could otherwise make. Combine that with a check for existing irrigation lines and major roots so you’re not slicing through either while trenching for cable.
Working at height around a tree canopy introduces a different kind of risk entirely. Moonlighting fixtures mounted high in branches need secure, tree-rated hardware, and if a ladder and a tall tree are both involved, that’s a reasonable point to bring in a professional rather than improvising. Wet bark, uneven ground, and low-voltage wire underfoot are a bad combination for a fall.
Glare is a safety issue as much as a design one. A fixture aimed straight into a walkway or a driver’s line of sight on the street can be genuinely dangerous, not just unattractive. Keep every beam angled between roughly 0 and 35 degrees from vertical, add shielding where needed, and always check the sightlines from a car in the driveway, not just from your patio chair.
When to DIY Your Tree Uplighting and When to Call a Pro
A small tree with easy ground access, a comfortable understanding of low-voltage wiring, and no work required above eye level is a reasonable DIY weekend. Once you’re dealing with large trees, complex multi-fixture wiring runs, canopy mounting at height, or anything touching permits or line voltage, hiring a professional pays for itself in reliability alone. A good designer also brings something a beam-angle chart can’t: an eye for how the whole composition reads together. Whichever route you take, test with temporary fixtures before you commit to anything permanent.
— Damian
Let professionals handle your tree uplighting design
Professional services provide a tested, professionally aimed lighting plan instead of a weekend of trial-and-error with mismatched fixtures. Design and installation work can cover lighting design, low-voltage wiring, irrigation and lighting integration, and ongoing maintenance so your trees keep looking sharp through the seasons.

A typical consultation starts with a site visit to walk your property and identify the trees and viewing angles worth designing around, followed by a design proposal, a written estimate, and a clear installation timeline before any wiring goes in the ground. If you’d rather have a professional handle the trunk-to-canopy details than spend a weekend testing beam angles yourself, visit our outdoor lighting services page to request a consultation and get a firm estimate for your property.
Sources
FAQ
How Do You Properly Uplight a Tree?
Place a warm-white LED fixture at ground level, 1 to 4 feet from the trunk depending on tree size, aim it between 0 and 35 degrees from vertical, and match beam angle to the tree’s shape: narrow for trunks and palms, wider for full canopies.
What Is the Best Type of Uplighting for Outdoor Trees?
Warm-white LED fixtures in the 2700K to 3000K range are the standard recommendation, since they preserve natural bark and foliage color and last far longer than halogen bulbs.
What Are the Best Fixtures for Uplighting Trees?
Narrow-beam spotlights suit trunks and palms, wash or floodlights suit broad canopies, and in-grade well lights work well where you want the fixture itself hidden during the day.
Can You Install Tree Uplighting Yourself?
Yes, for small to medium trees with simple ground access and basic low-voltage wiring, DIY installation is realistic if you test placement at night before finalizing anything permanent; large trees, canopy mounting, or line-voltage work call for a professional.
How Many Uplights Does a Tree Need?
One fixture is usually enough for a small tree, two for a medium tree, and two to three or more for a large canopy, often arranged in a triangulated pattern for balanced coverage from multiple angles.