
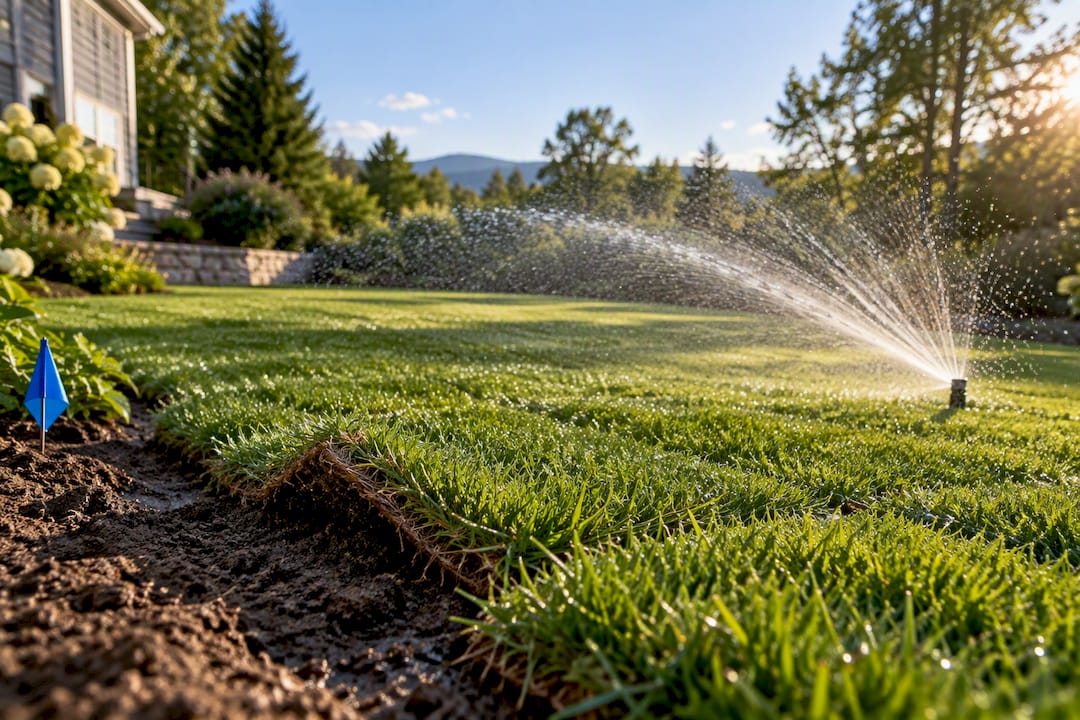
Water your new sod immediately after installation, then keep it moist with short, frequent cycles every morning (and again in the afternoon during hot stretches) for about 7 to 14 days. Once the sod resists a gentle lift, roots have anchored, and it’s time to switch to deeper, less-frequent irrigation. Get this sequence right, and you avoid the two mistakes that kill more new lawns than anything else: drying out young roots or drowning them before they ever form.
TL;DR:
- Water new sod immediately after installation to ensure soil contact and prevent drying or drowning, then switch to deeper, less frequent watering after roots anchor in 10 to 14 days.
- Use a catch-can test to measure system output and tailor daily watering, aiming for 1/8 to 1/4 inch of water for the first week and gradually increasing as roots develop.
- Adjust watering frequency and amount based on soil type, slope, and grass species, with sandy soil requiring shorter, more frequent cycles and clay needing less frequent, longer watering.
- Check sod health at one week for uniform greenness and resilience, increasing watering if edges curl or the turf turns gray, and reducing if it becomes soggy or shows signs of overwatering.
- Ensure sprinkler systems are properly calibrated, with matched heads and zone adjustments, to avoid uneven coverage and optimize watering effectiveness.
Table of Contents
- How Do You Irrigate New Sod Right After Installation?
- What’s the Right Watering Schedule for the First Two Weeks?
- When Should You Switch to Deeper, Less Frequent Watering?
- What Should New Sod Look Like After One Week?
- How Do Soil Type, Slope, and Grass Species Change Your Schedule?
- What Do Professional Installers Check That Homeowners Miss?
- Why Most Sod Watering Advice Misses the Point
- Get Your Irrigation System Calibrated Right the First Time
- Sources
- FAQ
How Do You Irrigate New Sod Right After Installation?
The first watering matters more than any other, because it determines whether the sod’s root system actually touches the soil beneath it. Installers roll fresh sod to press out air pockets and improve contact, then irrigate right away. Skip this step, and you’re left with dry gaps between the sod and the ground, which is where roots stall out before they even start growing.
You want enough water to soak the sod and wet the top 4 inches of soil underneath it, based on University of Nebraska Extension guidance. That’s a deep first drink, not a light sprinkle. Ohio EPA guidance on new turf installation echoes the same principle: poor soil contact and compacted, poorly prepared ground are two of the most common reasons sod fails to establish.
After that first watering, walk the yard and check:
- No standing puddles or continuous runoff anywhere on the lawn
- Seams between sod pieces feel moist, not dry or curling at the edges
- Lifting a corner shows wet soil clinging to the roots, not a dry gap underneath
If any of those checks fail, water again before moving on to the daily schedule.
What’s the Right Watering Schedule for the First Two Weeks?
New sod has almost no root system yet, so it can’t pull moisture from anywhere but the top inch of soil. That’s why Iowa State University Extension recommends daily morning irrigation for the first 7 to 10 days, with an extra afternoon cycle when temperatures climb. University of Tennessee Extension frames this as a target depth: roughly 1/8 to 1/4 inch of water per day, which works out to about 75 to 150 gallons per 1,000 square feet.
Minutes on a timer don’t tell you much on their own, since precipitation rates vary wildly between sprinkler heads, nozzle types, and water pressure. The fix is a catch-can test: set out a few straight-sided cans or tuna cans across a zone, run the system for 15 minutes, then measure what collected. If you get 1/8 inch in 15 minutes, that zone needs about 30 minutes to hit a quarter inch.
- Run each zone once and measure the catch-can depth after 15 minutes.
- Divide your target depth (1/8 to 1/4 inch) by that result to get your daily runtime.
- Split the total into two shorter cycles, roughly 20 minutes apart, so water soaks in instead of running off.
- Add a second, lighter cycle in the afternoon on days above 85 degrees Fahrenheit or when wind is drying the surface fast.
- Recheck weekly, since a system’s output can shift after nozzle clogs or head misalignment.
Pro Tip: Run your catch-can test on a still morning, not a windy afternoon. Wind skews the numbers by pushing spray sideways, which makes a perfectly good zone look like it’s underperforming.
Humidity and cloud cover slow evaporation, so a muggy week needs less water than a dry, breezy one even at the same temperature. Iowa State’s guidance points to daily observation and a rain gauge over a fixed calendar, since weather swings faster than any preset schedule can track.
When Should You Switch to Deeper, Less Frequent Watering?
Roots typically anchor in 10 to 14 days, and Iowa State Extension recommends confirming that with a simple lift test rather than guessing off the calendar. Grab a corner of a sod strip and tug gently. If it resists and holds firm, the roots have knit into the soil below.
Once that happens, change the controller settings; this step is key to establishing large trees after installation and ensuring solid root growth.
- Cut watering frequency from daily to every 2 to 3 days
- Extend each session to around 1/2 inch of water, roughly 300 gallons per 1,000 square feet, based on University of Tennessee Extension figures
- Drop the afternoon cycle unless a heat wave demands it
- Keep checking new areas of the lawn, since shaded or low spots root slower than sunny ones
This shift isn’t just about convenience. Frequent shallow watering keeps roots near the surface because that’s where the moisture is. Deeper, less frequent irrigation pulls roots downward as they chase water further into the soil, which builds the drought tolerance that carries your lawn through next summer.
What Should New Sod Look Like After One Week?
Seven days in, healthy sod should look uniformly green, feel cool and pliable underfoot, and resist a gentle lift at the corners. Seams should have knit together enough that you can’t easily see where one strip ends and the next begins.
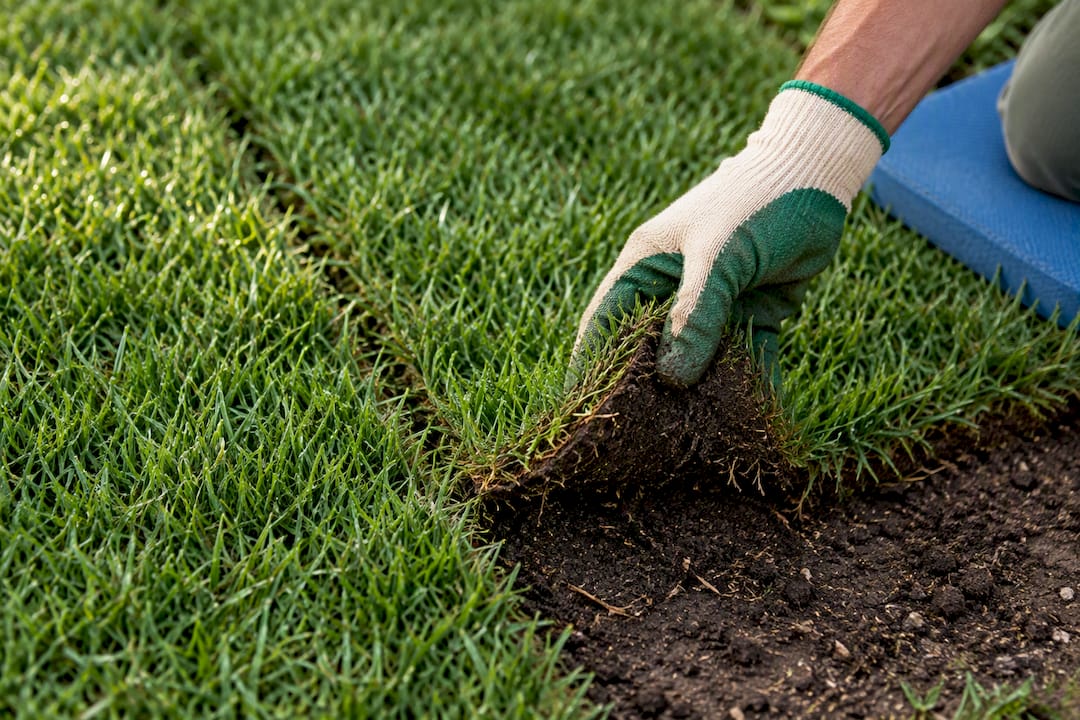
If it doesn’t look like that, the cause is usually one of two things.
Underwatering shows up as curling edges, a grayish or blue-green tint, and sod that lifts easily with dry soil clinging underneath. The fix is more frequent short cycles, plus a check of seams and edges where moisture escapes fastest.
Overwatering looks different: soggy, spongy turf, a sour smell, or standing water hours after a cycle ends. Sod industry irrigation guidance from Florida’s Department of Agriculture and Consumer Services notes that uneven system coverage is a common, overlooked cause of overwatering complaints. Many homeowners assume they’re applying too much water when the real issue is a system putting down water unevenly across a zone.
- Green, cool, pliable turf that resists lifting: on track, keep the current schedule.
- Curling, gray edges, easy lift with dry soil underneath: increase short-cycle frequency.
- Soggy turf, standing water, or a sour smell: shorten cycles and check drainage.
- Large discolored patches or persistent poor rooting past 3 weeks: bring in a professional.
How Do Soil Type, Slope, and Grass Species Change Your Schedule?
Sandy soil drains fast and dries out within hours, so it usually needs shorter, more frequent cycles than the baseline schedule. Clay-heavy soil holds water longer and drains slowly, which means the same runtime can leave clay soaked for days if you don’t dial it back.
Slopes and edges near driveways or sidewalks lose water to runoff and reflected heat, so a single lawn often needs more than one setting.
- Test your soil by digging a small hole and checking how quickly water disappears after the first watering.
- On slopes, split each cycle into two or three shorter bursts so water soaks in before it can run downhill.
- Treat sunny strips against pavement as their own micro-zone, since they dry out faster than shaded turf a few feet away.
- Match your species to the plan: cool-season grasses like tall fescue and Kentucky bluegrass tolerate the standard schedule well, while warm-season sod such as zoysia often needs slightly less frequent watering once established.
- Water before 10 a.m. whenever possible, since morning irrigation loses less water to evaporation and gives grass blades time to dry before evening, which cuts down on fungal disease risk.
Pro Tip: If one part of your lawn always dries out faster than the rest, don’t crank up the whole system’s runtime to compensate. Add a separate cycle or a dedicated head for that spot instead. A tool like a residential irrigation plan built zone by zone accounts for exactly this kind of variation before installation even starts.
What Do Professional Installers Check That Homeowners Miss?
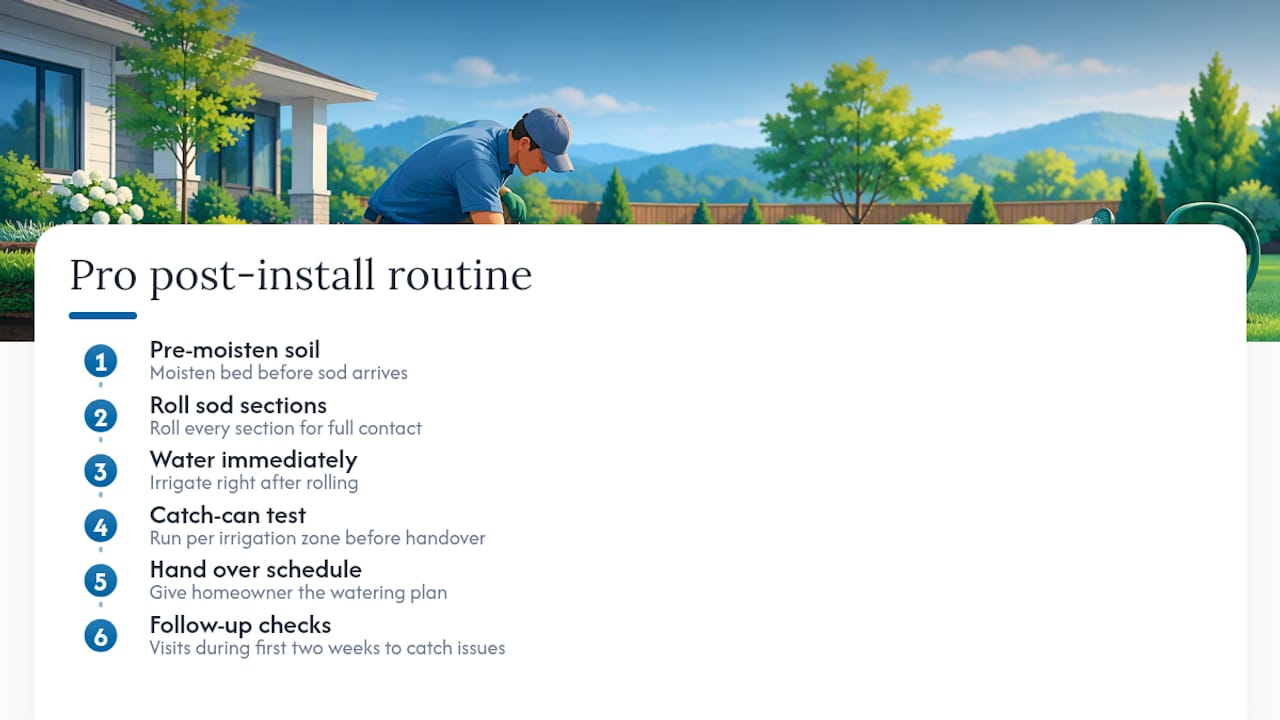
An installer’s post-install routine goes further than most homeowners realize: pre-moistening the soil bed before sod arrives, rolling every section for full contact, watering immediately, then running a catch-can test on each zone before handing the schedule over. Follow-up visits in the first two weeks catch problems early, before they show up as brown patches.
The fixes homeowners skip most often aren’t complicated, they’re just easy to overlook: retuning sprinkler heads that drift out of alignment, splitting a lawn into micro-zones instead of running one blanket schedule, and correcting soil contact under sod that didn’t get rolled well the first time. If your lawn keeps showing uneven rooting despite following the schedule, that’s usually a hardware problem, not a watering problem, and it’s worth a professional look through full lawn irrigation installation and repair.
Why Most Sod Watering Advice Misses the Point
Most sod watering advice hands you a number of minutes and calls it a schedule. That’s backwards. Two identical sprinkler heads on two different systems can lay down completely different amounts of water depending on pressure and nozzle wear, so a flat “water for 20 minutes twice a day” instruction is close to useless without knowing your system’s actual output.
The extension guidance behind this article gets it right by talking in depths, not minutes, then leaving the conversion up to a catch-can test. That’s the part homeowners skip, and it’s the part that actually matters. I’d argue the tug test gets underused too. Color tells you almost nothing in the first week; a lawn can look green and still have zero root contact underneath. Lifting a corner takes ten seconds and tells you the truth.
If you take one thing from this guide, prioritize measuring your system before you trust any schedule, including this one. A perfectly timed controller running on a poorly calibrated system will still leave you guessing.
— Damian
Get Your Irrigation System Calibrated Right the First Time
A DIY schedule only works as well as the hardware behind it. If your sprinkler heads are mismatched, your zones overlap poorly, or your pressure runs low, no amount of careful math will save your new sod. Some irrigation system providers design and install systems built around a property’s actual soil, slope, and sun exposure, rather than using generic timing charts.

That’s the real difference between a system that keeps up with new sod and one that fights you the whole first season. Through full lawn irrigation installation, replacement, and repair, Divinelandscapingllc sets up zoning, head placement, and controller programming so your new lawn gets exactly what it needs without the guesswork of hand-testing every zone yourself. If you’re planning a sod installation or dealing with a system that’s leaving patches dry or soggy, reach out through Divinelandscapingllc’s irrigation services to get your setup evaluated before the next watering season starts.
Sources
- How should I water a newly sodded lawn? | Yard and Garden
- Turfgrass Establishment (University of Tennessee W160-C)
- Establishing lawns from sod (UNL Extension)
- Sod Operations BMP manual (Florida Department of Agriculture and Consumer Services)
FAQ
What’s the Best Way to Water New Sod?
Water immediately after installation to soak the sod and the top 4 inches of soil, then keep it moist with short daily cycles for about 7 to 14 days. After that, switch to deeper, less frequent watering once the sod resists a gentle lift.
How Long Should You Run Irrigation for New Sod?
Runtime depends on your system’s precipitation rate, which is why a catch-can test matters more than any fixed number of minutes. As a target, aim for about 1/8 to 1/4 inch of water daily during the first two weeks, then roughly 1/2 inch every 2 to 3 days after roots anchor.
What Should New Sod Look Like After One Week?
Healthy sod at the one-week mark looks uniformly green, feels cool and pliable, and resists a gentle lift at the corners. Curling edges or a grayish tint usually point to underwatering, while soggy, spongy turf signals too much water or uneven system coverage.
What Type of Sprinkler System Is Best for Newly Laid Sod?
A zoned system with heads matched to precipitation rate and calibrated through a catch-can test works best, since it lets you apply even, measured water across sun, shade, and slope differently. Divinelandscapingllc builds these zoning plans as part of its irrigation and lighting services, tailored to a property’s soil and layout rather than a one-size-fits-all setup.