
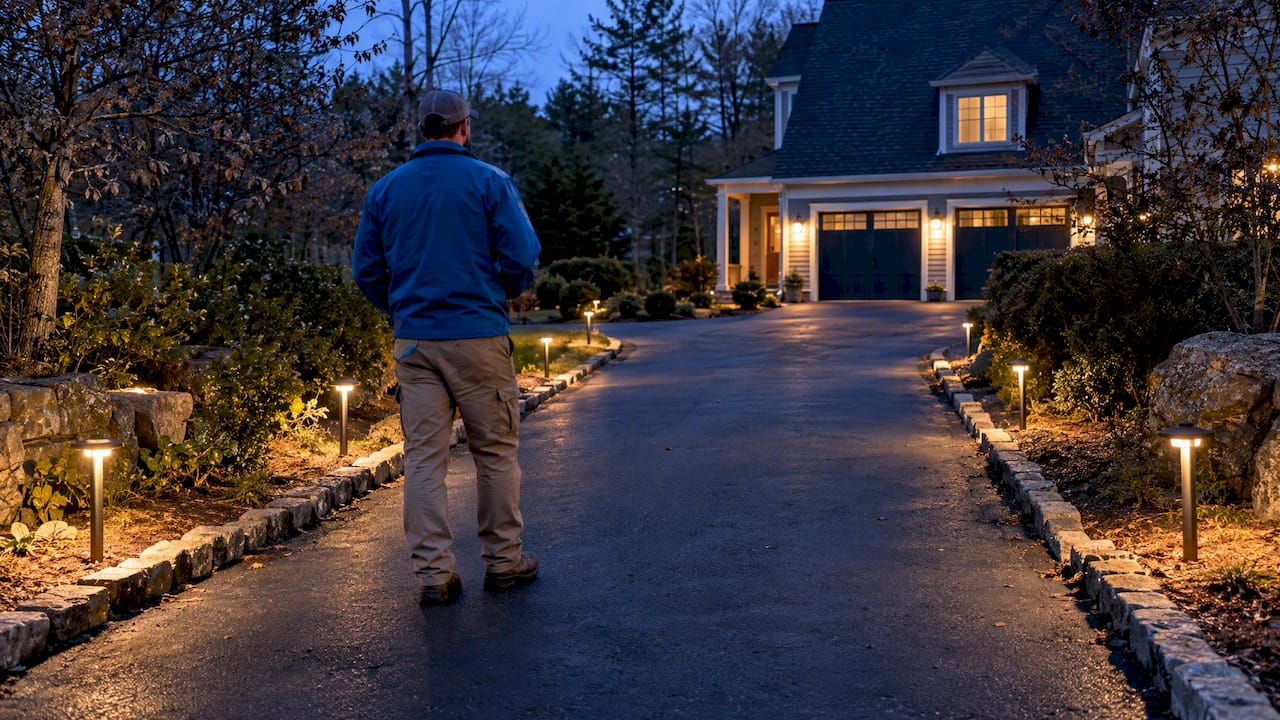
The best driveway lighting approach is layered: warm LED fixtures between 2700K and 3000K, directed and shielded to cut glare, paired with motion or timer controls. This combination improves safety, makes nighttime navigation easier, and boosts curb appeal while avoiding harsh, blue-toned light. The ideas, spacing rules, and fixture types below will help you plan a layout that fits your driveway’s length and style.
TL;DR:
- Proper driveway lighting relies on layered fixtures, primarily warm LEDs between 2700K and 3000K, with shielding and motion controls for safety and curb appeal.
- Spacing for pathway lights should be between 6 and 10 feet, while driveway fixtures can be placed 10 to 15 feet apart, depending on fixture height and beam angle.
- Low-voltage systems are generally recommended for residential driveways due to better control, while solar options may lack consistency in shaded areas.
- Testing fixture placement at night before permanent installation is essential to avoid glare and dark spots, ensuring safety and functionality.
- Responsible design emphasizes directing light downward, using warm tones, and limiting brightness to prevent light pollution and enhance visual safety.
Table of Contents
- 1. Fixture types and where each one works best
- 2. How far apart should your driveway lights be?
- 3. Choosing between solar, low-voltage, and line-voltage power
- 4. Picking the right color temperature and brightness
- 5. Setting up controls that save energy and reduce hassle
- 6. Applying layered and responsible lighting design
- 7. Materials and upkeep that keep fixtures looking new
- 8. Field-tested approaches from Divine Landscaping LLC
- What most driveway lighting advice gets wrong
- Get your driveway lighting professionally installed
- FAQ
- Sources
1. Fixture types and where each one works best
A good driveway lighting plan rarely relies on one fixture type; for more detailed driveway lighting ideas and benefits, see this practical guide for common fixture types and uses. Instead, it layers a few options to handle different jobs: guiding footsteps, marking edges, and highlighting features.
- Bollard or post lights suit long, formal driveways and entrances, standing tall enough to define the path without requiring dozens of fixtures.
- Path or low-voltage stake lights work well along edges, offering subtle, low-profile guidance for shorter or curving drives.
- In-ground well lights sit flush with the ground and throw light upward, making them a discreet choice for walls, trees, or stone columns.
- Recessed driveway lights embed directly into pavement or hardscape for a clean, modern look with no visible fixture during the day.
- Spot or wash lights highlight architecture, specimen trees, or stone facades, adding depth rather than just illumination.
- Wall- or fence-mounted fixtures fit short driveways where ground-level options would feel crowded or redundant.
- Solar fixtures offer a no-wiring option, though output and placement depend heavily on sun exposure.
For most properties, combining two or three of these types, such as bollards along the main run with well lights at a stone wall, creates the layered look that professionals use to achieve both safety and curb appeal. A short suburban driveway might only need stake lights and one accent fixture, while a long rural approach benefits from taller, widely spaced bollards that guide the eye without creating glaring hot spots.
2. How far apart should your driveway lights be?
Spacing depends on fixture height, beam angle, and the job each light is doing. Professional installers generally recommend 6 to 10 feet between pathway lights to keep a steady visual rhythm without overlapping pools of light. Driveway runs can use wider spacing, typically 10 to 15 feet, since the goal is guidance rather than continuous brightness.
- Taller fixtures and wider beam angles allow for greater spacing without creating dark gaps.
- Shorter stake lights with narrow beams need tighter spacing to avoid uneven coverage.
- A single-side layout works for narrow drives, while staggered or paired placement suits wider ones.
- Before digging anything in, place fixtures temporarily and walk the driveway at night to check for dark spots or glare.
3. Choosing between solar, low-voltage, and line-voltage power
Power type affects cost, brightness, and how much flexibility you have in fixture placement.
- Solar fixtures need no wiring and install quickly, but battery output drops in shaded spots and weakens over a New England winter.
- Low-voltage (12V) systems are the standard choice for most residential landscapes, offering safer handling, easier DIY installation, and good control over brightness and timing.
- Line-voltage fixtures deliver more light over longer distances, useful for long driveways or security lighting, but require conduit and a licensed electrician.
- Checking for proper listings matters regardless of power type: UL guidance on landscape and outdoor lighting covers line-voltage, low-voltage, and photovoltaic luminaire categories along with the safety testing each one should meet.
Pro Tip: Mixing power types on one driveway works fine, but plan the layout first. Combining solar accents with a low-voltage path run without a clear map often leads to mismatched brightness and more maintenance calls later.
4. Picking the right color temperature and brightness
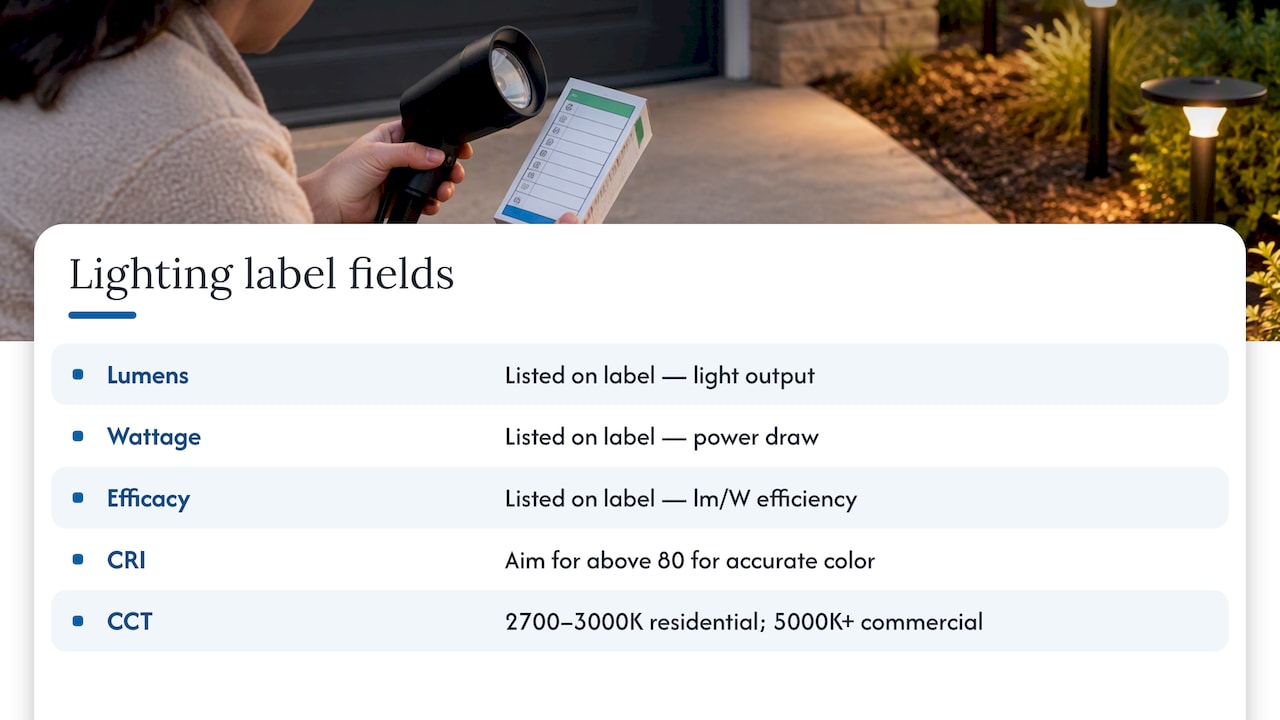
Color temperature matters as much as fixture choice. Warmer LEDs between 2700K and 3000K render stone, brick, and greenery more naturally and avoid the harsh, blue-white cast of higher Kelvin ratings. Fixtures at 5000K or above are typically better suited to commercial or security applications, not residential driveways, since blue-rich light is more disruptive to sleep cycles and nearby wildlife.
For brightness, accent lighting on trees or walls generally needs far fewer lumens than task lighting along a walking path.
According to DOE Lighting Facts guidance, product labels list lumen output, wattage, efficacy, CRI, and CCT together, giving homeowners a consistent way to compare fixtures before buying. A CRI above 80 is worth looking for if you want stone and plant colors to look accurate at night rather than washed out.
5. Setting up controls that save energy and reduce hassle
The right controls make a lighting plan safer and cheaper to run. Motion sensors work well near entry points where sudden brightness signals arrival, while dusk-to-dawn settings suit ambient path lights that need to stay on all evening.
- Use motion sensors for driveway entrances and garage approaches, not for continuous path lighting.
- Dusk-to-dawn timers handle ambient and accent fixtures without manual switching.
- Smart dimming lets you lower output late at night while keeping enough light for safety.
- Solar fixtures need periodic battery checks, especially before winter, to avoid dim or failed lights when days get shorter.
Short motion-sensor durations also help avoid triggering lights every time a car passes on the street, a detail worth adjusting during setup rather than after a complaint.
6. Applying layered and responsible lighting design
Layering means combining three roles: ambient light for general visibility, task light for safe footing, and accent light for visual interest. A typical driveway might use ambient bollards along the run, task lighting at steps or uneven pavement, and accent spotlights on a tree or stone wall.
The IDA and IES outline five core principles for responsible outdoor lighting that apply directly to driveways:
- Use light only when and where it is needed.
- Direct light downward or toward the intended target, not outward or upward into the sky.
- Keep brightness at the level needed for the task, not beyond it.
- Favor warmer color temperatures to limit blue light.
- Avoid lighting that serves no clear purpose.
Following these principles reduces shadowed areas where hazards can hide, since layered light fills gaps that a single bright fixture would leave dark. The DarkSky Model CC&R guidance also recommends shielding fixtures and limiting motion-sensor run time to avoid light spilling onto a neighbor’s property.
Pro Tip: Always test fixture aim and brightness after dark before finalizing the layout. What looks right at noon often throws glare or dark gaps once the sun goes down.

7. Materials and upkeep that keep fixtures looking new
Outdoor fixtures face moisture, salt, and temperature swings, so material choice affects how long they last. Anodized aluminum, stainless steel, and UV-stable polymers resist corrosion and fading better than painted metal or basic plastic housings.
- Check the IP rating before buying: wet-location fixtures need at least IP65 for driveway exposure to snow and runoff.
- Coastal or salted-road properties benefit from stainless steel or marine-grade finishes over standard aluminum.
- Clean lenses twice a year to maintain brightness and check seals for cracking.
- Replace or recharge solar batteries annually, since output fades well before total failure.
8. Field-tested approaches from Divine Landscaping LLC
It is often recommended to use 2700K to 3000K LEDs for uplighting trees and pathway edges, a warmth level that holds up across both stone and greenery.
- Edging treatments that hide wiring runs make recessed and well lights look built in rather than added on later.
- Long rural driveways typically call for taller, widely spaced bollards, while short suburban drives do better with low stake lights and one accent fixture.
- Testing fixture placement at night before trenching can avoid costly rework once lights are wired in.
- Pairing lighting with existing hardscape features, like retaining walls or walkway borders, can keep the finished look intentional.
What most driveway lighting advice gets wrong
Most driveway lighting guides focus on buying the brightest fixture available, as if more lumens automatically means more safety. In practice, a driveway lined with overpowered floodlights creates glare that makes it harder to see, not easier, and it is the layout and aim of the light that guide the eye, not raw output.
The conventional checklist approach (pick a fixture, pick a bulb, install it) skips the step that matters most: testing at night before anything gets permanent. A fixture that looks perfect in daylight can throw a blinding glare from the kitchen window or leave a section of the driveway in heavy shadow once it is dark. Homeowners who walk their own driveway after dusk, phone flashlight off, usually catch these issues before they become a wiring headache.
If there is one priority worth putting ahead of fixture shopping, it is this: decide where the dark spots and hazards actually are first, then light those specific points with warm, shielded fixtures. Curb appeal follows naturally once the functional layout is right. Chasing a showroom look before solving for safety tends to produce driveways that look good in photos and frustrate the people walking them every night.
— Damian
Get your driveway lighting professionally installed
Planning a layout is one thing; running wiring, grading for drainage, and integrating fixtures with your hardscape is another. Divine Landscaping’s Irrigation & Lighting services cover landscape and perimeter lighting designed around your property, not a one-size layout.
- Landscape Design services help plan lighting alongside plantings and hardscape from the start.
- Masonry & Hardscape work integrates recessed and well lights cleanly into walls, walkways, and edging.
- Browse the outdoor lighting gallery for examples, or request a quote to get your driveway plan started.
FAQ
What is the best color temperature for driveway lighting?
Warm white between 2700K and 3000K is the standard recommendation for residential driveways, since it renders stone and landscaping naturally while limiting blue light. Higher temperatures like 5000K tend to look harsh and are better suited to commercial security lighting.
How far apart should driveway lights be placed?
Pathway lights typically sit 6 to 10 feet apart, while driveway fixtures can space out to 10 to 15 feet depending on fixture height and beam angle. Taller bollards with wider beams allow for greater spacing without leaving dark gaps.
Should I choose solar or low-voltage driveway lights?
Low-voltage systems generally offer more consistent brightness and better control through timers and dimmers, making them the common choice for driveways. Solar fixtures skip wiring entirely but depend on sun exposure and battery health, which can weaken in shaded or wooded spots.
Do I need an electrician for driveway lighting?
Low-voltage systems are often installable without an electrician, but line-voltage fixtures require conduit and licensed wiring work. Checking a fixture’s UL listing and IP rating before installation helps confirm it is built for outdoor and wet-location use, as outlined in UL’s landscape lighting guidance.
What does Divine Landscaping recommend for driveway lighting?
Divine Landscaping generally recommends 2700K to 3000K LEDs for uplighting and pathway tones, paired with placements tested on-site before any wiring is finalized. Professional installation through their landscape lighting services also covers integrating fixtures with existing hardscape and edging.
Sources
- IES advocacy: Light at night
- IDA model CC&R language for outdoor lighting
- LED color characteristics fact sheet | DOE
- Landscape and outdoor lighting | UL