
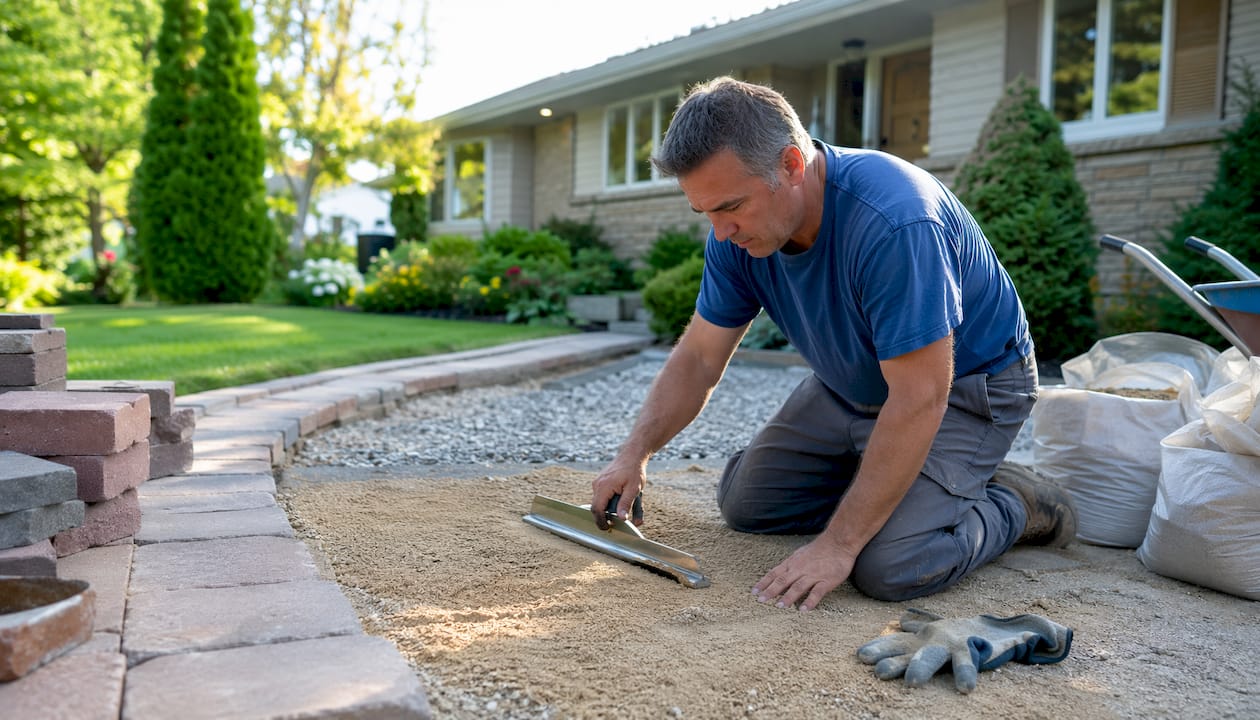
You can build a durable, attractive front-yard walkway yourself. The first two decisions are material and route. Get those right, and everything else follows a logical sequence. Get them wrong, and no amount of careful laying will save you from a path that shifts, pools water, or looks out of place within a few seasons.
Three rules apply regardless of which material you choose:
- Width: For a primary front entrance, industry standards recommend a width of 4–5 feet to allow two people to walk side by side comfortably. The absolute minimum is 36 inches, but 48–60 inches is preferred for accessibility and ease of use. Side yard and garden paths can be narrower, typically 2.5–3 feet wide.
- Base depth: Plan to excavate sufficiently deep to fit a compacted gravel base, a sand bed, and your surface material. Anything shallower invites frost heave and settling.
- Drainage slope: The finished surface must slope at least a small measurable amount away from your foundation. Water that sits against the house causes far more damage than a slightly imperfect paver joint.
A properly built path with a solid compacted base and good drainage can serve your home for 20 years or more. The investment in base prep is where that longevity is earned.
Table of Contents
- What materials work best for a front yard walkway?
- How do you plan the route and layout of a front walkway?
- How to build a front yard walkway step by step
- What does it cost, and how long does it take?
- Why do walkways fail, and how do you prevent it?
- How do you keep a front walkway looking good year-round?
- Front walkway design ideas that boost curb appeal
- Tools, materials, and quantity estimates before you shop
- Key Takeaways
- When should you hire a pro instead of going DIY?
- Ready to get a professional estimate for your walkway?
What materials work best for a front yard walkway?
Choosing the right surface material is as much a design decision as a practical one. The table below covers the six most common options, their cost bands, durability, and best architectural pairings.
| Material | Installed cost (per sq ft) | Durability | Best architectural fit | DIY difficulty |
|---|---|---|---|---|
| Poured concrete | $6–$12 | High | Modern, contemporary, ranch | Moderate (formwork required) |
| Concrete pavers | $10–$20 | Very high | Traditional, colonial, craftsman | Low–moderate |
| Brick | $10–$20 | High | Formal, colonial, Federal | Moderate |
| Flagstone | $15–$30 | Very high | Cottage, farmhouse, rustic | Moderate–high |
| Gravel | $3–$8 | Low–moderate | Cottage, informal, naturalistic | Low |
| Wood/steppers | Varies | Low–moderate | Cabin, woodland, informal | Low |
Concrete pavers are the most DIY-friendly choice for a front entrance. They arrive in consistent thicknesses, interlock predictably, and individual units can be replaced if one cracks or stains. For patio-grade hardscape materials, the same durability logic applies: a well-compacted base matters more than which specific paver you pick.
Flagstone delivers the most natural, organic look and pairs beautifully with cottage or farmhouse homes. The trade-off is irregular thickness, which demands more skill during bedding to keep the surface level and safe underfoot. Large slabs also require careful lifting technique to avoid injury.
Brick suits formal homes and creates a timeless, symmetrical look. It can become slippery when wet if moss develops, so a north-facing path in a shaded yard needs periodic cleaning. Running-bond and herringbone patterns both work well; herringbone adds visual interest but requires more cuts at the edges.
Gravel costs the least upfront but demands the most ongoing maintenance. Without solid edge restraints, it migrates into the lawn within a season. It works well as a secondary path or as a filler between stepping stones, but it is rarely the right call for a high-traffic front entrance.
Edging and planting pairings change the finished look dramatically. Metal edging keeps lines crisp and nearly disappears at ground level. A soldier-course brick border adds formality. Low ornamental grasses or boxwood hedges alongside a straight concrete path reinforce a formal feel. Lavender, creeping thyme, or ornamental sedges soften the edge of a flagstone path and fill gaps between stones naturally.
How do you plan the route and layout of a front walkway?
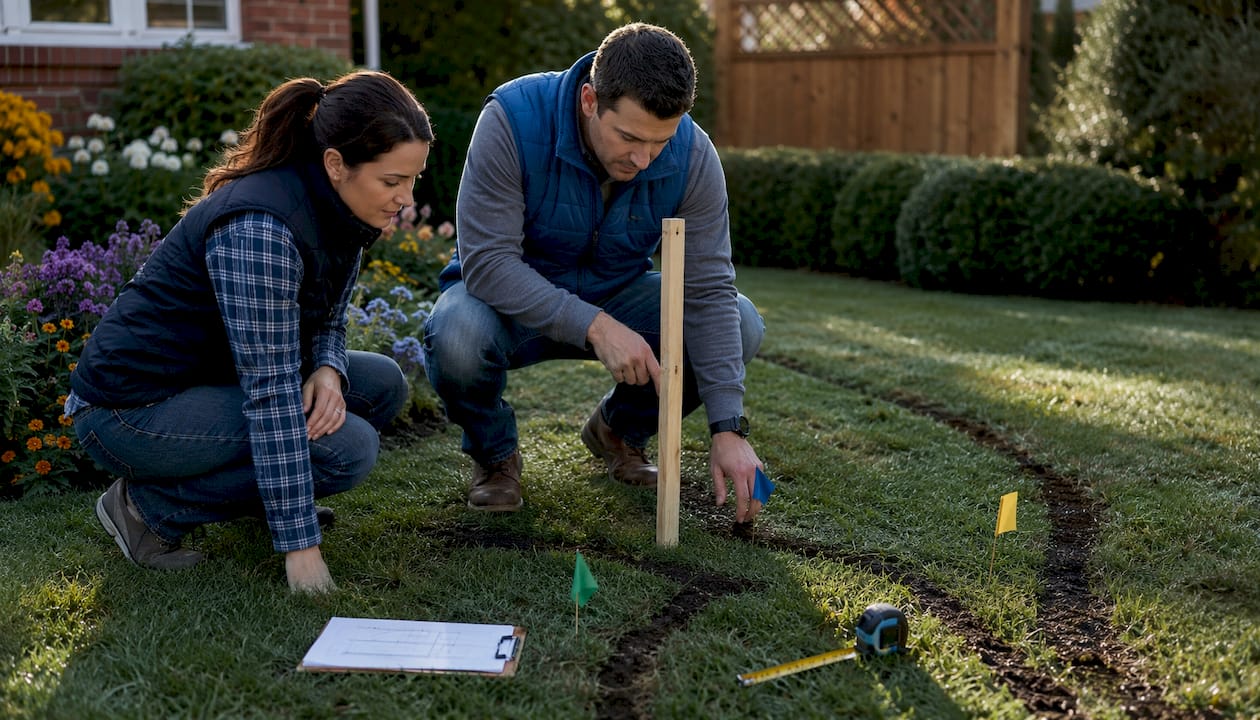
Before you mark a single line, walk the path you naturally take from the street or driveway to your front door. Do it several times, at different times of day, with and without carrying something. That worn line in the grass is your desire line, and a path that follows it will feel intuitive to every visitor.
Mapping the route is straightforward with a garden hose, a can of marking spray paint, or a length of mason’s string. Lay it out, step back from the street, and look at it from a distance. Adjust until the route looks deliberate rather than accidental.
Width decisions come down to how the path is used:
- Generally wide enough for a primary front entrance to allow two people side by side, or a parent with a stroller
- Wider for main entrance paths; narrower for secondary or side-yard paths
- Wide enough to allow comfortable wheelchair access if needed
- Sufficient clearance for wheelbarrows or lawn mowers if the path doubles as a maintenance route
For small front yards, a slightly narrower path (about 3.5 feet/42 inches) with a generous flare at the front door creates the impression of width without overwhelming the space. That flare, where the path widens to 5 or even 6 feet at the entry, gives visitors room to pause, turn, and face the door without stepping off the edge.
Curves versus straight lines depend on your home’s architecture. Straight paths suit formal homes with symmetrical facades. A gentle curve reads as intentional and inviting on a cottage or informal landscape, but only when the curve follows a natural reason, such as a tree, a planting bed, or a grade change. Tight S-curves with no logical cause look forced and create awkward mowing angles. Paths should feel discovered, not engineered.
Slope and drainage must be planned at the layout stage, not corrected afterward. The finished surface needs a cross-slope of 1/4 inch per foot directed away from the foundation. On a flat yard, this is easy to build in. On a sloped site, you may need to step the path or add a channel drain at the low end.
How to build a front yard walkway step by step
This method covers a paver or natural stone system, the most forgiving and repairable approach for DIY homeowners. Poured concrete follows a different process entirely; if that is your chosen material, a concrete sidewalk guide covers the formwork and pour sequence in detail.
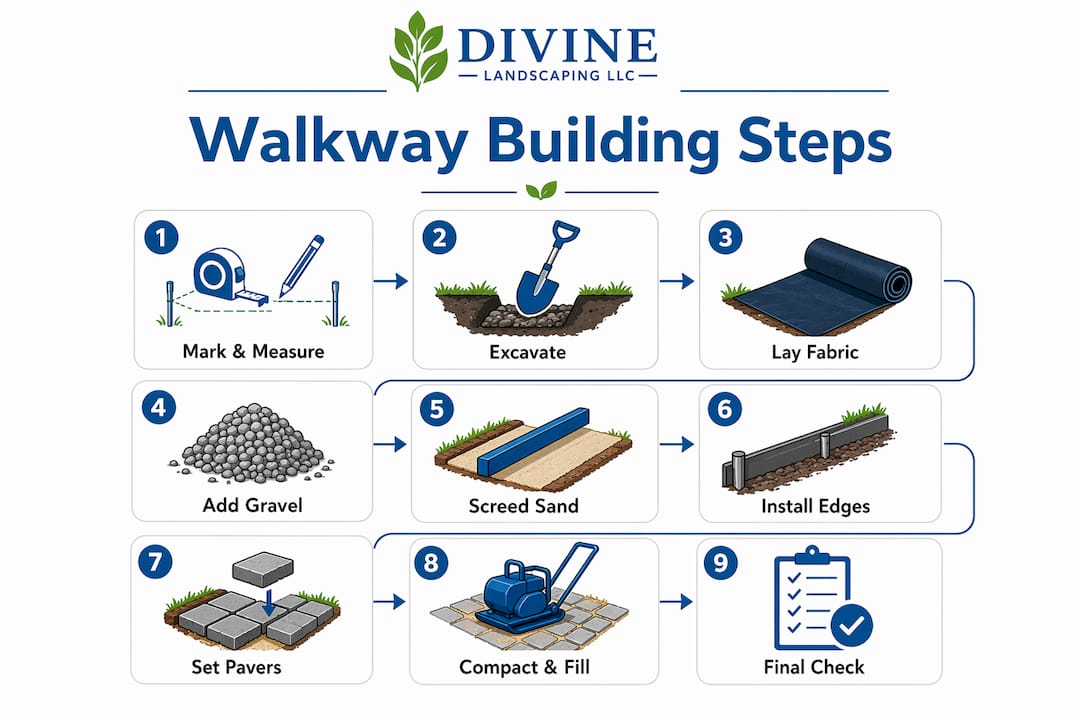
Step 0: Mark, measure, and call 811
Before any digging, call 811 (the national Dig Safe line) to have underground utilities marked. This is not optional. Mark your path outline with spray paint or stakes and string. Confirm final dimensions with a tape measure.
Step 1: Excavate to depth
Dig out the marked area to 7–9 inches below finished grade. That depth accommodates a 4–6 inch gravel base, a 1-inch sand bed, and your paver or stone thickness. Remove all sod, roots, and organic material. Loose or soft spots in the subgrade should be compacted with a hand tamper before you add any base material.
Step 2: Lay landscape fabric
Roll landscape fabric across the excavated area and pin it to the sides. This layer suppresses weed growth from below without blocking drainage. Overlap seams by at least 6 inches.
Step 3: Build the gravel base in lifts
Add crushed stone (3/4-inch clean crushed gravel or crusher run) in 2-inch layers. Compact each lift with a plate compactor before adding the next. Compacting in 2-inch lifts rather than all at once is the single most important technique for a base that resists frost heave and long-term settling. Total compacted depth should reach 4–6 inches. Check your cross-slope with a level and a straightedge after the final lift.
Pro Tip: Rent a plate compactor rather than relying on a hand tamper for the gravel base. A plate compactor delivers far more consistent force and reaches the full depth of each lift. Most rental centers charge by the half-day, so schedule excavation and base work on the same day.
Step 4: Screed the sand bed
Spread 1 inch of coarse bedding sand over the compacted gravel. Use two lengths of 1-inch-diameter PVC pipe as screed guides, set parallel to the path edges. Drag a straight 2×4 across the pipes to create a perfectly level, consistent sand surface. Remove the pipes and fill the channels with sand.
Step 5: Install edge restraints
Set permanent edge restraints along both sides before laying a single paver. Metal or plastic edging spiked into the gravel base prevents the walkway from spreading outward over time. A soldier-course border (pavers set vertically or on end along the edge) works as both restraint and design detail. Without this step, even a perfectly laid surface will gradually lose its crisp lines.
Step 6: Lay pavers or stone
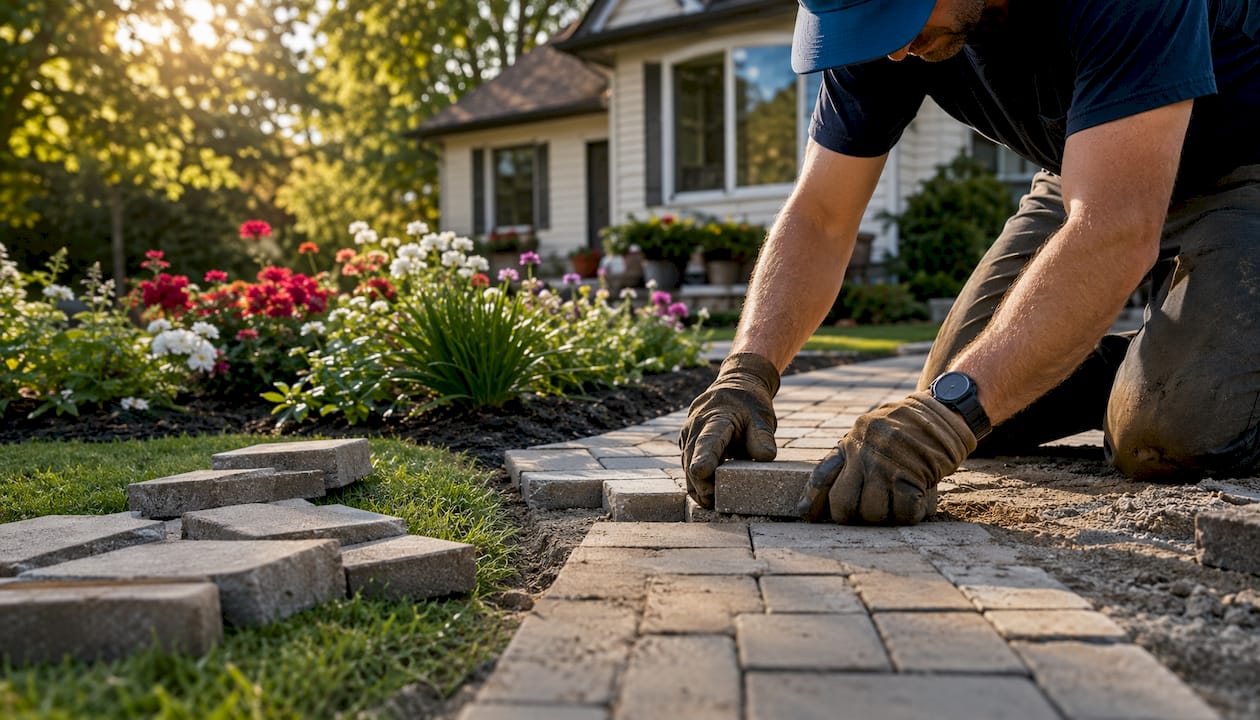
Start from the most visible end, typically the front door, and work toward the street. Set each unit firmly into the sand without sliding it. Maintain consistent joint spacing (typically 1/8–1/4 inch for pavers). For a running-bond pattern, offset each row by half a unit. Cut edge pieces with a masonry saw or angle grinder fitted with a diamond blade. Wear safety glasses, hearing protection, and work gloves during cutting.
Step 7: Compact the surface and fill joints
Once all units are set, run the plate compactor over the entire surface to seat the pavers into the sand. Sweep polymeric sand into the joints, blow off the excess with a leaf blower, and mist the surface with water to activate the binding agent. Polymeric sand resists weed growth and ant excavation better than plain jointing sand.
Step 8: Final checks
Use a 4-foot level to confirm no individual unit is rocking or sitting high. Check your cross-slope with a level and a 1/4-inch shim. Walk the path fully loaded (carry something heavy) to feel for any soft spots. Mark any problem areas and reset those units before calling the job complete.
Realistic timeline: Excavation and base work typically take one full weekend day for a 40–60 square foot front walk. Setting pavers and finishing joints takes a second day. Allow 24–48 hours for polymeric sand to cure before heavy foot traffic.
What does it cost, and how long does it take?
Budget and schedule vary significantly by material, path size, and whether you rent equipment or hire help. The table below uses a typical front walk of 60 square feet as a reference.
| Material | DIY material cost (60 sq ft) | Estimated DIY time | Equipment rental needed |
|---|---|---|---|
| Poured concrete | — | 2–3 days | Mixer, forms, float |
| Concrete pavers | $600 | 2 weekend days | Plate compactor, masonry saw |
| Flagstone | $900–$1,800 | 2–3 days | Plate compactor, angle grinder |
| Brick | $600 | 2–3 days | Plate compactor, masonry saw |
| Gravel | — | 1 day | Hand tamper |
These figures reflect material costs only. A professional crew typically completes the same 60-square-foot walk in one day, with installed costs ranging from $600 to $1,800 for pavers and $900 to $3,600 for flagstone, depending on site conditions and region.
Cost drivers that push budgets higher:
- Poor soil or clay-heavy ground requiring deeper excavation or added drainage pipe
- Steep slopes or significant grade changes that require stepped sections or a retaining wall
- Complex patterns (herringbone, diagonal) that increase cut waste by 10–15%
- Difficult access that prevents a wheelbarrow from reaching the work area
- Decorative edging upgrades (poured curbing, natural stone border)
When hiring a pro makes financial sense: If your site has poor drainage, heavy clay soil, a slope greater than a few inches across the path width, or if the project requires permits or accessibility compliance, professional installation typically pays for itself in avoided repairs. Patio installation follows the same logic: complex grading is where DIY savings evaporate fastest.
Why do walkways fail, and how do you prevent it?
Most front walkway failures trace back to one of four causes, and all four are preventable with proper prep.
- Inadequate base depth or compaction. Skipping lifts or using a hand tamper on a 6-inch base leaves voids that collapse under load or freeze-thaw cycles. The fix is always excavating deeper and renting a plate compactor.
- Missing edge restraints. Without permanent edging, pavers and gravel migrate outward. Within two or three seasons, the path loses its defined edges and requires a full reset. Installing permanent edge restraints from the start costs very little and prevents this entirely.
- Poor cross-slope. A flat or inward-sloping surface pools water on the path and directs it toward the foundation. Check your slope with a level after every base lift, not just at the end.
- Wrong material for traffic level. Gravel and wood steppers are fine for a low-traffic garden path. A front entrance that sees daily use, deliveries, and winter ice removal needs a harder, more stable surface.
Soil type matters more than most guides acknowledge. Sandy, well-draining soil is forgiving; a 4-inch compacted base often suffices. Clay soil holds water, expands when frozen, and can push pavers upward by an inch or more over a single winter. In clay-heavy yards or freeze-thaw regions like New England, increase the gravel base to 6 inches and consider running a perforated drain pipe within the base layer to carry subsurface water away from the path. For steep sites where water management is a bigger concern, walkway construction drainage practices offer additional guidance.
Repairing common failures is straightforward when caught early. A shifted paver can be lifted, the sand bed releveled, and the unit reset in under an hour. Settled gravel paths need a fresh layer of compacted stone topped with new surface gravel. Voids under large flagstones, usually caused by water washing out the sand bed, require lifting the stone, filling the void with compacted gravel and fresh sand, and resetting.
How do you keep a front walkway looking good year-round?
A well-built path needs only light seasonal attention to stay safe and attractive.
Spring: Inspect for frost heave. Any paver that shifted over winter can be reset before the ground fully thaws. Sweep out winter debris, check joints for gaps, and re-sweep polymeric sand into any open joints. Pull any weeds that established in the joints over the previous season.
Summer: Rinse the surface with a garden hose or low-pressure washer to remove dirt and organic staining. Avoid high-pressure washing on polymeric sand joints; it strips the binder. For brick or natural stone, a mild pH-neutral cleaner removes algae without etching the surface. Do not use bleach on pavers; it can discolor the surface and harm adjacent plantings.
Pro Tip: For persistent moss or algae on shaded stone paths, a diluted white vinegar solution (one part vinegar to three parts water) applied with a stiff brush is effective and safe for surrounding plants. Rinse thoroughly after scrubbing.
Fall: Clear leaves promptly. Wet leaves on pavers or stone become slippery and stain light-colored surfaces. This is also the right time to check for any settling that developed over the summer and reset units before winter.
Winter: Use sand or fine gravel for traction rather than rock salt. Rock salt and calcium chloride accelerate surface spalling on concrete and pavers, especially in the first few years after installation. If you must use a deicer, calcium magnesium acetate (CMA) is gentler on hardscape surfaces. Never use a metal-edged snow shovel on pavers; a plastic blade or rubber-edged pusher prevents surface scratching.
Long-term checks: Every two to three years, walk the path slowly and look for any rocking units, low spots where water collects, or edge restraints that have shifted. Catching these early means a simple reset rather than a full section rebuild.
Front walkway design ideas that boost curb appeal
The surface material gets you started, but the design details are what make a front path feel finished and intentional. Architectural style should guide every choice: a straight, symmetrical brick path reinforces a formal colonial facade, while a gently curved flagstone approach suits a craftsman or cottage home.
Style approaches worth considering:
- A broad, straight path with a generous flare at the entry steps creates a formal, welcoming arrival sequence for traditional homes.
- Stepping stones set in low ground cover (creeping thyme, moss, or dwarf mondo grass) give a naturalistic feel and allow water to percolate between units.
- Mixed-material borders, such as a paver field with a natural stone edge course, add visual texture without increasing complexity.
- For tight front yards, a slightly diagonal path from the driveway to the door uses the space more efficiently than a straight run and adds visual interest. Small yard ideas often rely on this diagonal approach to create the impression of more space.
Planting pairings do the most work for the least money. Low-growing plants along the path edge soften the transition from hard surface to lawn without overgrowing the walkway. Good choices by scale:
- Low (under 12 inches): Creeping thyme, dwarf mondo grass, ajuga, or blue star creeper fill gaps and suppress weeds.
- Medium (12–24 inches): Ornamental grasses, lavender, or compact boxwood create a defined edge without blocking the path.
- Seasonal color: A single row of annuals (salvia, marigold, or impatiens for shade) along one side adds color from spring through fall with minimal maintenance.
Lighting transforms a walkway from a daytime feature to a nighttime focal point. Low-voltage or solar path lights spaced every 6–8 feet provide safe illumination without over-lighting the space. Fixtures set slightly back from the path edge and angled downward avoid glare. For a more architectural effect, uplighting a specimen tree or the front facade creates depth and draws the eye toward the entry. Solar fixtures require no wiring but perform poorly in heavily shaded yards; low-voltage LED systems are more reliable in those conditions.
Edging options by aesthetic and maintenance impact:
- Metal edging: Nearly invisible, very durable, low maintenance. Best for clean modern or contemporary looks.
- Brick soldier course: Adds formality and color contrast. Requires the same base prep as the main path.
- Poured concrete curbing: Permanent and crisp. Harder to modify if you change the planting scheme later.
- Natural stone border: Irregular and organic. Works well alongside flagstone or gravel paths.
For broader curb appeal landscaping ideas that extend beyond the walkway itself, pairing the path design with coordinated planting beds and a defined entry creates a cohesive first impression.
Tools, materials, and quantity estimates before you shop
Buying the right amount of material and having the right tools on hand before you start prevents mid-project delays.
Tools to own vs. rent
Own: Tape measure, 4-foot level, rubber mallet, hand tamper, mason’s string and stakes, landscape fabric pins, push broom, safety glasses, work gloves, knee pads.
Rent: Plate compactor (essential for base compaction), masonry saw or angle grinder with diamond blade (for cutting pavers or stone), sod cutter (speeds up excavation significantly on established lawns).
Quantity formulas
- Gravel base: Multiply path length (ft) × width (ft) × base depth (ft, typically 0.4 for 5 inches) ÷ 27 = cubic yards needed. Add 10% for waste and compaction loss.
- Bedding sand: Length × width × 0.083 (1 inch) ÷ 27 = cubic yards. For a 60-square-foot path, that is roughly 0.18 cubic yards, or about half a standard bag per square foot.
- Pavers: Most standard concrete pavers cover approximately 1 square foot per unit. Order 10% extra for cuts and breakage.
- Polymeric sand: One 50-pound bag typically covers 30–50 square feet of standard paver joints, depending on joint width.
Pro Tip: For a typical 60-square-foot front walk, you will need roughly 1.5 cubic yards of compacted gravel base material. Order 1.7 cubic yards to account for compaction loss and waste. Delivered bulk material is almost always cheaper per yard than bagged product from a home center.
Staging on a small front yard
Stack base material on a tarp on the driveway rather than on the lawn. Crushed gravel left on grass for more than a day or two kills the turf beneath it. Move material to the work area in a wheelbarrow in small loads. If delivery access is limited, ask your supplier about smaller “mini-load” deliveries that fit through a standard gate opening.
Key Takeaways
A well-built front walkway depends on base depth, compaction, and drainage far more than surface material choice.
| Point | Details |
|---|---|
| Choose material and route first | Walk the natural desire line before marking; match material to your home’s style and traffic level. |
| Width and base depth are non-negotiable | Front entrances need sufficient width and proper excavation depth for a durable paver or stone system. |
| Compact gravel in 2-inch lifts | Use a plate compactor, not a hand tamper, to build a base that resists frost heave and long-term settling. |
| Drainage slope prevents most failures | Maintain a slope of 1/4 inch per foot of width, directed away from the foundation, to prevent pooling and protect the house. |
| Divinelandscapingllc for complex projects | When grading, poor soils, or accessibility needs go beyond DIY scope, Divinelandscapingllc’s hardscape team handles the full installation. |
When should you hire a pro instead of going DIY?
Most homeowners with basic tool skills can successfully build a front yard walkway on flat, well-draining ground using pavers or gravel. The DIY method described above is genuinely achievable over two weekends. That said, certain site conditions shift the math decisively toward professional installation.
Hire a professional when your site has any of the following: significant grade change across the path route (more than 4–6 inches over the length of the walk), heavy clay soil that retains water after rain, a history of frost heave on existing hardscape, or a need for accessibility compliance such as a zero-step entry or ADA-standard turning radius. These conditions require drainage engineering, deeper excavation, or structural solutions that go beyond standard DIY scope.
What to have ready before requesting an estimate: a rough sketch or photo of the path route, the approximate dimensions (length and width), your preferred material if you have one, any known drainage issues (where water pools after rain), and notes on access (can a wheelbarrow reach the work area from the street?). That information lets a contractor give you an accurate number on the first visit rather than a wide range.
Divinelandscapingllc’s team evaluates front-walk projects by looking at the full site: soil type, existing grade, drainage patterns, and how the walkway connects to other hardscape elements like the driveway or a patio. Their hardscape services cover the complete installation from excavation through final jointing, with the same base-prep standards described in this guide.
Ready to get a professional estimate for your walkway?
Divinelandscapingllc gives homeowners a concrete alternative to the full DIY process: a professionally designed and installed front walkway built to the same base-prep and drainage standards described here, without the equipment rental, material staging, or two-weekend time commitment.

Their New Hampshire hardscape team handles material selection, excavation, base compaction, and finishing, so you get a path that performs through freeze-thaw cycles and looks right from the street on day one. Before you reach out, pull together a photo of your front yard from the street, your approximate path dimensions, your preferred material (or a shortlist), and any notes on drainage problems you have noticed. That preparation makes the estimate conversation faster and more accurate.
View finished walkway and patio projects in the project gallery, or go directly to the quote request page to describe your project and schedule a site visit.