
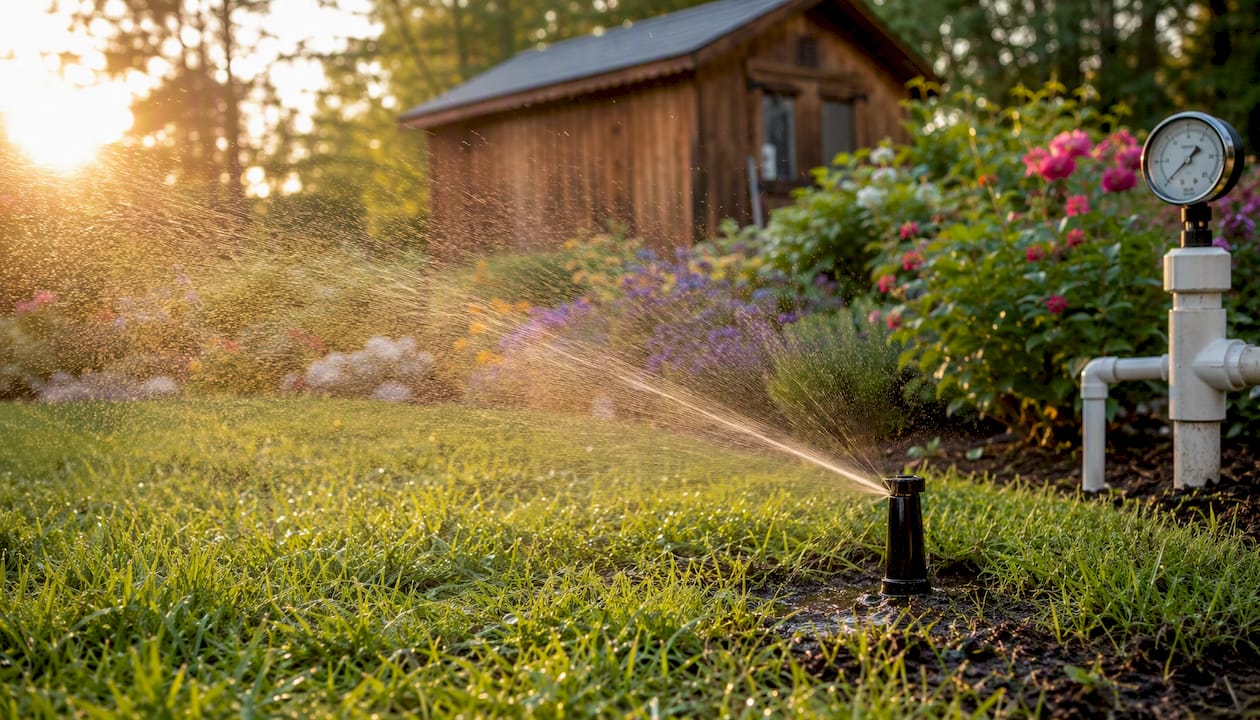
The most common irrigation system mistakes are pressure and flow problems, mixed head types in one zone, clogged emitters, undersized mains, bad controller programming, electrical and valve faults, skipped backflow prevention, poor winterization, overwatering, and no routine maintenance. Fix pressure and zone design first — those two errors alone account for the majority of water waste and plant damage on residential properties.
Quick checklist and one immediate action for each:
- Pressure/flow problems — Check static pressure at a hose bib with a gauge; target an appropriate pressure for most zones.
- Mixed head types in one zone — Walk each zone and note every head type; separate sprays from rotors before the next season.
- Clogged emitters or filters — Remove and rinse the inline filter; replace any emitter that drips unevenly.
- Improper head spacing — Measure head-to-head distance; adjust so each head reaches the next one.
- Undersized mainline — Trace your supply pipe; if it’s 1/2" polyethylene over a long run, plan to upsize.
- Controller programming errors — Open the controller and verify zone-specific run times and cycle-and-soak settings.
- Electrical/valve faults — Use a multimeter to check solenoid resistance; a typical resistance range is considered normal.
- No backflow prevention — Confirm a backflow preventer is installed and tested per your local code.
- Skipped winterization — Schedule a blowout before the first hard freeze (typically October in New Hampshire).
- No routine maintenance — Set a calendar reminder for monthly head checks and a full seasonal inspection.
Call a pro when you see any of these:
- Suspected underground pipe leak (wet spots with no rain, unexplained water bill spike)
- Pump faults or booster pump failures
- Solenoid wiring faults you cannot isolate with a multimeter
- Backflow device installation or annual testing
- Freeze-season blowouts requiring a compressor
- Major re-piping or zone redesign
Key Takeaways
Fixing pressure, zone design, and clogged emitters first resolves the majority of irrigation system errors before they damage plants or inflate your water bill.
| Point | Details |
|---|---|
| Pressure comes first | Check static and operating psi at a hose bib; most rotors need 40–45 psi and impact heads need ~50 psi to function correctly. |
| Separate head types by zone | Mixing fixed sprays and rotors in one zone creates precipitation-rate mismatches that no run-time adjustment can fix. |
| Test solenoids with a multimeter | Acceptable resistance is 20–60 Ohms; readings outside that range pinpoint shorted solenoids, wiring faults, or cut common wires. |
| Run a catch-can test each spring | Place cans across a zone, run 15 minutes, and compare depths; a significant variance signals a coverage or pressure problem. |
| Divinelandscapingllc handles complex fixes | For re-piping, backflow installation, pump faults, or full zone redesign, Divinelandscapingllc serves NH and nearby MA with diagnostics, written estimates, and seasonal maintenance. |
Table of Contents
- 1. Why your heads don’t pop and rotors don’t rotate
- 2. How mixed head types and poor spacing cause dry patches
- 3. Clogged emitters, dirty filters, and water quality problems
- 4. Why a small mainline ruins your whole system
- 5. How bad controller programming wastes water every cycle
- 6. Electrical and valve faults: how to test solenoids yourself
- 7. Backflow prevention, code compliance, and winterization
- 8. Overwatering, soil type, and matching your schedule to plant needs
- 9. Routine maintenance and the catch-can test every homeowner should run
- 10. How to triage irrigation problems: DIY vs. calling a pro
- What a local irrigation contractor sees every season
- Divinelandscapingllc’s irrigation services: what to expect when you hire a pro
- Sources
1. Why your heads don’t pop and rotors don’t rotate
Pressure is the single most common irrigation system error, and it’s the one most homeowners overlook because the failure is gradual. When operating pressure falls below a head’s minimum requirement, nozzle radius shrinks, rotors stall, and precipitation rate drops unevenly across the zone.
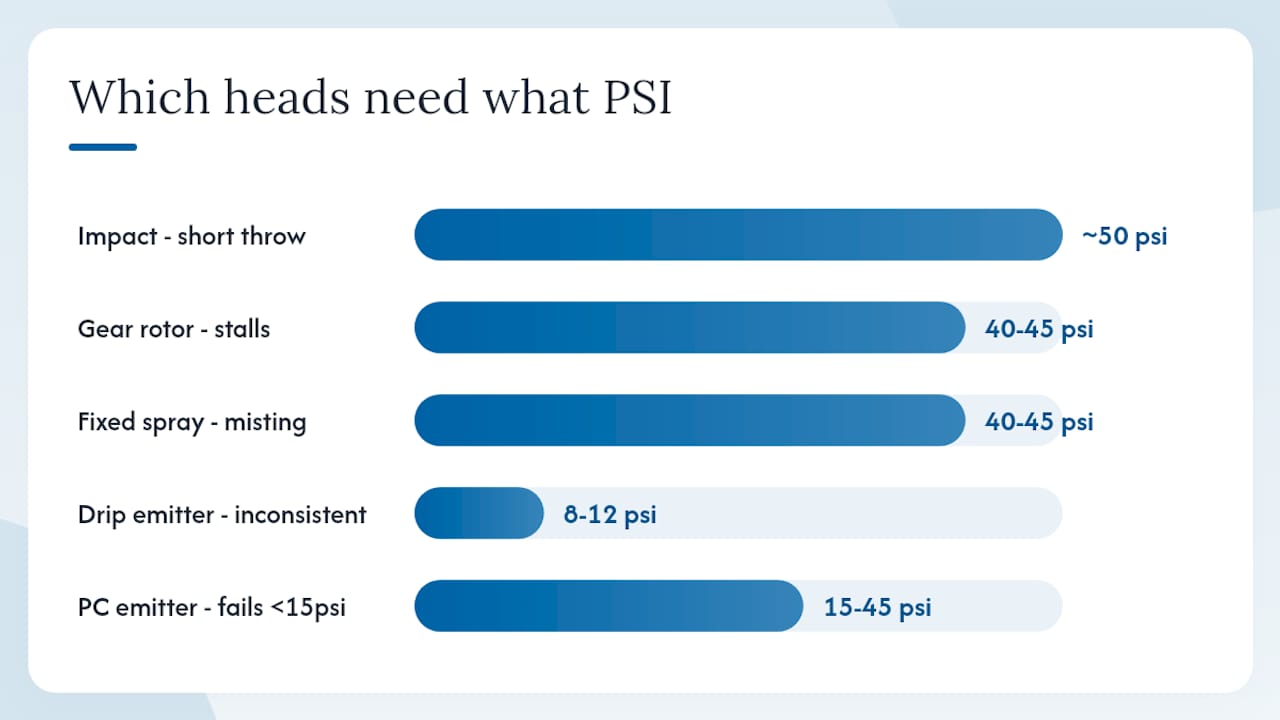
Different head types need different pressure to function correctly. Impact sprinklers typically need around 50 psi; gear-drive rotors generally require 40–45 psi; many stream nozzles also need 40–45 psi; drip emitters run at 8–12 psi unless they are pressure-compensating models, which tolerate a wider range.
| Head type | Typical operating PSI | Failure sign at low pressure |
|---|---|---|
| Impact sprinkler | ~50 psi | Short throw, incomplete rotation |
| Gear-drive rotor (Hunter, Rain Bird, Toro) | 40–45 psi | Stalls mid-rotation, short radius |
| Fixed spray nozzle | 40–45 psi | Misting, uneven arc |
| Drip emitter (standard) | 8–12 psi | Inconsistent drip, dry end-of-line |
| Pressure-compensating emitter | 15–45 psi | Tolerates wider range; still fails below 15 psi |
How to measure pressure: Attach a simple dial gauge to any hose bib and read static pressure with the system off, then operating pressure with one zone running. A drop of more than 10–15 psi between static and operating usually points to a flow demand problem, a partially closed valve, or a long undersized supply line.
Immediate fixes:
- Install a pressure regulator at the point of connection if static pressure is excessively high.
- Reduce the number of heads per zone so demand stays within your available flow.
- Check for any partially closed isolation valves on the supply side.
- Replace clogged or worn nozzles that restrict flow and distort pressure readings.
When to call a pro: if pressure is low even with one zone running and all valves fully open, you likely need a booster pump or a re-pipe. That’s not a DIY fix.
Pro Tip: Measure pressure at the farthest head in the zone, not just at the valve box. A gauge that reads fine at the valve can still show a 15–20 psi drop at the end of a long lateral run, which is exactly where brown patches appear.
2. How mixed head types and poor spacing cause dry patches
Mixing fixed-spray nozzles with rotary heads in the same zone is one of the most widespread irrigation design blunders on residential properties. Fixed sprays often deliver significantly higher precipitation rates than rotary nozzles. Run them together and you’re simultaneously overwatering one area and underwatering another, no matter how you set the controller.
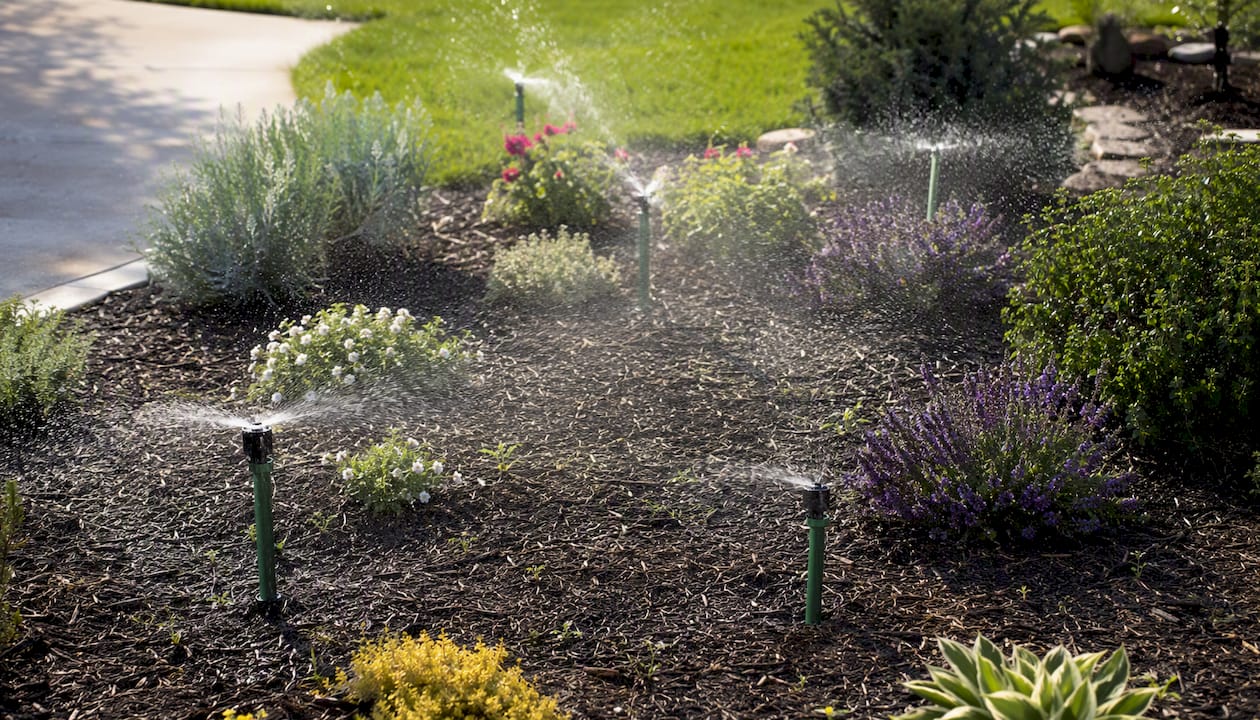
Poor spacing compounds the problem. Insufficient head-to-head coverage is the most common spacing mistake, and it reduces distribution uniformity (DU) significantly on larger areas because homeowners compensate by running zones longer, which wastes water without fixing the dry spots.
Layout rules to follow:
- Use head-to-head spacing: each head’s throw radius should reach the adjacent head.
- Arrange heads in an equilateral triangle or square pattern for the most uniform coverage.
- Keep heads at grade level; a head sitting 1–2 inches above grade gets clipped by mowers and deflects spray.
- Guard against overspray onto pavement, driveways, and structures.
- Account for wind and evaporation: fine spray heads in windy conditions can lose a significant portion of their output to drift, so choose larger-droplet nozzles or rotary heads in exposed areas.
- On slopes, install check valves or anti-drain devices to prevent low-head drainage after shutoff, which oversaturates low points and leaves uphill areas dry.
Before/after example: A backyard zone with two Rain Bird fixed sprays and three Toro rotors showed chronic brown patches between the rotor heads. After separating into two zones, one spray-only and one rotor-only, and adjusting run times to match each type’s precipitation rate, the brown patches resolved within two weeks.
Pro Tip: Before any retrofit, walk each zone with the system running and photograph every head type and its label. That inventory takes 20 minutes and tells you exactly how many zones you need to split, which prevents buying the wrong replacement heads.
3. Clogged emitters, dirty filters, and water quality problems
Drip systems are efficient when they work and invisible when they fail. Clogged emitters are one of the most frequent drip system problems, and the causes range from mineral scale and sediment to algae, biofilm, and root intrusion at the emitter tip.
Step-by-step filter cleaning and flush procedure:
- Shut off the zone at the controller.
- Locate the inline filter, typically at the zone valve or at the head of the drip lateral.
- Unscrew the filter housing and remove the screen.
- Rinse the screen under clean water; use a soft brush for mineral deposits.
- Inspect the screen mesh for tears; replace if damaged.
- Reinstall the filter and open the end cap on the drip lateral to flush sediment from the line.
- Run the zone for 30 seconds with the end cap off, then cap and resume normal operation.
- Check each emitter for even drip; replace any that drip unevenly or not at all.
Filtration types and when to use each:
- Screen filter: Standard choice for most residential drip systems; catches sediment and debris.
- Disc filter: Better for water with algae or organic matter; discs trap particles that screens miss.
- Media filter: For well water or high-sediment sources; requires more maintenance but handles heavy loads.
- Sediment pre-filter: Install at the point of connection when your water supply carries visible particulates.
Pressure-compensating emitters add another layer of protection. Because they maintain consistent output across a range of inlet pressures (typically 15–45 psi), they reduce the variability that makes some emitters run dry while others flood. They’re especially useful on long laterals where pressure drops toward the end of the line.
4. Why a small mainline ruins your whole system
Pipe diameter and run length determine how much pressure reaches your heads. A 1/2" polyethylene main carrying a full drip zone over a long run will lose pressure steadily along its length, leaving end-of-line emitters running at a fraction of their rated output. Undersized pipes and too many heads on one zone create hydraulic overload: as demand exceeds supply, radius shrinks and distribution uniformity collapses.
Sizing guidelines:
- Use 3/4" or 1" polyethylene supply hose for drip laterals longer than 50 feet or serving more than 15–20 emitters.
- Limit 1/2" laterals to short runs with fewer emitters, or switch to pressure-compensating emitters to offset the pressure drop.
- For sprinkler zones, calculate total flow demand (GPM per head × number of heads) before finalizing zone size; keep demand within 75% of your meter’s available flow.
- Use larger-diameter manifolded runs when a single supply line would otherwise carry the full zone load.
- Avoid mixing pipe diameters mid-run without accounting for the friction loss change at the transition.
Case example: A 100-foot 1/2" drip lateral serving 20 standard emitters showed strong output at the first six emitters and near-zero flow at the last four. Upsizing the supply to 3/4" and switching the end-of-line emitters to pressure-compensating models resolved the uniformity problem without adding a new zone.
Immediate checks: Measure the diameter of your supply hose and count the emitters or heads on the longest zone. If the math doesn’t add up, plan to upsize before the next season. Re-piping a zone is a half-day pro job for most residential systems.
5. How bad controller programming wastes water every cycle
The controller is where most overwatering starts. The most common error is setting one run time for every zone regardless of head type, soil, or plant water needs. A rotor zone on sandy loam and a spray zone on clay slope need completely different schedules, but most factory-default programs treat them identically.
Common controller mistakes:
- One runtime for all zones, ignoring precipitation rate differences between head types.
- No cycle-and-soak on slopes or clay soils, causing runoff before water infiltrates.
- No rain sensor or ET sensor installed, so the system runs during and after rain events.
- Seasonal adjustment left at 100% year-round instead of scaling down in spring and fall.
Programming checklist:
- Set zone-specific run times based on each zone’s precipitation rate and your soil’s infiltration rate.
- Enable cycle-and-soak for any zone on a slope or clay soil: run 5–7 minutes, pause 30–60 minutes, repeat.
- Install a rain shutoff sensor or a smart controller with ET integration — these devices prevent irrigation during rain events and can recover their cost in water savings within a season.
- Set seasonal adjustment percentages: reduce to 50–60% in spring and fall, scale up only during peak summer heat.
- Review and update the schedule at the start of each season.
Cycle-and-soak example: Clay soil absorbs water at roughly 0.1–0.2 inches per hour. A spray head delivering 1.5 inches per hour will produce runoff within minutes on clay. Breaking a 15-minute runtime into three 5-minute cycles with 45-minute pauses between them lets water infiltrate fully. Sandy soil, by contrast, absorbs water quickly and benefits from longer, less frequent cycles.
Sensor types worth installing: a basic rain shutoff device (Hunter, Rain Bird, or Toro all make reliable models), a soil moisture probe for high-value planting beds, or a full smart controller like B-hyve that pulls local ET data automatically.
6. Electrical and valve faults: how to test solenoids yourself
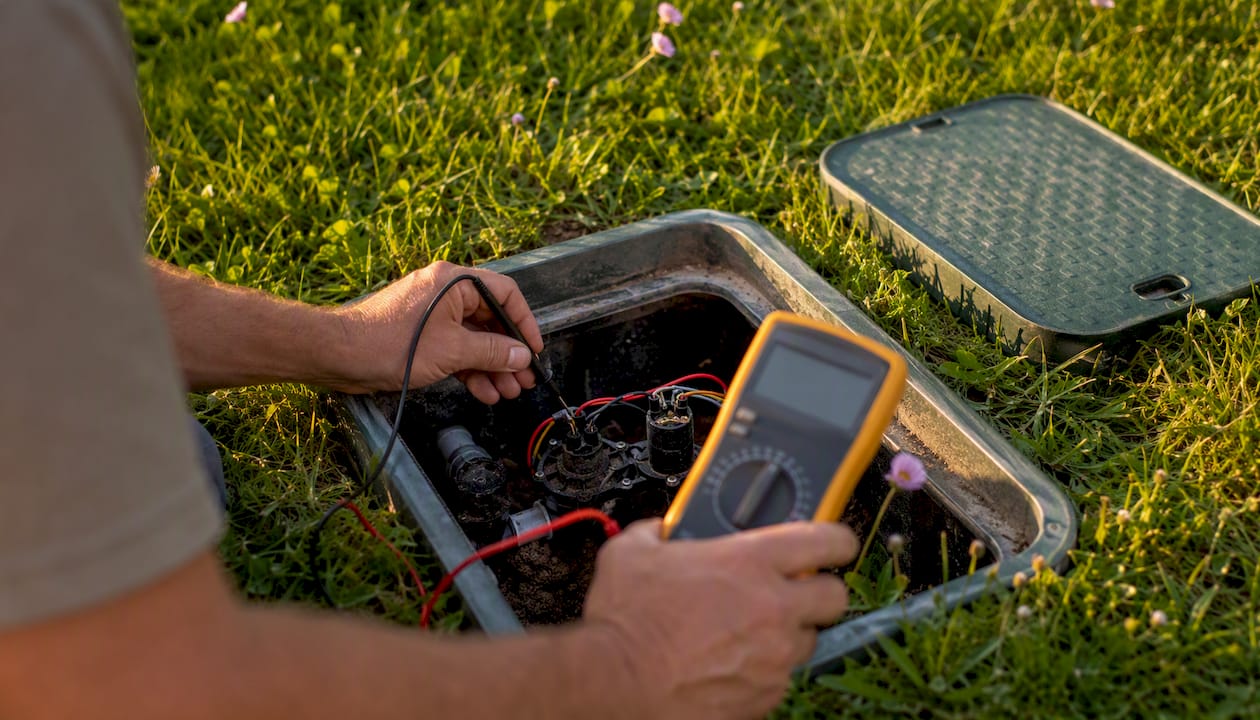
Valve and wiring problems are responsible for zones that won’t open, fault messages on smart controllers like B-hyve, and pumps that won’t engage. Most of these faults are diagnosable with a basic multimeter before you call anyone.
Step-by-step multimeter checks:
- Turn off the controller and disconnect the zone wire you want to test at the controller terminal.
- Set your multimeter to the resistance (Ohms) setting.
- Touch one probe to the zone wire and the other to the common wire at the controller.
- Read the resistance.
- If the reading is normal, reconnect and test the next zone. If abnormal, move to the valve box and test directly at the solenoid leads.
- Swap the solenoid with a known-good one to isolate whether the fault is in the solenoid or the wiring.
Solenoid resistance reference: Manufacturer guidance shows that acceptable solenoid resistance typically falls between 20–60 Ohms. A reading below ~20Ω often indicates a shorted solenoid. Above ~60Ω suggests a wiring fault or open circuit. A reading of 0Ω usually points to a cut common wire.
Safety note: Low-voltage irrigation wiring (24VAC) is generally safe to handle with the controller off, but any work involving 120V pump wiring, main electrical panels, or pump control boxes requires a licensed electrician. Don’t attempt pump wiring repairs yourself.
When to hire a pro: if you’ve swapped the solenoid and the fault persists, the problem is in the field wiring, which often means a splice failure or a cut wire underground. Tracing and repairing buried wiring is a pro job.
7. Backflow prevention, code compliance, and winterization
Backflow preventers stop irrigation water from flowing back into your potable supply. Most local jurisdictions in the United States require a backflow prevention device on any irrigation system connected to a municipal water supply, and many require annual testing by a certified tester. For a practical overview of backflow prevention and compliance requirements, check with your local authority having jurisdiction (AHJ) for the specific device type and testing schedule required in your area.
Winterization checklist:
- Shut off the main irrigation supply valve.
- Drain any manual drain valves at low points in the system.
- Connect a compressor to the blowout port (typically 1/2" NPT fitting near the backflow preventer).
- Set the controller to manual mode and activate one zone at a time.
- Blow each zone for 2–3 minutes at 50 psi or less for drip; 50–60 psi for spray zones; no more than 50 psi for rotor zones. Never exceed the head manufacturer’s rated pressure.
- Repeat two to three passes per zone until no water exits the heads.
- Insulate any above-ground components (backflow preventer, exposed pipe) with foam pipe insulation.
- Set the controller to “off” or “rain” mode for the season.
Timing for New Hampshire: Schedule your blowout before the first hard freeze, typically late September through mid-October. Waiting until November risks a freeze event that cracks heads, valves, and backflow devices overnight.
Typical cost ranges: Professional blowouts for a residential system generally run $75–$150 depending on zone count and region. Backflow device installation ranges from $150–$400 for most residential assemblies, not including permit fees where required.
Local code action items:
- Contact your water utility or town building department to confirm which backflow device type is required.
- Ask whether annual testing is mandatory and who is certified to perform it in your area.
- Check whether a permit is required for new backflow device installation.
8. Overwatering, soil type, and matching your schedule to plant needs
Overwatering is quieter than a broken head but more damaging over time. Soggy soil, surface runoff after short runtimes, yellowing leaves on otherwise healthy plants, and shallow root systems that pull out of the ground easily are all signs that your schedule is delivering more water than your soil can absorb or your plants can use.
Soil check steps:
- Dig 6 inches into the root zone 24 hours after a watering cycle.
- Squeeze a handful of soil: if it holds a tight ball and feels wet, the zone is overwatered.
- Run an infiltration test: pour one inch of water into a small hole and time how long it takes to drain. Sandy soil drains in minutes; clay can take an hour or more.
| Soil type | Infiltration rate | Recommended cycle pattern | Watering frequency |
|---|---|---|---|
| Sandy | Fast (>1 in/hr) | Longer single cycles | Every 2–3 days in peak summer |
| Loam | Moderate | Standard single cycle | Every 3–4 days |
| Clay | Slow (<0.2 in/hr) | Cycle-and-soak (3–4 short cycles) | Every 5–7 days |
Pro Tip: Place your highest-value plantings, specimen trees, and new sod on their own zones so you can dial in run times precisely. Grouping a mature oak with newly seeded grass on one zone means one of them is always wrong.
Smart controllers with soil moisture probes or ET-based scheduling, such as those available from Hunter, Rain Bird, and Toro, remove the guesswork entirely by adjusting run times based on actual soil conditions and local evapotranspiration data.
9. Routine maintenance and the catch-can test every homeowner should run
A seasonal maintenance routine catches small problems before they become expensive repairs. Most irrigation failures, from cracked heads to failed solenoids, show early warning signs that a 30-minute monthly check will reveal.
Monthly and seasonal checklist:
- Walk each zone while it runs; look for heads that don’t pop, spray sideways, or produce mist instead of a clean arc.
- Check and clean inline filters at the start of each season and mid-season for drip zones.
- Test each valve manually from the controller; listen for the click of the solenoid engaging.
- Verify the controller schedule reflects the current season and any recent plant additions.
- Inspect exposed pipe, backflow preventer, and valve boxes for cracks, corrosion, or pest damage.
- Check for wet spots or unusually green patches between heads, which often indicate an underground leak.
Catch-can test (distribution uniformity):
Place six to eight straight-sided cans (tuna cans work well) across a zone in a grid pattern. Run the zone for 15 minutes. Measure the water depth in each can. Adjust head spacing, replace worn nozzles, or rebalance zone pressure to bring readings closer together. A basic catch-can test is one of the most reliable DIY methods for identifying coverage gaps before they show up as dead grass.
DIY troubleshooting quick guide:
- Brown patches: Run the catch-can test; check for low pressure or mixed head types.
- Wet spots with no rain: Suspect a cracked lateral pipe or a valve stuck open.
- Low pressure on one zone: Check the zone valve for partial closure; test solenoid resistance.
- Faulty valve (won’t open or close): Test solenoid resistance; swap solenoid; check wiring continuity.
Time and cost estimates: Cleaning a filter takes 10–15 minutes and costs nothing. Replacing a single head runs $5–$20 in parts and 20 minutes of labor. A full zone re-pipe or valve replacement by a pro typically takes 2–4 hours and runs $150–$400 depending on complexity and region.
10. How to triage irrigation problems: DIY vs. calling a pro
Not every irrigation problem needs a contractor, but some absolutely do. Knowing which is which saves you time and prevents a small fix from becoming a larger one.
Triage decision checklist:
- DIY (30 minutes or less): Clean filters, replace a single head or nozzle, adjust head height, update controller schedule, install a rain sensor.
- Short pro visit (1–2 hours): Solenoid replacement, valve adjustment, pressure regulator installation, controller upgrade to a smart system.
- Significant rework (half-day or more): Re-piping a zone, pump installation or repair, backflow device installation, major zone redesign, underground leak repair.
Information to gather before calling a contractor:
- Controller make and model (Hunter, Rain Bird, Toro, B-hyve, or other)
- Approximate age of the system
- Number of zones and head types per zone
- Photos of wet spots, damaged heads, or fault messages on the controller
- Your measured static and operating pressure (psi)
- Solenoid resistance readings (Ohms) from your multimeter
- Catch-can test results if you’ve run one
What to expect from a pro visit: A diagnostic inspection typically takes 1–2 hours. Most irrigation contractors charge an inspection fee of $75–$150, which is often credited toward repair work. The contractor should provide a written estimate with a prioritized fix list before any work begins. For backflow device installation or testing, confirm the contractor holds the required state certification.
For homeowners and property managers in New Hampshire and nearby Massachusetts, Divinelandscapingllc’s irrigation services team handles diagnostics, design, installation, and seasonal maintenance. Reaching out early in the season means faster scheduling and more options for phased repairs if budget is a consideration.
What a local irrigation contractor sees every season
Most irrigation problems I encounter on-site come down to three things: pressure nobody measured, head types nobody inventoried, and filters nobody cleaned. A homeowner will spend two seasons chasing brown patches with longer run times when the real fix is splitting one zone into two and dropping in a pressure regulator.
The properties that hold up best season after season are the ones where someone ran a catch-can test in spring, cleaned the filters in June, and scheduled a blowout before the first freeze. Those three habits prevent the majority of the repair calls we get in October and November. Water savings follow naturally when the system is actually delivering what the controller says it is.
Divinelandscapingllc works with homeowners and property managers across New Hampshire and neighboring Massachusetts, and the pattern is consistent: a few prioritized fixes, done in the right order, protect both the landscape investment and the water bill.
Divinelandscapingllc’s irrigation services: what to expect when you hire a pro
Fixing pressure problems, redesigning zones, and installing backflow devices are faster and less disruptive when a trained crew handles them in a single visit. Divinelandscapingllc offers irrigation design, installation, seasonal maintenance, winterization blowouts, backflow testing and installation, and smart controller setup for residential and commercial properties in New Hampshire and nearby Massachusetts.

When you schedule a service visit, the crew runs a full diagnostic inspection, including pressure checks, solenoid resistance tests, and a zone-by-zone walkthrough. You receive a written estimate with a prioritized fix list so you can decide what to address now and what to phase in later. For property managers overseeing multi-tenant properties, Divinelandscapingllc can coordinate seasonal maintenance across multiple zones and buildings on a single schedule.
Contact Divinelandscapingllc through the irrigation services page to request an inspection or get a written estimate for your property.
Sources
- Five common mistakes in irrigation management for nurseries and greenhouses (UC Davis extension)
- 11 Common Irrigation Errors | Sprinkler School
- 8 most common irrigation design mistakes and how to avoid them — SmartPluvia
- Open-field sprinkler irrigation: What you need to know — Netafim