
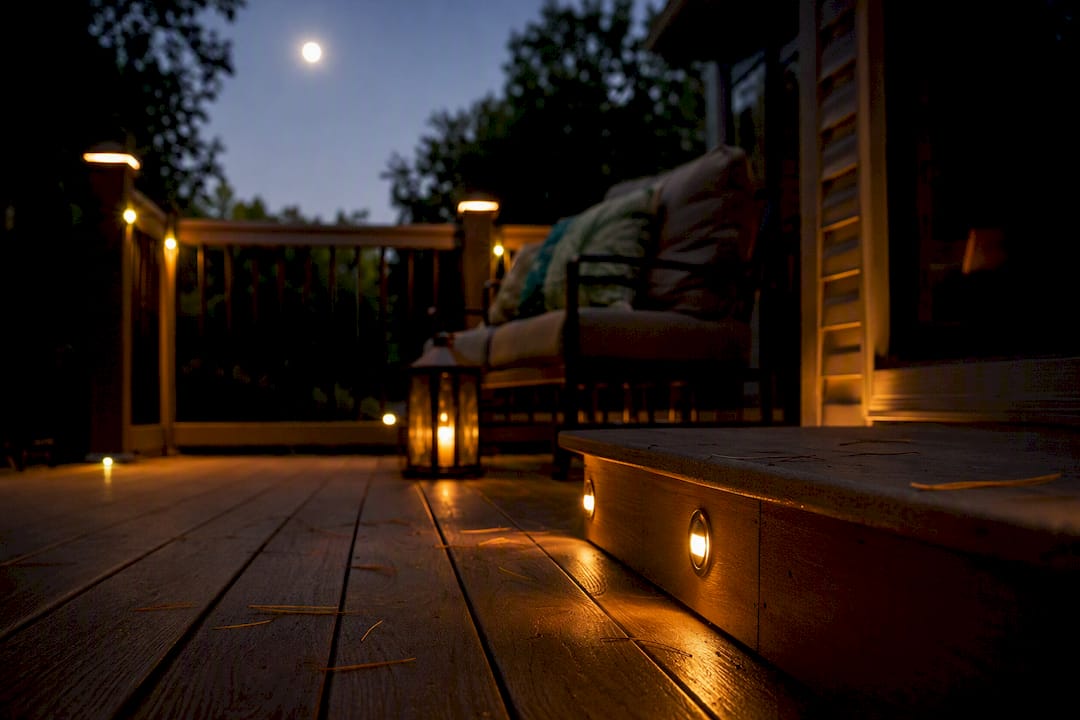
The best approach is a layered deck lighting plan anchored by low-voltage LED fixtures, with solar as a fallback wherever wiring is impractical. Start with the fixtures that solve safety first, then build outward toward ambiance. Low-voltage 12V systems are the standard for a reason: they run cool, cost little to operate, and let you expand the system in phases without rewiring your whole deck.
Here’s where to put your first dollars:
- Stair riser lights — prevent missteps on the most dangerous part of any deck
- Under-rail LED strip — a soft perimeter glow that defines the edge at night
- Post-cap lights — marks corners and high-traffic posts without glare
- String or hanging lights — turns the dining area into a real gathering space
- Recessed puck lights — subtle accents for built-in benches or planters
Pro Tip: Install stairs and perimeter lighting before you touch anything decorative. A gorgeous string-light display means nothing if someone misses a step in the dark. Every fixture here runs on a dimmer-compatible transformer, so the system you install this month can support smart scene controls later.
Key Takeaways
A layered plan built on low-voltage LED, correct lumen targets, and proper wiring turns scattered fixture ideas into a deck that’s both safer and more inviting after dark.
| Point | Details |
|---|---|
| Start with safety | Install stair and step lights first, targeting 20 to 50 lumens per fixture. |
| Layer, don’t scatter | Combine ambient, task, and accent lighting instead of one uniform brightness. |
| Follow spacing rules | Space perimeter lights 6 to 8 feet apart and stagger them for even coverage. |
| Choose fixtures for exposure | Pick corrosion-resistant, wet-rated housings for coastal or high-exposure decks. |
| Work with a pro for wiring | Divine Landscaping LLC designs and installs phased, zoned lighting systems for New Hampshire and Massachusetts decks. |
Table of Contents
- Deck Lighting Ideas: Stair, Rail, Post, String, Recessed, and Solar Options
- How to Plan Your Deck’s Lighting Zones and Brightness
- Low-Voltage vs. Line-Voltage: What Installation Actually Involves
- What Professional Installers Fix Most Often
- Choosing Fixtures That Actually Survive Outdoors
- Editorial Take: Why Most Deck Lighting Advice Skips the Hard Part
- Get a Deck Lighting Plan Built by Divine Landscaping LLC
- Sources
Deck Lighting Ideas: Stair, Rail, Post, String, Recessed, and Solar Options
Not every fixture type deserves equal real estate on your deck. Some solve a safety problem, others solve a mood problem, and a few just look good doing very little. Here’s how the main categories stack up.
-
Stair and step lights. These are non-negotiable on any deck with more than two treads. Aim for 20 to 50 lumens per fixture, enough to define the edge of a step without blinding anyone looking down. You can mount them in the riser face or tuck them under the stair nosing. Riser-mounted fixtures are easier to retrofit into existing framing; under-nosing units look cleaner but often require cutting into the tread during a rebuild.
-
Under-rail and rail-strip lighting. A continuous LED strip run beneath the top rail throws a soft wash down the balusters and across the decking, creating that ambient perimeter glow you see in higher-end outdoor photography. Most strips integrate with standard 2×4 and composite railing profiles using clip channels, so retrofitting an existing rail is usually straightforward.
-
Post-cap lights. These sit on top of your railing posts and do double duty: they light the perimeter and they finish the look of the deck itself. Wired post caps give consistent output all season; solar versions skip the wiring entirely but dim faster in cloudy weather and in shaded yards. Corners and any post near stairs or a gate are the priority spots.
-
String and hanging lights. Best reserved for the dining or lounge zone rather than the whole perimeter. A plug-in string gives you dimmer control and reliable output; a solar string skips the outlet search but needs direct sun exposure during the day to hold a charge through dinner.
-
Recessed pucks and in-floor lights. These create quiet accents along stair treads, bench seating, or the deck’s leading edge. Skip them on decks you plan to reseal or refinish often, since retrofitting a puck into finished decking after the fact means cutting new holes.
-
Spotlights and feature uplights. Useful for washing a tree, a stone accent wall, or a water feature, typically in the 50 to 200 lumen range. Always add a shield or baffle. An unshielded uplight pointed at eye level ruins the effect it’s supposed to create.
According to Lowe’s, common fixture types span exactly these categories, and the layered combination of ambient, task, and accent lighting is what separates a deck that looks designed from one that looks like it has a few lights bolted on. Solar works well for a fast retrofit but performs less reliably in shaded locations and needs periodic battery swaps, something worth knowing before you commit an entire perimeter to it.
How to Plan Your Deck’s Lighting Zones and Brightness
Good deck lighting design starts with a map, not a shopping list. Walk your deck and divide it into three functional layers before you buy a single fixture.
- Ambient layer: perimeter and post-cap lights that establish the overall glow
- Task layer: stairs, the grill area, any spot where people need to see clearly
- Accent layer: planters, architectural details, water features, anything purely decorative
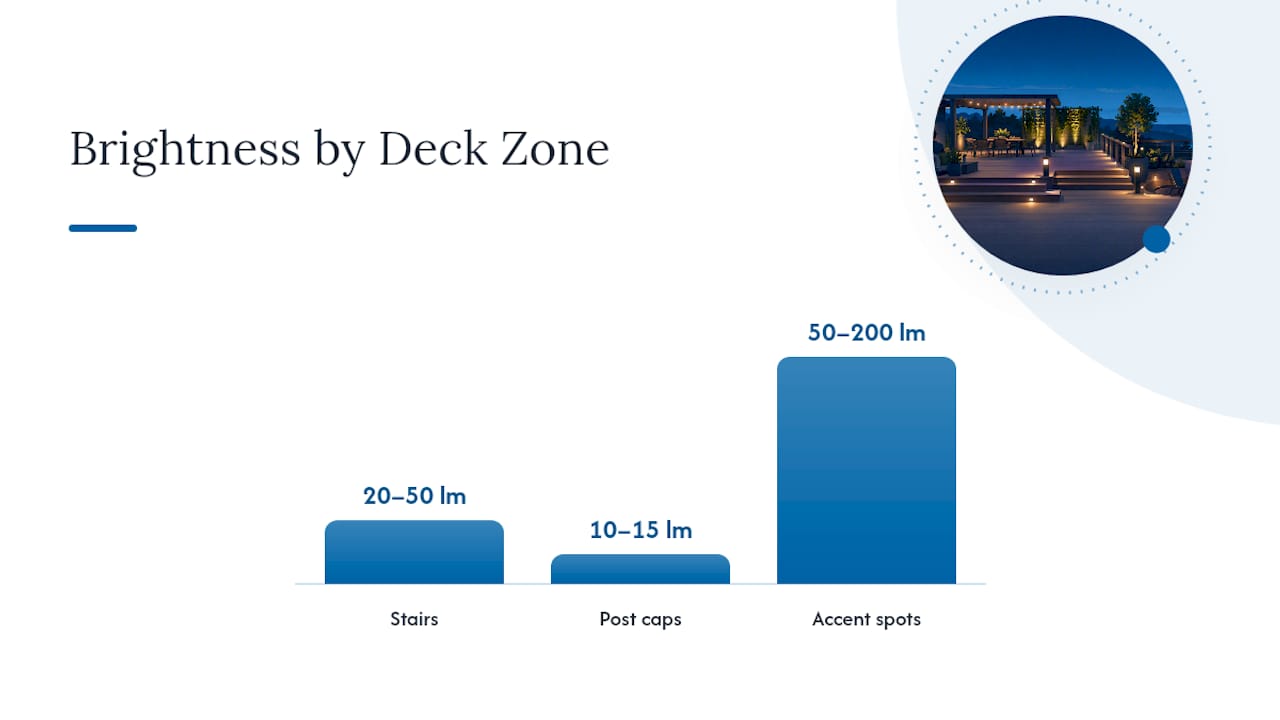
Brightness and color temperature should follow the zone. Stair lights run 20 to 50 lumens, post caps sit lower at 10 to 15 lumens, and accent spots can climb to 50 to 200 lumens depending on what they’re highlighting. For color temperature, 2700 to 3000K reads as warm and inviting for nearly every residential deck, while stairs sometimes benefit from a touch more contrast near 3000K for clarity underfoot.
Spacing matters more than most homeowners expect. Path and perimeter lights are often spaced a few feet apart to provide even coverage., and staggering fixtures rather than lining them up in a straight row produces smoother, more natural coverage.
Plan your controls at the same time as your layout. Give each zone its own switch or dimmer, add a dusk-to-dawn photocell or timer so the perimeter comes on automatically, and consider smart dimming for switching between a full-bright party scene and a low stair-only setting. For transformer sizing, add up total fixture wattage and multiply by 1.2 for headroom, then size your wire gauge up for any run pushing toward the far end of your deck.
Low-Voltage vs. Line-Voltage: What Installation Actually Involves
Low-voltage 12V LED is the standard choice for deck lighting because it’s energy-efficient, safe to handle, and easy to expand fixture by fixture. Line-voltage only makes sense for large accent floodlights or when you’re tying lighting into an existing 120V circuit already running to the deck.
- Wiring basics. Use 12-gauge cable for longer runs to limit voltage drop, and keep every splice inside a rated junction box rather than a direct-bury connector that will fail in a few seasons.
- Permits and code. Line-voltage work and new circuits often require a permit, and any outdoor circuit needs GFCI protection along with wet-rated fixtures throughout.
- Cost ranges. A basic DIY low-voltage kit covering stairs and a rail run costs far less than a full professional install with trenching, a dedicated transformer, and smart controls, but a pro install buys you correct sizing and code compliance from day one.
- Durability checklist. Confirm the IP rating on every fixture, favor corrosion-resistant housings for coastal exposure, and plan to swap solar batteries every couple of seasons.
Pro Tip: If your deck sees direct salt spray or heavy snow load, spend the extra money on marine-grade housings now. Replacing corroded fixtures under a finished rail is far more expensive than buying the right ones the first time.
What Professional Installers Fix Most Often
After installing outdoor lighting on decks across New Hampshire and Massachusetts, Divine Landscaping LLC sees the same three mistakes on almost every retrofit call.
- Overlighting. Homeowners add too many fixtures at full brightness and end up with glare instead of ambiance.
- Wrong fixture rating for the site. A fixture rated for a covered porch fails fast when it’s actually exposed to open weather.
- Wiring planned too late. Retrofitting a transformer and buried cable after the decking is finished costs more and looks worse than planning it during the build.
A phased plan solves most of this before it starts: Phase 1 covers stairs and perimeter safety, Phase 2 adds under-rail glow and post caps for ambiance, and Phase 3 layers in accent spots and smart controls once you know how you actually use the space.
If your deck sits on a coastal lot or takes heavy weather exposure, that’s exactly when it makes sense to bring in a design and installation team rather than guessing at fixture ratings yourself.
Choosing Fixtures That Actually Survive Outdoors
The biggest factor in how long your lighting lasts isn’t the LED bulb inside, it’s the housing around it. Durability comes down to corrosion resistance and connection quality far more than LED lifespan, which is why two fixtures with identical bulbs can have wildly different life spans on the same deck.
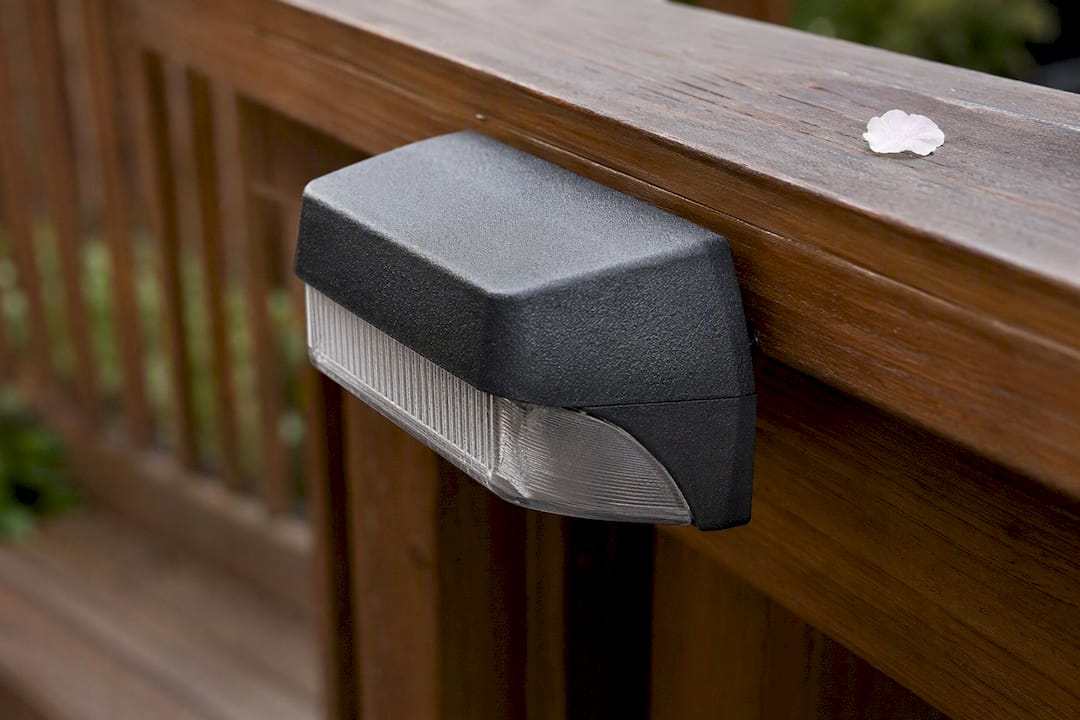
Look for an IP rating of at least IP65 for any fixture exposed to rain or direct weather, and IP67 if you’re near salt air or standing water. Housings matter just as much as the rating on the box. Solid brass and marine-grade stainless steel resist corrosion far longer than painted aluminum, which tends to pit and discolor within a season or two near the coast. Composite and powder-coated housings sit in the middle: durable for most inland decks, but not the first choice if you’re a few hundred feet from saltwater.
Check the gasket and lens seal too. A fixture can carry a good IP rating on paper and still fail early if the lens seal degrades from UV exposure. Look for UV-stabilized polycarbonate lenses over plain acrylic, since acrylic tends to yellow and crack faster in direct sun.
For hardware, stainless steel screws and connectors avoid the rust streaks that plain steel leaves on light-colored decking. It’s a small detail, but it’s the difference between a fixture that still looks new in five years and one that’s staining the wood around it by year two.
Editorial Take: Why Most Deck Lighting Advice Skips the Hard Part
Most deck lighting content is a photo gallery dressed up as a guide. It shows you string lights over a dinner party and calls it inspiration, but it never tells you the lumen count, the spacing, or why that same setup would look and function terribly on your stairs. The gap between what looks good in a photo and what actually holds up on a real deck, in real weather, is where most DIY installs go wrong.
The conventional advice treats lighting as one decision. It isn’t. It’s three separate decisions layered on top of each other: safety first, ambiance second, accents last. Skip that order and you end up with homeowners who buy string lights before they’ve solved their stair problem, which is backwards given how transformer wiring and dimming zones cost so little to plan upfront compared to retrofitting later.
If there’s one thing worth prioritizing above all else, it’s wiring the deck for zones from day one, even if you only install stair lights this year. The cost difference between planning ahead and retrofitting later isn’t close.
— Damian
Get a Deck Lighting Plan Built by Divine Landscaping LLC
Divine Landscaping LLC designs and installs the exact layered lighting system this article describes, but tailored to your deck’s exposure, layout, and how you actually use it. Where a DIY kit forces you to guess at transformer sizing and fixture ratings, our team handles the zoning, wiring, and weather-rated fixture selection as part of one project, so you don’t end up retrofitting a rushed job two seasons later.

That matters most for coastal or high-exposure New Hampshire and Massachusetts properties, where the wrong housing material can mean corroded fixtures within a year. Our decks and outdoor living team can design a phased lighting plan alongside a new deck build or retrofit an existing one, and our outdoor living project gallery shows completed lighting work across both states. If you’re ready to move past the idea stage, request a design consultation and get a fixture and wiring plan built around your actual deck, not a generic kit.
Sources
- How to install low-voltage deck lighting | Decks
- Deck lighting ideas | Lowe’s
- 12 ideas for lighting up your deck | Family Handyman
- Deck lighting guide: Ideas, types & costs | INSO Supply