
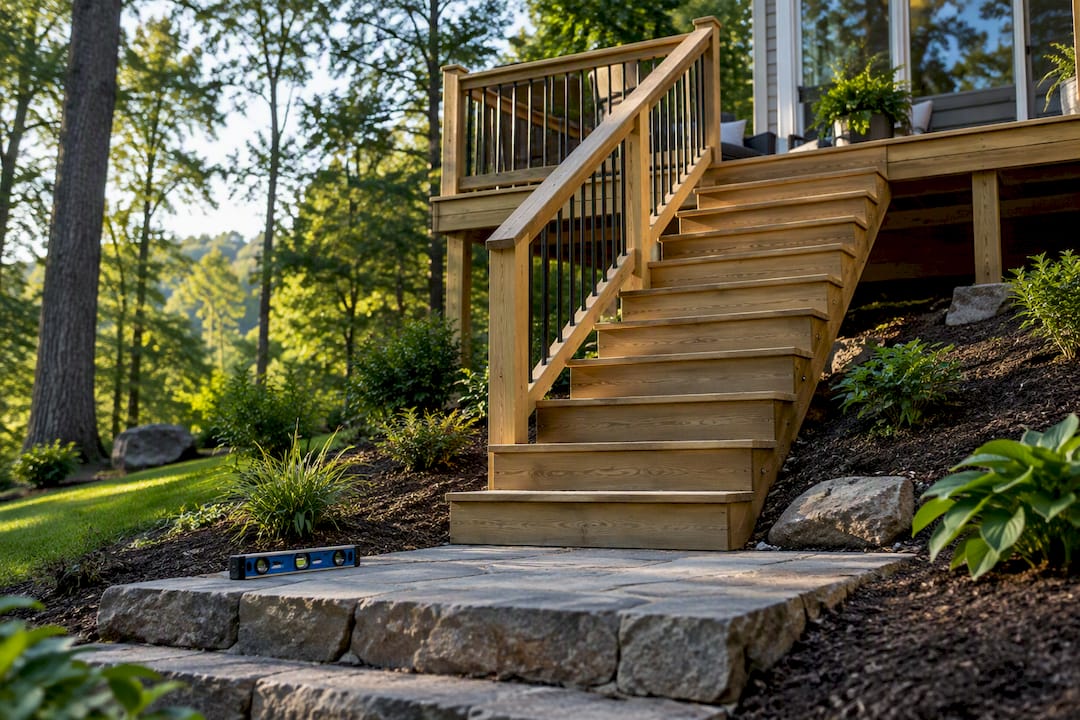
For most sloped yards, either a graded landing or a framed landing paired with a short run of code-compliant stairs will solve the problem simply and safely. The choice depends on riser height limits, tread depth, and how much the ground drops. Very steep or uneven lots often call for terraced steps, a switchback layout, or a professional grading plan instead of a single straight run.
TL;DR:
- For slopes over 10 percent, a switchback or terraced stair layout is recommended to ensure safety and code compliance.
- Properly compacted, stable landings are essential, using concrete or pavers on a base that slopes no more than 2 percent to avoid shifting or settling.
- Measure the vertical rise accurately with a plumb line, dividing by 7 inches for riser count, and adjust to keep riser height under 7.75 inches with minimal variance.
- Building on loose soil or ungraded land increases future hazards, so use footings at least 12 inches deep and implement drainage measures around the landing.
- Contractors are advised for yards with extensive grade changes or erosion risk, as they can design durable, code-compliant stairs tailored to the terrain.
Table of Contents
- Choosing the right approach for your slope
- How to measure and plan your stair layout
- Building a stable base where stairs meet grade
- Stringers, risers, and the code numbers that matter
- Solutions for steep and uneven ground
- Finishing touches: railings, lighting, and drainage
- What contractors see go wrong on sloped stair projects
- How Divine Landscaping LLC builds stairs that hold up on a slope
- Sources
- FAQ
Choosing the right approach for your slope
A gentle slope usually needs only a graded landing: you reshape the soil near the bottom of the stairs so it meets code without much extra construction. It is the most economical option but requires proper soil compaction to prevent later settling.
A framed landing works well when the grade change is modest but the existing soil is soft or uneven. You build a small platform, often on concrete piers, so the stairs land on something stable rather than shifting dirt.
For moderate-to-steep yards, terraced steps with short retaining walls tend to look better and hold up longer, blending the stairway into the landscape instead of dropping straight down a hillside. Paver or timber steps set on a compacted base give a similar landscape look at a lower cost, though they need real prep work underneath to stay level.
On very steep runs, a switchback or multi-flight stair layout breaks the climb into shorter, safer sections.
- Graded landing: cheapest, best for shallow slopes, needs proper soil compaction.
- Framed landing: stable platform, good for small grade changes or soft soil.
- Terraced steps: best for moderate-to-steep yards, integrates with landscaping.
- Paver or timber steps: budget-friendly, requires compacted base.
- Switchback stairs: reduces rise per flight, best for steep or long runs.
- Measure your total vertical rise before choosing a method.
- Match the method to your slope percentage and budget.
- Confirm the bottom landing location can meet grade safely.
How to measure and plan your stair layout
Getting the numbers right up front prevents almost every common stair problem later. Start by measuring the vertical, plumb rise from the deck surface down to the stable point where the stairs will land, never along the surface of the slope itself. Measuring along a slope produces uneven bottom risers, which is one of the most frequent causes of failed inspections.
- Measure the plumb vertical rise from the deck to your intended landing point using a long level or a laser level.
- Divide that total rise by a target riser height, generally close to 7 inches, to estimate how many risers you need.
- Adjust the count so no riser exceeds 7.75 inches, with no more than 3/8 inch of variance between any two risers in the flight.
- Apply the comfort rule, roughly two times the riser height plus the tread depth equaling 26 to 27 inches, to choose a tread depth that feels natural to walk.
- Set your stair width at a minimum of 36 inches, then decide where the bottom tread will actually land relative to your yard.
- Mark the layout on site with stakes and string, and recheck the grade side to side across the run, not just from top to bottom.
Building a stable base where stairs meet grade
Stringers need solid bearing. Resting them on loose soil, gravel that has not been compacted, or bare dirt is a shortcut that shows up later as sagging steps and uneven risers. Landings should slope no more than about 2 percent, roughly 1:48, and should be built from materials that will not shift.
- Use concrete, pavers on a compacted base, or sleepers on compacted gravel for the landing, never loose mulch or ungraded soil.
- Footings for freestanding stair structures need to sit at least 12 inches below undisturbed ground, or to local frost depth if the stairs connect to a ledger-mounted deck.
- Build in drainage away from the base of the stairs so water does not pool and undermine the landing over time.
- Add a geotextile underlay beneath crushed stone landings on sloped ground to keep the base from settling.
A landing that shifts by even a small amount changes your bottom riser height and can turn a code-compliant stairway into a tripping hazard, which is why a compacted, non-displaceable base matters as much as the stairs themselves.
Stringers, risers, and the code numbers that matter
Exterior stairs are governed by a short list of dimensional rules, and getting them wrong is the fastest way to fail an inspection or create a hazard. The maximum riser height is 7.75 inches, the minimum tread depth is 10 inches, and riser variance within a single flight cannot exceed 3/8 inch.
- Cut stringers should be at least 2×12 lumber, spaced 12 to 16 inches apart depending on tread material and span.
- Stair width should be a minimum of 36 inches for comfortable, code-compliant use.
- Any stairway with four or more risers needs a handrail, generally set between 34 and 38 inches above the tread nosing.
- Use fasteners and lumber rated for ground contact wherever stringers or posts sit near soil or moisture.
- Document riser height, tread depth, stringer spacing, and footing depth clearly before requesting an inspection.
Footings must bear on solid ground and be placed at least 12 inches below undisturbed ground or below frost depth.
Homeowners who want the fuller code breakdown, including how these numbers interact with permitting, can review our detailed guide to deck stair code requirements. The same source material is echoed in this IRC stair compliance guide, which is a useful second reference for cut-stringer spans.
Solutions for steep and uneven ground
Deciding between regrading and terracing usually comes down to cost and erosion risk. Regrading a steep slope can be expensive and, done poorly, increases runoff and soil loss. Terracing costs more upfront but tends to hold up better over time and integrates naturally with plantings.
- For moderate slopes, terraced retaining walls with an integrated step at each level, built from stone, segmental block, or timber, keep each rise manageable.
- For very steep lots, a switchback or multi-flight layout breaks one long climb into two or more shorter runs, each meeting the same riser and tread limits.
- Paver or timber treads on a compacted base give a landscaped look, but they need periodic checking since they are more exposed to frost heave than framed stairs.
- Avoid measuring along the slope’s surface, skimping on the base beneath the bottom stringer, or letting erosion creep in under the landing. These are the three mistakes that show up again and again on sloped installations.
Pro Tip: Build your bottom landing first, then work upward. It’s far easier to plan riser heights when you already know exactly where the stairs need to end.
For a closer look at terracing options and retaining wall integration, see our guide to sloped yard terracing, or this outside resource on slope solutions without full retaining walls.
Finishing touches: railings, lighting, and drainage
The structural work only solves half the problem. Railings, lighting, and drainage are what keep a slope stairway safe through wet weather, snow, and years of use.
- Install a graspable handrail on any stairway with four or more risers, typically 34 to 38 inches above the nosing.
- Add lighting at the top, bottom, and mid-landing of any run, especially where the terrain is uneven; see our deck lighting ideas for placement options.
- Route water away from the base with a gravel trench or positive grading so runoff cannot undercut the landing.
- Keep plantings and edging a few inches back from the footing and landing so roots and soil buildup do not interfere with drainage.
Homeowners weighing whether to grade the whole yard first can also read our overview of what landscape grading actually involves before committing to a stair plan.
What contractors see go wrong on sloped stair projects
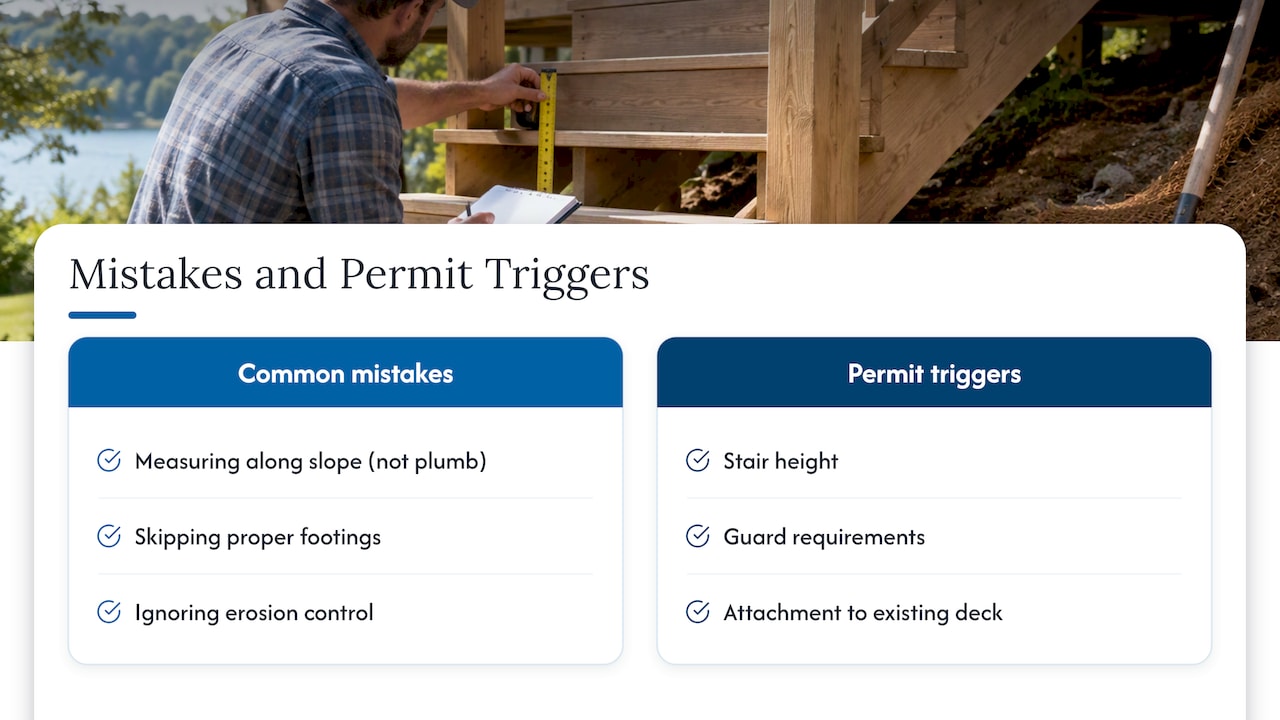
The most common DIY mistakes are measuring along the slope instead of plumb, skipping proper footings, and ignoring erosion control until water has already undermined the landing. Permits typically get triggered by stair height, guard requirements, or attachment to an existing deck. When a lot has serious grade changes or requires retaining work, hiring a contractor is often the safer and cheaper long-term choice.
How Divine Landscaping LLC builds stairs that hold up on a slope
If your yard has a real grade change, a contractor can shortcut a lot of trial and error. A landscaping company designs and builds custom decks, framed landings, and retaining wall systems suited to New England slopes, drawing on premium materials and a project process that runs from consultation through installation.
A typical first visit includes a site measure, a walkthrough of the approaches that fit your slope, whether that is a graded landing, terraced steps, or a switchback stair layout, and a ballpark sense of cost before any design work begins. For hardscape-heavy sites, our masonry and hardscape services cover retaining walls and paver landings, while our decks and outdoor living page is the place to start for a full deck and stair build. If you would rather have a professional handle the grading, footings, and inspection details, you can request a quote and get a plan built around your yard.
Sources
- DCA6 Prescriptive Residential Wood Deck Construction Guide Based on 2015 IRC
- Best Practices for Building a Deck-Stair Landing – Fine Homebuilding
- How to Build a Deck: Wood Stairs and Stair Railings – Lowe’s
- Deck stairs on uneven ground — DIY Stack Exchange
FAQ
Should deck stairs have a slope?
The stairs themselves should not lean or slope side to side, but the landing at the bottom can have a slight slope of no more than about 2 percent, or roughly 1:48, to allow for drainage. Anything steeper risks water pooling or undermining the base over time.
How can I build stairs on a steep slope?
For steep ground, break the run into a switchback or multi-flight layout so each section keeps risers within the standard limits rather than trying to force one long, steep flight. Terraced steps with short retaining walls are another proven pattern, spreading the rise across several shorter levels instead of one steep run.
How do I make steps out of pavers on a slope?
Paver steps need a compacted gravel base under each tread, often with a geotextile layer to stop settling, since soft or loose material under a step tends to shift and change riser heights over time. Each paver tier should be leveled individually rather than relying on the slope to set the grade.
How steep is too steep for stairs?
There is no single slope percentage that makes stairs “too steep,” but the riser height itself is capped at 7.75 inches with a maximum variance of 3/8 inch between risers in the same flight. When a slope would push riser heights beyond that limit in a single run, a switchback layout or terraced design is the standard fix.