
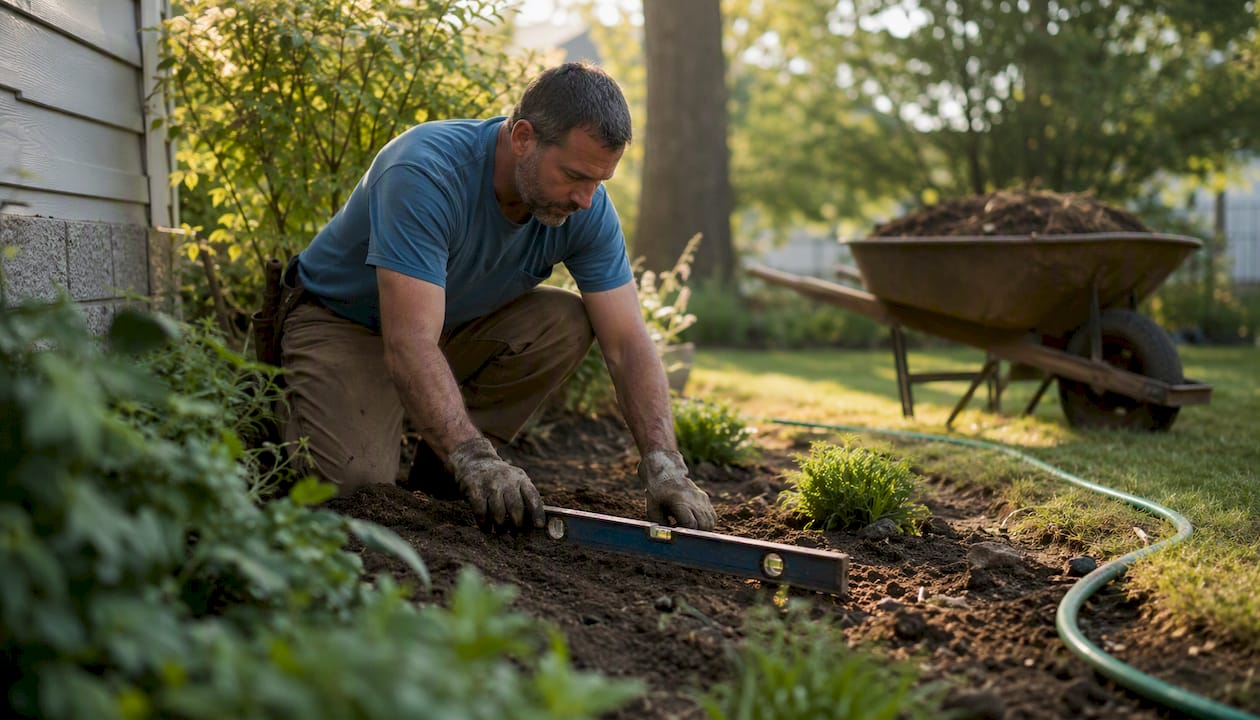
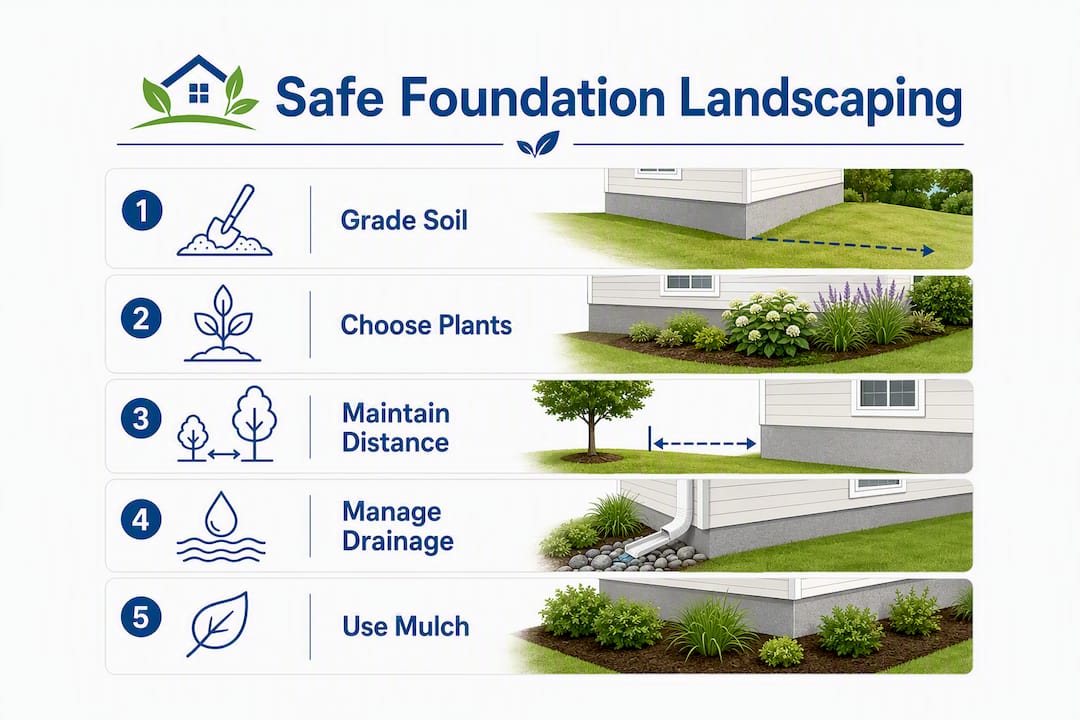
You can create attractive, foundation-safe plantings by choosing shallow, fibrous-rooted plants, grading soil away from the house, and keeping organic mulch pulled back from siding. Those three principles do most of the protective work. Before you buy a single plant, run through this quick checklist:
- Check your grade. Walk the perimeter after a rain. Water should flow away from the house, not pool against it. A minimum 5% slope (6 inches of drop over the first 10 feet) is the professional standard.
- Pull mulch back. Organic mulch piled against siding traps moisture and invites pests. Keep a 3–4 inch gap between any mulch or soil and the foundation wall, and maintain 6–8 inches of exposed foundation above grade.
- Measure for mature size. The most common planting mistake is buying plants at their current size and ignoring what they become. Check mature height and width before you dig a single hole.
Your USDA hardiness zone tells you what will survive winter, but it doesn’t tell you what will stay safe next to a foundation. That requires matching plant root behavior and mature spread to your specific bed depth and site conditions. Divinelandscapingllc works with homeowners across New Hampshire and Massachusetts on exactly this kind of planning, from a simple planting refresh to a full grading and drainage overhaul.
Table of Contents
- Which plants work best around a home foundation?
- Design rules that frame your house instead of hiding it
- How to protect your foundation with proper grading and drainage
- What materials work best close to a foundation?
- A seasonal maintenance schedule for foundation plantings
- How to choose plants for your specific site and zone
- What does a foundation planting project actually cost?
- When should you hire a professional landscaper?
- Key Takeaways
- What professionals notice first at your foundation
- Divinelandscapingllc designs foundation plantings that protect and impress
- Useful sources
Which plants work best around a home foundation?
The most useful way to think about foundation plants is by the job they do in the bed, not just by species. A corner anchor needs height and structure. A mid-layer shrub fills the space between corners and windows. A low edging or groundcover ties everything together at grade. Seasonal accents add color without demanding much space. Here is a role-based breakdown with the details that matter most for foundation safety.
Corner anchors
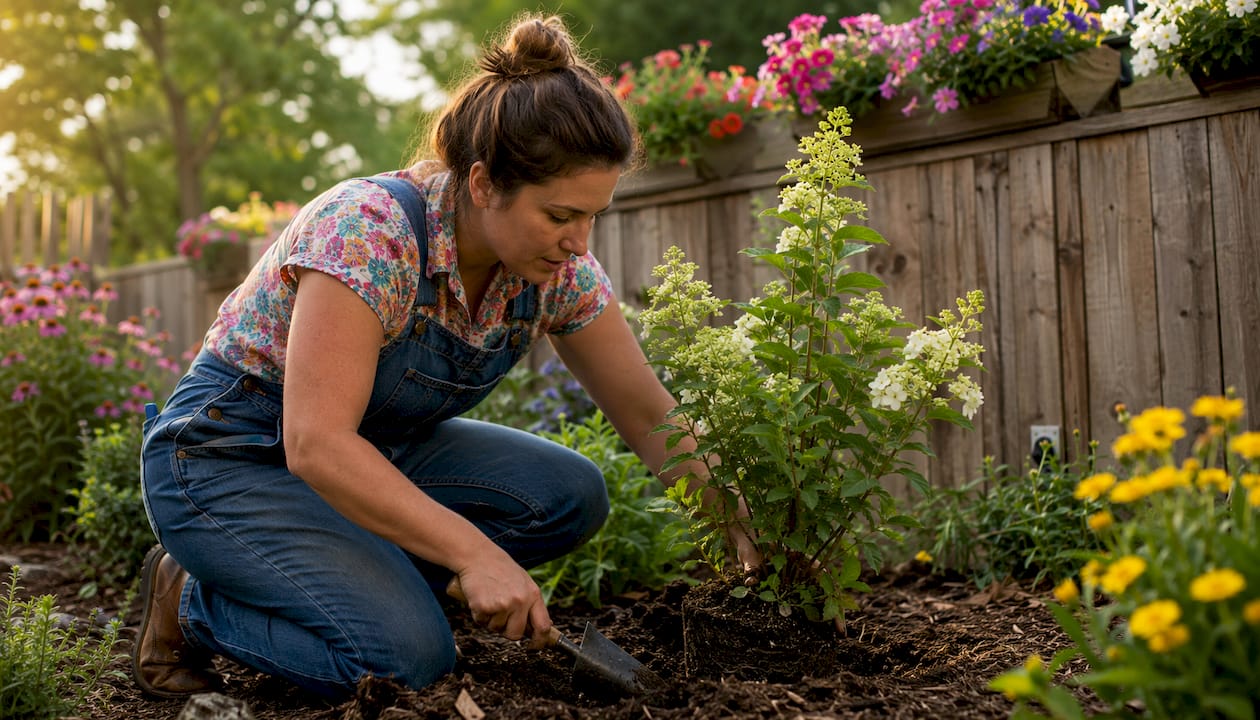
Panicle Hydrangea (Hydrangea paniculata) — Matures at 6–15 ft tall and 6–12 ft wide depending on cultivar. Full sun to part shade; moderate water needs. Root system is fibrous and non-aggressive, making it one of the safest shrubs for close-in planting. ‘Limelight’ and ‘Quick Fire’ (both available through Proven Winners) are compact enough for most foundation corners. Maintenance: annual late-winter pruning to shape. Best use: corner anchor or large mid-layer specimen.
Juniper (Juniperus spp.) — Spreading types like ‘Blue Rug’ stay under 12 inches tall; upright cultivars like ‘Sky Rocket’ can reach 15 ft. Full sun; excellent drought tolerance once established. Roots are fibrous and stay shallow. Maintenance is minimal after establishment. Best use: upright junipers as corner anchors; spreading types as groundcover.
Mid-layer shrubs
Boxwood (Buxus spp.) — Compact cultivars like ‘Green Velvet’ mature at 3–4 ft tall and wide. Full sun to part shade; moderate water. Roots are shallow and fibrous, consistently rated among the most foundation-safe options. Maintenance: light shearing once or twice per year. Best use: mid-layer structure, formal framing near entry.
Dwarf Yew (Taxus spp.) — Typically 3–5 ft tall and wide at maturity. Tolerates deep shade better than almost any other evergreen shrub. Fibrous roots; no documented foundation risk. Maintenance: low. Best use: shady north-facing foundation beds where other shrubs struggle.
Low edgings and seasonal accents
Catmint (Nepeta spp.) — Matures at 18–24 inches tall and 24–36 inches wide. Full sun; drought-tolerant once established. Fibrous, clumping roots. Blooms blue-purple from late spring through summer, with a second flush if cut back. Maintenance: cut back after first bloom. Best use: low front edging, sunny foundation beds.
Hosta (Hosta spp.) — Mature size varies widely by cultivar: ‘Sum and Substance’ reaches 3 ft tall and 5 ft wide; ‘Blue Mouse Ears’ stays under 8 inches. Part to full shade; moderate water. Clumping, non-invasive roots. Monrovia lists dozens of cultivars suited to tight foundation beds. Best use: shady mid-layer or front edging; excellent for north and east exposures.
Sedum (Stonecrop) (Sedum spp.) — Low-growing types like ‘Angelina’ stay under 6 inches tall and spread 12–18 inches. Full sun; very drought-tolerant. Shallow, fibrous roots. Virtually zero maintenance after establishment. Best use: sunny groundcover, front edging, or narrow beds under 2 ft deep.
Groundcovers
Creeping Juniper (Juniperus horizontalis) — 6–12 inches tall; spreads 6–8 ft. Full sun; drought-tolerant. Fibrous roots; no foundation risk. Best use: wide, sunny foundation strips where you want year-round green without mowing.
Quick reference table
| Plant | Mature H × W | Sun | Water | Root Safety | Maintenance | Best Foundation Role |
|---|---|---|---|---|---|---|
| Panicle Hydrangea | 6–15 ft × 6–12 ft | Full/Part | Moderate | Safe (fibrous) | Low–Moderate | Corner anchor |
| Boxwood ‘Green Velvet’ | 3–4 ft × 3–4 ft | Full/Part | Moderate | Safe (fibrous) | Low | Mid-layer, entry framing |
| Dwarf Yew | 3–5 ft × 3–5 ft | Full/Shade | Low | Safe (fibrous) | Low | Shady mid-layer |
| Upright Juniper | 10–15 ft × 2–3 ft | Full | Low | Safe (fibrous) | Low | Corner accent |
| Catmint (Nepeta) | 18–24 in × 24–36 in | Full | Low | Safe (clumping) | Low | Sunny front edging |
| Hosta | 8 in–3 ft × 1–5 ft | Part/Shade | Moderate | Safe (clumping) | Low | Shady edging/mid-layer |
| Sedum ‘Angelina’ | 4–6 in × 12–18 in | Full | Very Low | Safe (shallow) | Very Low | Sunny groundcover |
| Creeping Juniper | 6–12 in × 6–8 ft | Full | Low | Safe (fibrous) | Very Low | Wide sunny strip |
Quick picks by site condition:
- Hot, sunny south or west wall: Catmint, Sedum ‘Angelina’, Creeping Juniper, upright Juniper
- Shady north or east side: Hosta, Dwarf Yew, Boxwood ‘Green Velvet’
- Tight 2–3 ft narrow beds: Sedum, Catmint, compact Hosta cultivars (‘Blue Mouse Ears’, ‘Halcyon’)
A well-planned bed that mixes evergreens, flowering shrubs, and perennials keeps the foundation looking finished in every season, not just in June.
Design rules that frame your house instead of hiding it
The strongest foundation plantings nestle the house into its site rather than screen the base with a wall of green. That single idea drives every layout decision below.
Start at the corners. Tall, structured plants at the corners visually anchor the house to the ground and draw the eye along the roofline. A corner anchor should reach roughly two-thirds the height of the wall it sits beside. For a standard 8-ft wall, that means a shrub or small ornamental tree in the 5–6 ft mature range.
Layer heights from back to front. Behind the corner anchor, place the tallest plant. Step down to mid-layer shrubs (3–5 ft), then to low edgings and groundcovers (under 2 ft) at the front of the bed. This graduated profile connects the roofline to the lawn in a way that feels intentional.
Bed depth math. A typical foundation bed runs 6–8 ft deep. That gives you room for a back row, a middle row, and a front edging without crowding. Narrow beds under 3 ft deep are better served by a single row of low plants or a gravel strip. For ideas on making tight spaces work, small yard landscaping strategies can help you think through the geometry.
Spacing from the foundation. Plant at least half the mature spread away from the wall. A boxwood that matures at 4 ft wide should be placed at least 2 ft from the siding. For shrubs over 6 ft tall at maturity, the clearance should be 5 ft or more. Shorter shrubs need at least 3 ft of clearance for air circulation and to prevent moisture buildup against the wall.
Layout pattern (textual diagram):
[HOUSE WALL]
  ← Corner anchor (tall, 5–8 ft) ←→ Corner anchor (tall, 5–8 ft) →
       Mid-layer shrubs (3–5 ft) filling between corners
         Low perennials/edging (under 2 ft) at front of bed
[LAWN EDGE]
Place focal plants (a panicle hydrangea in bloom, a Japanese maple) near the entry to draw visitors toward the door. Use odd-numbered groupings of the same plant for a natural, non-repetitive look.
Pro Tip: Avoid planting a single unbroken hedge across the entire foundation. A continuous row of identical shrubs reads as a wall, not a garden. Use repetition with variation: the same plant species at corners, a different species in between, and a low edging at the front. That rhythm gives the bed structure without making it look institutional.
The Clemson Home & Garden Information Center describes this area as an “entry garden” whose purpose is to complement the house, not camouflage it. That framing is worth keeping in mind every time you add a plant.
How to protect your foundation with proper grading and drainage
Grading is the single most important factor in foundation protection. Even well-chosen plants won’t protect a foundation if water pools at the base of the wall. Get the drainage right first, then plant.
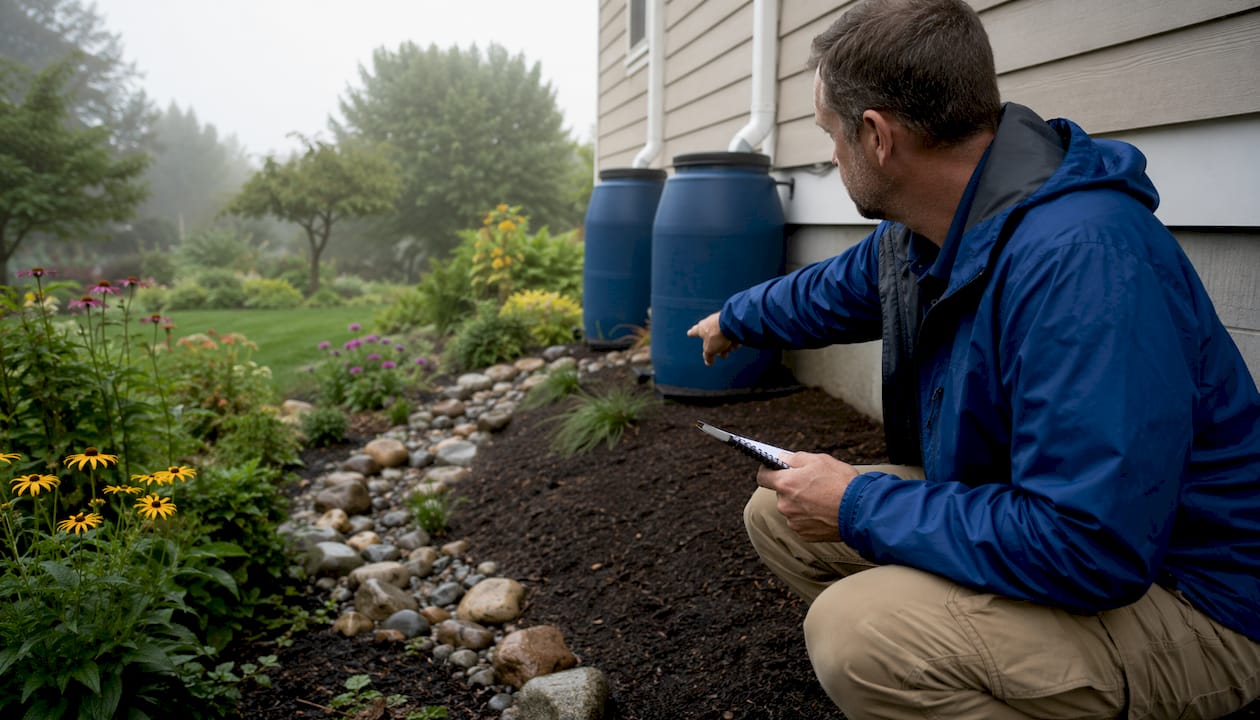
The grade rule. Soil should drop at least 6 inches over the first 10 feet away from the house. That 5% slope keeps surface water moving away from the slab edge. If your yard has settled and reversed that slope, regrading before planting is the priority.
Downspout management. Gutter clogs and downspout failures are a leading cause of soil saturation next to foundations. Extend downspouts a sufficient distance away from the foundation wall and clean gutters regularly, spring and fall. A splash block alone is rarely enough; a downspout extension or buried drain line is a better long-term fix. Understanding why drainage systems fail can help you spot the weak points before they become expensive problems.
Root behavior. Prefer plants with shallow, fibrous root systems for beds within 5–10 feet of the wall. Keep large trees well away: small trees (under 20 ft tall) at least 10–20 ft from the foundation; large trees (over 20 ft tall) at least 20–40 ft away. Willows, poplars, silver maples, and oaks with aggressive root systems should never be planted close to the house.
Drainage options (text description):
- Swale: A shallow, gently sloped channel graded into the lawn to redirect surface water around the house and away from the foundation.
- French drain: A perforated pipe buried in gravel-filled trench, installed along the foundation footing to collect and redirect subsurface water. Best for persistent wet spots. For more on landscape grading basics, that resource walks through the fundamentals.
- Downspout extension: A rigid or flexible pipe that carries roof runoff at least 5 feet from the wall before releasing it onto a splash area or into a buried drain.
Foundation drainage checklist:
- Walk the perimeter after a heavy rain and note any pooling spots.
- Check that gutters are clear and downspouts discharge at least 5 feet from the wall.
- Verify the grade slopes away from the house over the yard.
- Amend soil with coarse sand or compost to improve drainage in clay-heavy beds.
- Install a French drain or swale if regrading alone does not resolve pooling.
Do not list:
- Do not pile soil or mulch against siding or the foundation wall.
- Do not plant large trees within the recommended setback distances.
- Do not direct downspouts toward planting beds close to the house.
- Do not use dense, water-retaining mulch directly against masonry.
What materials work best close to a foundation?
Use well-draining materials near the foundation and keep organic mulch pulled back from siding. A narrow gravel border directly against the wall is often the most durable, drainage-friendly option for the first 6–12 inches.
Wood mulch and shredded bark: The most common choice. Use 2–4 inches maximum depth and pull it back 3–4 inches from the foundation wall. Organic mulch retains moisture, which is useful for plants but problematic against masonry. It also compacts over time and can become a pest habitat if piled against the wall.
Rubber mulch: Better drainage than wood mulch and does not attract termites. Stays in place in rain. The trade-off is heat retention in summer, which can stress plants in hot exposures. Not the best choice for south-facing beds.
Pea gravel and river rock: Drain freely, do not compact, and do not attract pests. A 2–3 inch layer of washed pea gravel in the first 6–12 inches next to the wall is a practical drainage buffer. The downside is that gravel can migrate into lawn areas without a solid edging border.
Crushed stone: Similar drainage benefits to pea gravel, slightly more stable. Works well under downspout splash zones. Reflects heat, so pair with heat-tolerant plants.
Pavers and hardscape edging: A narrow paver strip (12–18 inches wide) along the foundation creates a clean maintenance edge, keeps mulch from migrating against the wall, and allows easy inspection of the foundation. Divinelandscapingllc’s hardscape services include exactly this kind of detail work.
Comparison at a glance:
| Material | Drainage | Pest Risk | Heat Reflection | Maintenance |
|---|---|---|---|---|
| Wood mulch | Moderate | Moderate (if against wall) | Low | Annual refresh |
| Shredded bark | Moderate | Moderate | Low | Annual refresh |
| Rubber mulch | Good | Low | High | Low |
| Pea gravel | Excellent | Very low | Moderate | Low (edging needed) |
| Crushed stone | Excellent | Very low | Moderate–High | Very low |
| Pavers/hardscape | Excellent | Very low | Moderate | Very low |
When to use hardscape vs. a planting strip: If the bed is under 2 ft deep, a gravel strip or paver edge is usually more practical than trying to fit plants. For beds 3 ft and deeper, a gravel buffer at the wall with plants behind it gives you both drainage protection and visual interest.
Pro rule: Pull mulch 3–4 inches away from the foundation wall and keep the total depth at 2–4 inches. Rock borders are durable but must be detailed carefully so they do not trap heat and moisture against masonry.
A seasonal maintenance schedule for foundation plantings
Regular, seasonal checks prevent the majority of landscape-related foundation problems. Most of the work takes under an hour per season.
Seasonal task list:
- Spring: Pull mulch back from siding after snowmelt; inspect the foundation for new cracks or moisture staining; check gutter hangers and clean downspouts; prune winter-damaged branches; refresh mulch to 2–4 inches but keep the gap at the wall (3–4 inches).
- Summer: Monitor irrigation; avoid shallow, frequent watering close to the foundation (deep, infrequent watering is better for both plants and soil stability); check that plants are not touching siding as they fill out; remove weeds before they set seed.
- Fall: Clean gutters before leaf drop and again after; cut back perennials like catmint and sedum after frost; check that downspout extensions are still in place; inspect mulch gap before winter.
- Winter: After heavy snow, gently clear snow from foundation shrubs to prevent branch breakage; check that downspout extensions have not been displaced by frost heave; note any ice damming near the foundation for spring correction.
Pruning basics:
- Prune shrubs to their mature size, not smaller. Repeated hard shearing encourages dense, twiggy growth that traps moisture.
- Keep shrub crowns 3–5 inches off siding at all times. A shrub touching the wall creates a moisture bridge and a pest pathway.
- Remove crossing branches that rub and create wounds.
Watering guidance: Deep, infrequent watering at the outer edge of the bed is better than daily shallow watering close to the wall. Differential moisture (wet near the foundation, dry farther out) causes soil to expand and contract unevenly, which stresses the slab over time.
Pest prevention: Keep firewood, leaf piles, and dense mulch away from the foundation. Moist organic material against the wall is the primary invitation for termites and rodents. A gravel buffer at the wall eliminates the shelter those pests need to access the structure.
How to choose plants for your specific site and zone
Zone compatibility is a starting point, not a complete answer. A plant rated for USDA Zone 5 will survive your New Hampshire winter, but it may still fail in a 2-ft-deep shady bed with clay soil and reflected heat from a white vinyl wall. Match the plant to the full site, not just the zone number.
Site assessment checklist:
- Sun hours: Count actual hours of direct sun at the bed location. South and west walls often get 6+ hours; north walls may get fewer than 2. Most shrubs labeled “full sun” need at least 6 hours.
- Soil texture and drainage: Squeeze a handful of moist soil. If it holds a ribbon, you have clay; if it crumbles, you have loam or sand. Clay drains slowly and holds moisture against the foundation. Amend with coarse sand and compost before planting.
- Bed depth: Measure from the wall to the lawn edge. Under 3 ft limits your options significantly. Over 6 ft gives you room for a full three-layer planting.
- HVAC and utility proximity: Avoid planting over buried utility lines or within 3 ft of HVAC condensers. Heat exhaust from condensers stresses plants and dries soil unevenly.
- Microclimates: South and west walls create heat-bounce zones that can push a plant one zone warmer. North walls stay cool and shaded. East walls get gentle morning sun. Factor these in when reading plant tags.
Using plant tags and cultivar guidance: USDA zones on Monrovia and Proven Winners plant tags are cultivar-specific, not just species-level. ‘Limelight’ panicle hydrangea, for example, is rated Zone 3–9, while some other hydrangea types are less cold-hardy. Read the tag for the specific cultivar you are buying, not just the species name.
Spacing from the foundation using mature spread: Divide the plant’s mature spread in half to get the minimum planting distance from the wall. A boxwood with a 4-ft mature spread should be planted at least 2 ft from the foundation. For a panicle hydrangea with an 8-ft spread, that minimum is 4 ft. This math prevents the overcrowding that traps moisture against siding and forces constant pruning.
For a low-maintenance front yard that holds up season after season, the site-assessment step is what separates a planting that thrives from one that needs replacing in three years.
What does a foundation planting project actually cost?
A small DIY planting project covering a 20–40 ft foundation bed can run from a few hundred dollars to around $2,000, depending on plant sizes and bed preparation needed. Professional design and installation starts higher, with the final number driven by plant quality, grading work, drainage solutions, and any hardscape.
Cost ranges by project type:
- DIY plant-only install (20–40 ft bed, no drainage work): Roughly $300–$1,500 for plants, mulch, and edging materials. Bed prep (soil amendment, edging installation) adds $100–$300.
- Contractor install with basic grading and drainage: $2,000–$6,000 for a typical residential foundation bed, including grading correction, downspout extensions, planting, and mulch. Foundation repair costs from water damage can run $2,000–$8,000, making preventive landscaping a sound investment.
- Full design and install with hardscape (paver edging, gravel strip, retaining elements): $5,000–$15,000+ depending on scope, site complexity, and materials. If a French drain or significant retaining wall work is required, budget at the higher end.
Timeline bullets:
- Site assessment and plan: 1–2 weeks (longer if permits or utility locates are needed)
- Planting-only job: 1–3 days
- Contractor install with grading and drainage: 1–3 weeks
- Full design, hardscape, and planting: 3–6 weeks
Best planting windows: Spring (after last frost) and early fall (6 weeks before first frost) are the strongest windows for establishing new plants. Summer planting is possible but requires more irrigation to get roots established before heat stress sets in.
Variables that increase cost and time: A French drain adds $1,000–$3,000 to a project. Retaining wall work near the foundation adds more. Major slope reversal requiring significant soil import is the most expensive scenario. For situations where a retaining structure is needed, retaining wall options for NH homeowners covers the material choices and cost factors.
When should you hire a professional landscaper?
Hire a professional when you see standing water near the foundation, need significant grading changes, want hardscape integrated with planting, or are dealing with large trees within 20–40 ft of the house. A well-planned small planting with no drainage issues is manageable as a DIY project. Anything involving grade correction, drainage structures, or hardscape is worth getting professional eyes on first.
When to call a pro:
- Standing water pools within 5 ft of the foundation after rain
- Visible foundation cracks, efflorescence (white mineral deposits), or moisture staining on the wall
- The grade slopes toward the house and needs correction
- Large trees within 20–40 ft need root assessment or removal
- You want integrated hardscape (paver edging, gravel strip, retaining wall) alongside planting
- You need irrigation or lighting integrated into the foundation bed
What to expect from a professional process:
- Site survey: Grade measurement, utility locate, drainage assessment, and a review of existing plants and their root behavior.
- Planting plan: A scaled drawing with mature-size callouts, spacing from the foundation, and seasonal interest notes.
- Drainage solutions: Recommendations for swales, French drains, or downspout extensions based on the site survey.
- Phased estimate: A breakdown of work by phase (drainage first, then hardscape, then planting) so you can budget and schedule in stages.
- Maintenance handover: Clear guidance on pruning timing, mulch refresh, and seasonal inspection so the planting stays healthy after installation.
Pro Tip: Before any contractor starts work near your foundation, ask them to confirm utility locations with your state’s 811 call-before-you-dig service. Digging without a locate is both a safety risk and a potential liability.
Divinelandscapingllc handles the full scope of this work for homeowners in New Hampshire and Massachusetts, from the initial site survey through planting and hardscape installation. Their landscape design process is built around exactly the kind of foundation-first thinking this article covers.
Key Takeaways
Safe, attractive foundation plantings come down to three non-negotiable rules: grade soil away from the house, choose shallow-rooted plants sized to the bed, and keep organic material pulled back from the wall.
| Point | Details |
|---|---|
| Grade first, plant second | Maintain a 5% slope (6 inches over 10 feet) away from the house before adding any plants. |
| Pull mulch back | Keep a 3–4 inch gap between mulch or soil and the foundation wall; maintain 6–8 inches of exposed foundation above grade. |
| Space to mature size | Plant at half the mature spread distance from the wall; never buy by current size alone. |
| Manage downspouts | Extend downspouts at least 5 feet from the foundation and clean gutters regularly. |
| Divinelandscapingllc | Provides design, grading, drainage, and hardscape installation for foundation-safe plantings in New Hampshire and Massachusetts. |
What professionals notice first at your foundation
The first thing a trained eye catches on a foundation walk-around is mulch piled against the siding. It is the single most common mistake, and it is almost universal on homes that have never had a professional review. Moist organic material against the wall is a direct invitation for moisture damage, termites, and rot, and it is a five-minute fix that most homeowners have never been told to make. The second thing that stands out is reversed grade: soil that has settled or been added over the years until it slopes toward the house rather than away. That one takes more work to correct, but it is the root cause of most persistent moisture problems. Third is spacing: plants that were installed at 1-gallon size and are now pressing against the siding, blocking foundation vents, and trapping humidity against the wall. Divinelandscapingllc’s crews see all three of these on nearly every first site visit, and in most cases, correcting them costs far less than the foundation repairs they eventually cause.
Divinelandscapingllc designs foundation plantings that protect and impress
Getting the foundation bed right the first time saves you from costly corrections later. Divinelandscapingllc brings together landscape design, grading and drainage work, hardscape installation, and planting into a single coordinated project so nothing gets missed. Their team handles the site survey, utility locates, drainage assessment, and a scaled planting plan with mature-size callouts before a single plant goes in the ground.

Services relevant to foundation planting projects include landscape design, grading and drainage correction, paver and gravel edging, retaining walls, irrigation, and phased installation for larger scopes. Whether you need a simple planting refresh or a full drainage and hardscape overhaul, the process starts with a site visit and a clear estimate. Homeowners in New Hampshire and Massachusetts can request a landscape design consultation to get a professional assessment of their foundation bed and a plan that addresses both curb appeal and long-term protection.
Useful sources
These are the primary references used throughout this article. Each one covers a distinct aspect of foundation planting and is worth bookmarking for deeper reading.
- Fine Gardening: Two Approaches to Foundation Plantings — Design principles for corner anchoring, layered planting, and framing the house rather than hiding it.
- BobVila: The Dos and Don’ts of Foundation Planting — Practical rules on mature-size planning, seasonal plant mix, and common homeowner mistakes.
- BobVila: Landscape Design Choices That Protect Your Foundation — Expert-sourced guidance on setback distances, grading, pest prevention, and ground cover selection.
- GardenTabs: Plants That Thrive Right Up Against Your Foundation — Plant-specific root safety ratings and recommendations for tight beds and challenging microclimates.
- GoBuildYourHouse: How to Prevent Landscaping from Damaging Your Foundation — Grading standards, the 6-inch exposed foundation rule, and drainage structure options.
- Yardcast: Foundation Landscaping Ideas — Mulch gap rules, rock border detailing, and material selection guidance.
- Golden Bay Foundation Builders: Plants Near Foundation — Balanced overview of how intentional plantings protect foundations and how neglect creates risk.
- Clemson Home & Garden Information Center: Foundation Plantings — Comprehensive design and plant selection guidance from a university extension program, including spacing clearances and drought-tolerance requirements.