
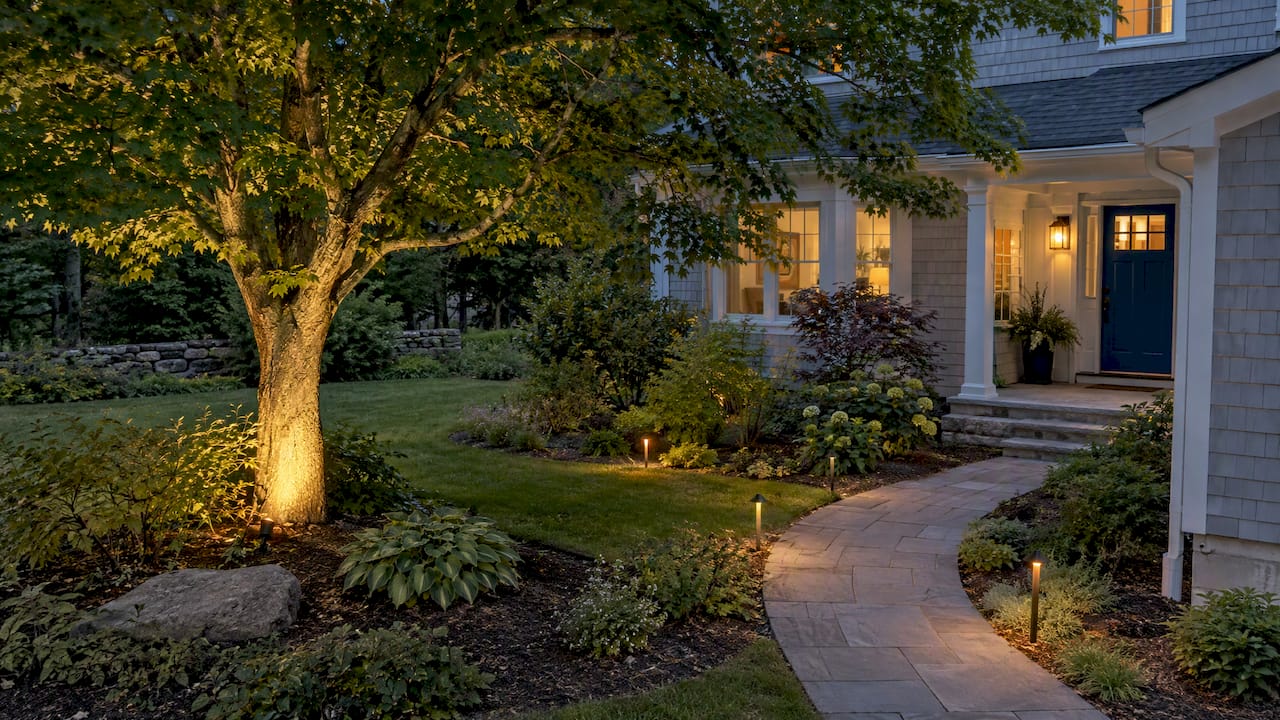
Landscape lighting design basics mean layering a few purposeful fixtures rather than lighting everything at once: path lights for safe footing, one or two uplights on your best tree or architectural feature, and warm 2700K to 3000K LEDs throughout. Start there, live with it for a week or two, then add layers only where the yard still feels dark or flat.
TL;DR:
- Space path lights 6 to 10 feet apart and larger accent pools 15 to 20 feet apart, then test positions after dark before digging.
- Add fixture wattages before choosing a transformer, keep its load at or below 80%, and use heavier gauge cable for runs beyond 100 feet.
- Protect outdoor receptacles with GFCI, and leave pool adjacent or underwater lighting and hardwired line voltage circuits to a licensed electrician.
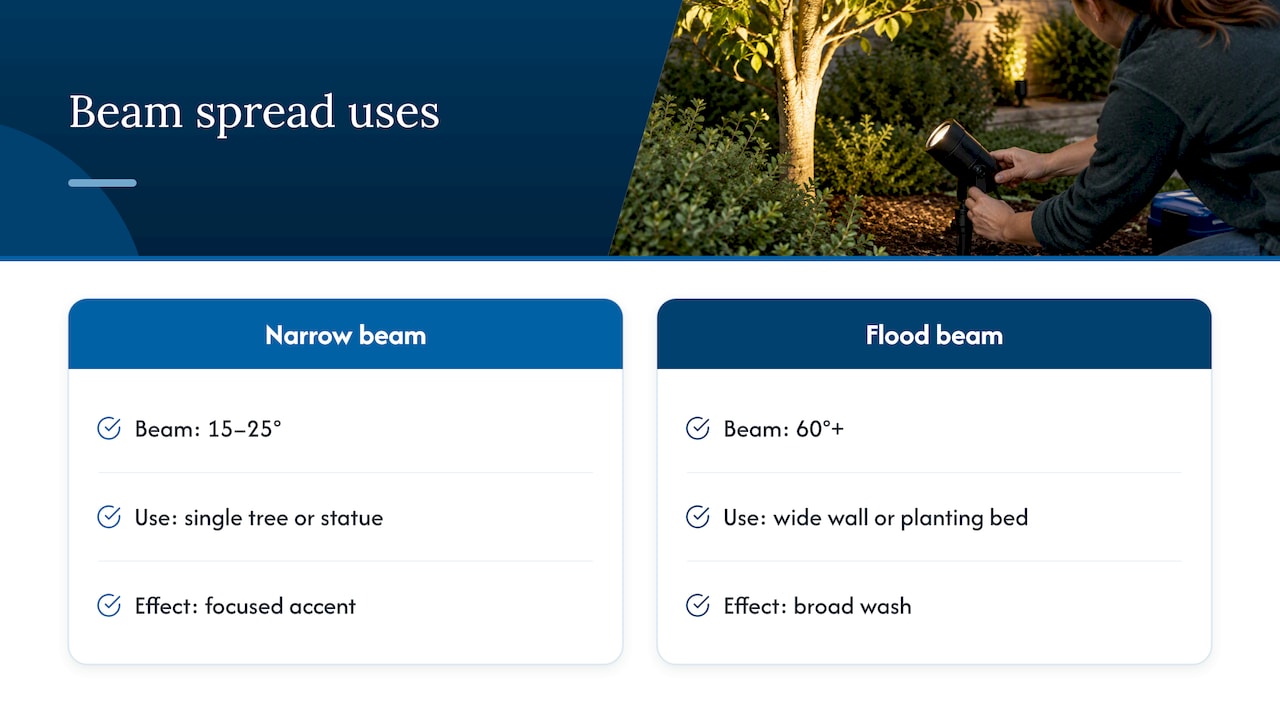
- Use 15 to 25 degree beams for single trees and 60 degree or wider beams for broad walls, and compare samples outdoors for color consistency.
Table of Contents
- Design Principles: Layering, Restraint, and Focal Points
- Which Fixture Does Which Job in Your Yard?
- How to Map Your Yard and Space Fixtures Correctly
- Lumens, Color Temperature, and Beam Spread Explained
- Low-Voltage Basics: Transformers, Wiring, and Electrical Safety
- Installing a Basic Low-Voltage System Step by Step
- Seasonal Maintenance and Common Mistakes to Avoid
- Lighting Residential Yards Versus Commercial Properties
- Pairing Lighting With Water Features, Hardscape, and Plants
- Energy-Efficient and Environmentally Friendly Lighting Choices
- Matching Fixture Style to Your Home’s Architecture
- Troubleshooting and Long-Term System Care
- Our Take on DIY Versus Hiring a Landscape Lighting Pro
- Get a Landscape Lighting Plan Built Around Your Property
- FAQ
- Sources
Design Principles: Layering, Restraint, and Focal Points
Good landscape lighting design rests on three layers working together. Ambient light sets the general mood and comes from low, soft sources like path lights and bollards. Task light supports a specific activity, such as illuminating steps, a grill station, or a driveway. Accent light draws the eye to a single feature, like an uplit maple or a stone wall, and creates the depth that makes a yard feel designed rather than just lit.
Before buying a single fixture, walk the property and identify two things: the paths people actually use at night, and the one or two features worth highlighting. A mature tree, a stacked-stone wall, or an architectural column usually makes a stronger focal point than trying to light the whole bed.
A useful rule of thumb is to limit yourself to two or three lighting techniques per zone: uplighting plus a path light, for example, rather than uplighting, downlighting, and a flood all aimed at the same corner. Professional designers describe this as a discipline of revealing select textures or forms while letting the fixtures themselves disappear into the landscape, since over-lighting flattens a yard instead of giving it depth.
- Ambient, task, and accent layers each do a different job and rarely overlap in the same spot.
- Pick one or two focal points first; resist lighting every shrub and corner.
- Cap each zone at two or three fixture types to avoid a washed-out look.
Which Fixture Does Which Job in Your Yard?
Every fixture type has a specific role, and matching the fixture to the job is most of what separates a clean layout from a cluttered one.
- Path lights sit low along walkways and driveways, spreading a soft pool of light downward for footing rather than glare.
- Spotlights and uplights aim upward into trees, columns, or facades from a few feet away, creating dramatic shadow and texture.
- Floodlights and wash lights cover broader surfaces like a long retaining wall or a garage side, spreading light evenly across the area.
- Well lights sit flush in the ground, often under trees or near hardscape, where a visible fixture would be a tripping hazard.
- Step and deck lights mount into risers or rail posts to mark elevation changes.
- Bollards stand upright along paths or driveways, combining ambient glow with a visible daytime fixture.
For aiming, keep uplights roughly one to two times the height of the feature away from its base, and mount step lights low enough to wash the tread without shining into anyone’s eyes. Driveway lighting layouts that have been field tested often space fixtures 6 to 15 feet apart depending on driveway width and the fixture’s beam spread.
When comparing fixtures, integrated LED units are sealed and often more efficient, while lamp-ready housings let you swap bulbs later as technology improves. Either way, check the IP rating for ground and wet-location exposure, and choose a finish, bronze, black, or verdigris, that disappears against your siding or stone rather than drawing attention to the hardware itself. Outdoor luminaire guidance from the Department of Energy recommends checking photometric reports, ingress protection ratings, and operating temperature range before buying, since outdoor fixtures face more stress than indoor ones.
Pro Tip: Buy one of each fixture type you’re considering before committing to a full order, then test them outside after dark to confirm the beam spread and color actually suit the spot you have in mind.
How to Map Your Yard and Space Fixtures Correctly
A simple three-step workflow turns a vague idea into a buildable layout.
- Walk the property after dark with a flashlight and note where you naturally want more light: steps, a side gate, the walk to the front door.
- Mark your one or two focal points on a rough sketch of the yard, along with the transformer location and any outdoor outlets nearby.
- Place fixtures on the sketch using spacing guidelines rather than guesswork, then double check the plan by walking it again with a portable light.
For spacing, path lights generally work best 6 to 10 feet apart, close enough to guide the eye along a walkway without creating a continuous bright runway that looks more like an airport taxiway than a garden path. Larger accent pools, such as uplighting spaced along a long facade or a row of trees, work well with a 15 to 20 foot spacing as a starting point, then adjust based on how wide each fixture’s beam actually spreads once installed.
Staggering fixtures slightly, rather than lining them up with rigid symmetry, tends to look more natural along curved beds and informal plantings, while a symmetrical layout suits formal entries and matched hardscape features. Choose a narrow beam spread for dramatic single-tree uplighting and a wider flood for washing a long wall evenly. Before finalizing anything, test your planned positions at night with a flashlight or a temporary fixture. It costs nothing and it is the single best way to catch a spacing mistake before you dig.
Lumens, Color Temperature, and Beam Spread Explained
Three numbers do most of the work in how a fixture looks once it is installed: color temperature, lumens, and beam spread.
Color temperature, measured in Kelvin, controls whether light looks warm or cool. For most home landscapes, 2700K to 3000K reads as warm and inviting, flattering stone, wood, and foliage the way candlelight does. Cooler temperatures above 4000K can work for modern architecture or for mimicking moonlight through tree canopies, but they tend to look harsh against warm brick or natural stone.
Lumens measure brightness, and the right number depends on what you are lighting:
A product’s CCT number alone does not guarantee color consistency. DOE guidance on LED color characteristics explains that LEDs vary in spectral output even within the same rated color temperature, and recommends checking Lighting Facts data and doing a visual evaluation outdoors before buying a full set, since two “3000K” fixtures from different makers can still look noticeably different side by side.
Beam spread should match the fixture’s job: a narrow 15 to 25 degree beam suits a single tree or statue, while a 60-degree-plus flood suits a wide wall or planting bed. Buying one sample fixture of each type and testing it against your actual materials beats guessing from a spec sheet.
Low-Voltage Basics: Transformers, Wiring, and Electrical Safety
Most residential landscape lighting runs on a low-voltage system, typically 12 volts, which is safer to install than line-voltage wiring and is the format most DIY-friendly kits use. Solar fixtures avoid wiring entirely but generally produce less consistent light and have less control over placement timing. Line-voltage and hardwired work, by contrast, usually calls for a licensed electrician.
A low-voltage system has four basic parts: a transformer, fixtures, cable, and connectors. To size a transformer, add up the wattage of every fixture you plan to run on that circuit, then choose a transformer rated comfortably above that total. The standard guidance is to load a transformer to no more than 80% of its rated capacity, which leaves room for adding fixtures later without buying a second transformer.
Voltage drop matters on longer runs: thinner wire or runs beyond roughly 100 feet can dim fixtures at the far end of a circuit, so heavier gauge cable is worth the small extra cost on long driveways or large lots.
- Tally every fixture’s wattage before shopping for a transformer, not after.
- Use 12-gauge wire for long runs and 14-gauge for shorter, lightly loaded circuits.
- Keep connectors weatherproof and above grade where possible for easier troubleshooting.
Safety rules are non-negotiable on anything connected to household power. The National Electrical Code and GFCI protection standards require GFCI protection for outdoor receptacles, and GFCIs are specifically required for any lighting within 20 feet of a pool or for underwater fixtures operating above 15 volts. Pool-adjacent and underwater lighting, along with any hardwired line-voltage circuit, is worth leaving to a licensed electrician rather than a weekend project.
Pro Tip: Test your GFCI outlet’s test and reset buttons before you ever plug in a transformer. A GFCI that doesn’t trip on command isn’t protecting anything.
Installing a Basic Low-Voltage System Step by Step
Before digging, confirm you have the right tools (shovel or edger, wire strippers, connectors, a voltage tester), your fixtures and cable, and a wattage tally for transformer sizing. Check with your local utility before trenching near buried lines.
- Mark your planned fixture positions and cable path with flags or spray paint, following your night-walk sketch.
- Lay cable along the marked path, either on the surface temporarily for testing or trenched 2 to 3 inches deep for a finished installation.
- Connect fixtures to the cable using waterproof connectors, following a simple three-step sequence of laying cable, installing the transformer, and wiring in fixtures.
- Mount the transformer on an exterior wall near a GFCI-protected outlet, keeping it above grade and out of direct water exposure.
- Power on and test every fixture before burying cable permanently, checking brightness and aim at the far end of the run for voltage drop.
- Bury the cable at final depth, secure connectors, and do a final night walk to adjust aim and spacing.
Confirm your transformer load sits at or under the 80% threshold once every fixture is connected, and recheck it anytime you add a light later. Choose connectors rated for direct burial rather than indoor wire nuts, since moisture is the most common cause of later failures.
Seasonal Maintenance and Common Mistakes to Avoid
A quick seasonal check keeps a system looking as good as the day it was installed. Clean fixture lenses of dirt and mineral buildup, inspect gaskets and connectors for cracking, test every GFCI’s trip and reset function, and confirm the transformer’s timer or photocell is still switching correctly as daylight hours shift.
- Over-lighting is the most common mistake: more fixtures rarely look better, and it flattens the shadows that give a yard depth.
- Mismatched color temperatures between fixtures make a yard look unfinished; stick to one CCT range throughout.
- Wrong beam spread for the job, a narrow spot trying to wash a wide wall, leaves gaps and hot spots.
- Spacing too far apart creates dark gaps on paths; spacing too close creates a runway effect.
When a fixture dims or goes dark, check the easy causes first: a loose connector, a failed lamp, or voltage drop at the end of a long run. A simple voltage tester at the fixture will confirm whether the problem is the bulb or the circuit feeding it.
Lighting Residential Yards Versus Commercial Properties
Residential and commercial lighting design share the same layering principles but differ in scale and purpose. A home yard typically centers on one or two focal points, a front walk, a favorite tree, and a seating area, with a warm, intimate feel built from a handful of fixtures.
Commercial properties usually need to solve for safety and wayfinding across a larger footprint: parking lot perimeters, entrances, and signage often take priority over single accent features, and fixture counts and transformer capacity scale up accordingly. Lighting zones defined by the Illuminating Engineering Society, from LZ0 for naturally dark areas to LZ4 for high-activity commercial districts, guide how much light is appropriate and help avoid spilling glare onto neighboring properties, a bigger concern for commercial sites than for a single-family yard.
Either way, the same discipline applies: identify what truly needs to be seen or highlighted, then light only that, rather than trying to flood an entire property evenly.
Pairing Lighting With Water Features, Hardscape, and Plants
Lighting works best when it is planned alongside the hardscape and planting design rather than bolted on afterward. A water feature, a fountain or a small pond, benefits from a submersible or well light aimed to catch movement and texture rather than flooding the surface, which tends to wash out the reflection and the sound-driven appeal of moving water.
Hardscape features like retaining walls, stone steps, or a stacked-stone fire pit take well to grazing light, a fixture placed close to the surface and aimed upward or downward to catch texture in the stone. Planting beds generally need less light than hardscape; a single well-placed uplight on a specimen tree or an ornamental grass clump does more than a row of spotlights across an entire bed.
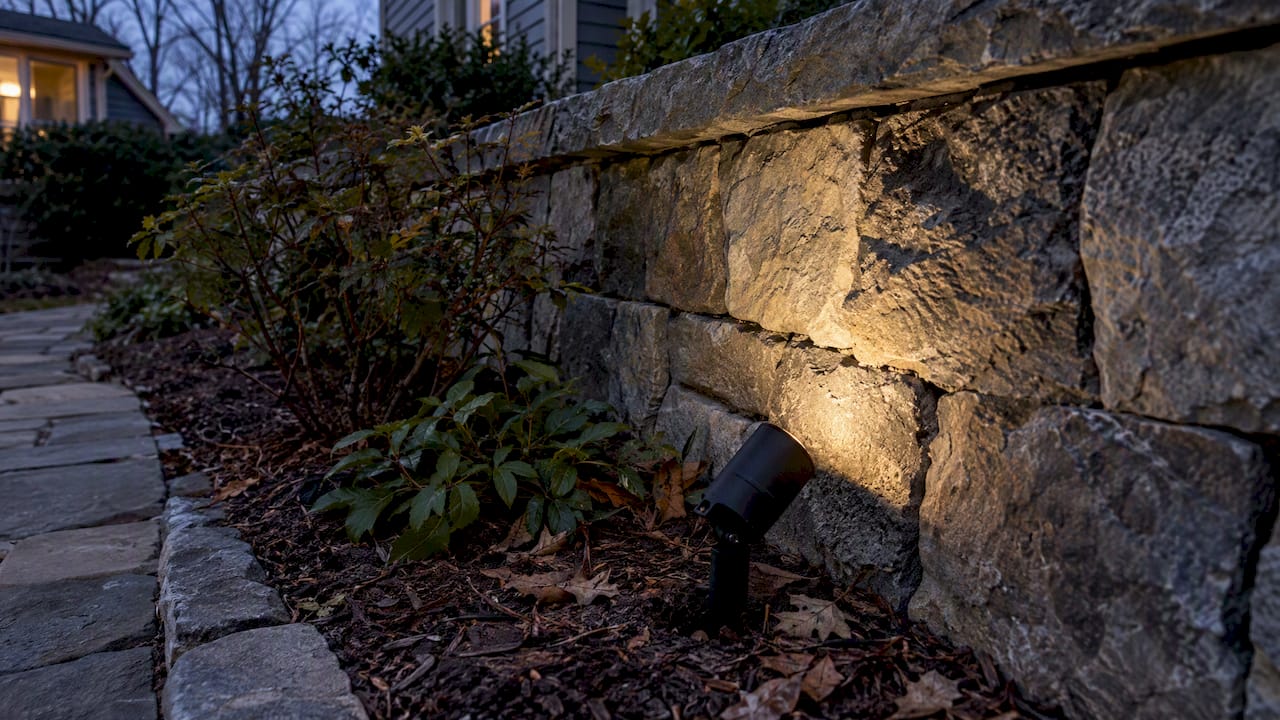
The goal is for lighting to support the features you already built or planted, not compete with them. A stone walkway with subtle path lights reads as intentional; the same walkway flooded with mismatched spotlights reads as an afterthought.
Energy-Efficient and Environmentally Friendly Lighting Choices
LED fixtures use a fraction of the electricity that older halogen landscape lights required, and they last far longer, which means fewer lamp replacements and less waste over time. Solar-powered path lights and accent markers eliminate wiring entirely for simple applications, though they depend on sun exposure and tend to produce less consistent brightness than wired LED fixtures.
Timers and photocells reduce runtime automatically, turning fixtures on at dusk and off at a set hour rather than running all night, which cuts electricity use without any sacrifice in appearance. Choosing fixtures with the appropriate IP rating and quality seals also extends the useful life of the system, reducing the number of replacement units that end up in landfill over the years.
For homeowners weighing environmental impact alongside aesthetics, a smaller, well-layered plan using efficient LEDs on a timer typically outperforms a larger, always-on system in both energy use and visual impact.
Matching Fixture Style to Your Home’s Architecture
The right fixture finish and form should feel like it belongs to the house, not like hardware dropped into the yard. A traditional colonial or farmhouse-style home generally pairs well with bronze or black fixtures with classic lantern-style housings, while a modern home with clean lines suits slim, minimal fixtures in matte black or graphite that disappear during the day.
Stone and brick exteriors tend to favor warmer finishes like aged bronze or copper, which weather naturally over time and blend rather than contrast with the material. Coastal or craftsman-style homes often lean toward verdigris or natural metal finishes that complement wood siding and shingle details.
Beyond finish, the lighting technique itself should echo the architecture: grazing light on a textured stone facade emphasizes craftsmanship, while a clean wash along a flat modern wall emphasizes geometry. Matching technique to architecture is often more important than matching the fixture brand or model line, since the same basic uplight or wash fixture can read completely differently depending on how it is aimed.
Troubleshooting and Long-Term System Care
Beyond the seasonal cleaning checklist, a few deeper checks keep a low-voltage system reliable for years. If multiple fixtures on one run seem dim, voltage drop across the cable length is the likely culprit, and the fix is either a heavier wire gauge or splitting the run into two shorter circuits from the transformer.
A single dead fixture more often points to a failed lamp or a corroded connector than a wiring fault. Disconnect and inspect the connector first, since moisture intrusion at a splice is the most common point of failure in an otherwise sound system.
If an entire circuit goes dark, check the transformer’s breaker or fuse first, then the GFCI outlet feeding it. A tripped GFCI that will not reset, or one that trips repeatedly, usually signals a short somewhere in the buried cable and is worth having tested with a multimeter before fixtures are replaced unnecessarily. For layering techniques that extend a basic system over time, adding fixtures gradually and rechecking transformer load after each addition keeps the whole system within safe operating range rather than overloading it one light at a time.
Our Take on DIY Versus Hiring a Landscape Lighting Pro
A basic path-and-accent layout is genuinely within reach for most homeowners willing to test fixtures at night and respect the 80% transformer rule. Where DIY projects tend to fall short is scale and integration: tying lighting into irrigation zones, hardscape lighting during a patio or wall build, or any hardwired and pool-adjacent work.
We design and build custom outdoor spaces across residential and commercial properties, including landscape design and irrigation and lighting work, and our field-tested layouts for driveway and tree lighting reflect the same spacing and color-temperature principles covered above. For a single small bed, a DIY path-and-uplight plan is a reasonable weekend project. For a full property plan that needs to work with existing hardscape, irrigation, and architecture, bringing in a professional at the design stage tends to save rework later.
— Damian
Get a Landscape Lighting Plan Built Around Your Property
Reading about spacing rules and transformer math is one thing; walking your actual yard at night with someone who does this daily is another. We handle landscape lighting design and installation as part of our broader irrigation and lighting services, including perimeter and safety lighting, and we can manage permitting and any hardwired or line-voltage work that falls outside typical DIY territory.
If you would rather start with the bigger picture, our landscape design services cover lighting alongside plantings, hardscape, and grading so the whole property works together instead of being planned feature by feature. Reach out for a site visit and we will walk the property with you, flag the focal points worth highlighting, and put together a plan sized to your yard and your budget.
FAQ
What are the 7 principles of landscape design?
Landscape design principles commonly include unity, balance, contrast, proportion, repetition, focalization, and sequence, and they apply to lighting as much as to plant beds. In practice, this means choosing a few focal points, keeping fixture styles consistent, and repeating spacing patterns so the layout reads as intentional rather than random.
What is the 3 lighting rule?
There is no single official “3 lighting rule” in residential landscape design, but a common practical version limits each zone to two or three lighting techniques, such as one uplight and one path light, rather than stacking several effects on the same feature. This keeps the layout from looking cluttered or overdone.
How do I plan a landscape lighting layout?
Start by walking your property after dark with a flashlight to spot where light is actually needed, then sketch your paths, focal points, and transformer location on paper. From there, apply spacing guidelines, path lights 6 to 10 feet apart and larger accent pools around 15 to 20 feet apart, and test fixture positions at night before digging any trenches.
What are the fundamentals of landscape lighting?
The fundamentals are layering (ambient, task, and accent light), matching fixture type to its job, spacing fixtures appropriately, choosing warm 2700K to 3000K color temperatures for most residential settings, and following low-voltage transformer and GFCI safety rules. Getting these basics right matters more than the number or cost of the fixtures themselves.
Can I install landscape lighting myself, or should I hire a professional?
A basic low-voltage system with path lights and one or two uplights is a reasonable DIY project for most homeowners who follow transformer sizing and GFCI safety rules. Larger plans that involve hardwired circuits, pool-adjacent lighting, or integration with irrigation and hardscape are generally better handled by a professional, such as through our irrigation and lighting services.
Sources
- Ground-fault circuit interrupters: Preventing electrocution since 1973 — ESFI
- Outdoor area lighting design and LED technology considerations — DOE
- Landscape lighting guide — Lumens (The Edit)
- Introduction to landscape lighting — VOLT®