
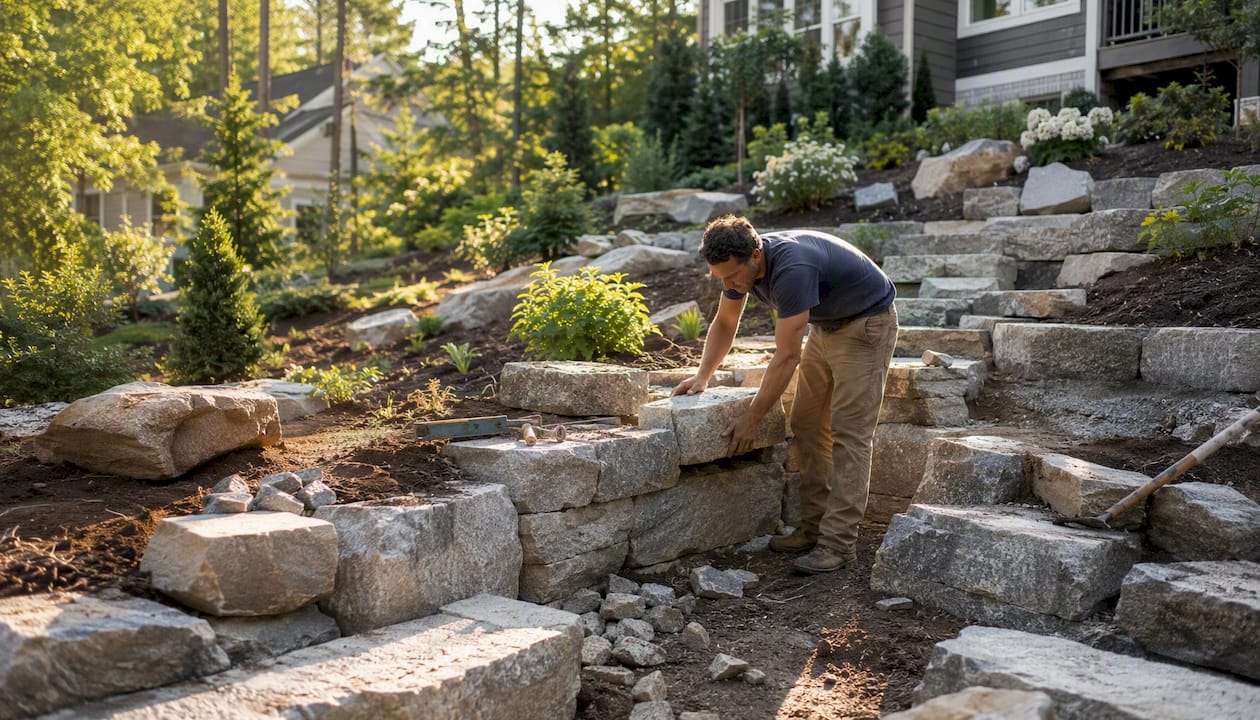
If your backyard drops off in a way that turns mowing into a workout, the fix is almost always the same: terrace it into multiple smaller levels and get drainage right before you place a single stone. This landscape sloped yard terracing guide gives you that approach because a series of low, manageable terraces distributes water pressure and soil weight far better than one tall wall, and it typically costs less to build.
Before you touch a shovel, work through this:
- Measure your grade (rise divided by run, expressed as a percent).
- Watch where water actually flows during and after rain.
- Flag any spots showing bare soil, gullies, or slumping.
- If a wall you’re planning will stand taller than 4 feet, call a structural engineer first.
Pro Tip: Walk your slope during a heavy rain with your phone camera running. You’ll see exactly where water concentrates, which tells you where your drainage work needs to start.
Slope severity dictates almost everything downstream. Grades of 20% or steeper are considered too steep for standard planting without special stabilization, and anything moving or cracking near a slope’s edge is a red flag, not a weekend project.
Key Takeaways
Terracing a slope into multiple smaller levels, paired with drainage-first construction, outperforms a single tall wall on cost, safety, and long-term stability.
| Point | Details |
|---|---|
| Measure before you build | Calculate rise over run first; grades above 20% typically need engineered solutions, not standard planting. |
| Terrace instead of building one tall wall | Multiple smaller terraces spread out soil pressure and generally cost less than one large retaining wall. |
| Drainage comes first | Every wall needs gravel backfill, geotextile fabric, and a drain pipe sloped to daylight, not buried dead ends. |
| Know the 4 foot threshold | Walls under 4 feet are often DIY-friendly; taller walls commonly need engineering and permits. |
| Hire a pro for structural risk | Divinelandscapingllc handles engineered walls, drainage plans, and permits when a slope exceeds safe DIY limits. |
Table of Contents
- How Do You Assess a Sloped Yard Before Terracing?
- What Are the Best Terracing Ideas for a Sloped Yard?
- Which Terracing Materials Work Best for Your Slope?
- How Do You Build a Retaining Wall on a Sloped Yard?
- What Plants Work Best on a Sloped Yard?
- What’s the Best Way to Stop Erosion on a Slope?
- How Do You Design Safe Steps and Paths on a Terraced Slope?
- How Much Does It Cost to Terrace a Sloped Yard?
- How Do You Maintain a Terraced Slope Over Time?
- What Do Landscaping Pros Know That Homeowners Often Miss?
- Get Professional Help Terracing Your Sloped Yard
- Frequently Asked Questions
- Sources
How Do You Assess a Sloped Yard Before Terracing?
Start with the math. Slope is rise over run, expressed as a percentage: if your yard drops 4 feet over a 20 foot run, that’s a 20% grade. Once you cross into the 20% range, standard lawn and planting techniques stop working, and around 30% you can’t mow safely at all.
Once you know the grade, work through this checklist:
- Test your soil (clay holds water and erodes differently than sandy loam).
- Trace where water enters and exits your property.
- Note distances from the slope to your foundation, septic system, and mature trees.
- Check whether equipment can physically reach the work area.
Then look for warning signs in person:
- Exposed roots or soil at the base of the slope
- Visible gullies or rill channels after rain
- Standing water that doesn’t drain within a day
- Any tilting fence posts, retaining structures, or trees
Active erosion channels or steep slopes typically require engineered solutions rather than DIY projects Understanding your property’s grading is the foundation every other decision rests on.
What Are the Best Terracing Ideas for a Sloped Yard?
Good terrace design follows three rules: work with the slope’s natural contours instead of fighting them, decide what each level is for before you build it, and route water on purpose rather than hoping it finds its own way out. A terrace that’s beautiful but too shallow to hold a chair is a terrace you’ll regret.
Fifteen approaches worth mixing into your plan:
- Three or four shallow terraces instead of one tall wall
- Planted earthen banks stabilized with groundcover roots
- A switchback path connecting each level
- Natural stone steps set into the grade
- Gabion cages filled with local stone for a modern terrace face
- Timber sleeper tiers for a budget-friendly build
- Built-in seating along a terrace’s retaining edge
- A small water feature that channels natural runoff
- Native planting pockets tucked into wall faces
- Boulders anchoring the base of a steep section
- Layered plantings, low groundcovers up to small trees
- Gravel terraces for low-maintenance side yards
- Lawn reserved only for the flattest, mowable terrace
- Integrated planters built into wall structures
- Naturalistic, curved banks instead of straight-edged terraces
Sketch your slope in profile on graph paper before committing. Terrace depth should match its use: a seating terrace needs real depth, a planting shelf can be narrower.
Pro Tip: Pick materials that echo something already on your house, brick, stone color, trim tone. Terraces that clash with the architecture always look like an afterthought, even when the construction is flawless.
Which Terracing Materials Work Best for Your Slope?
Your material choice depends on slope severity, budget, and how long you want the structure to last without attention.
- Natural/planted terraces: cheapest option, moderate erosion risk until roots establish, best on gentle to moderate grades, low ecological impact.
- Timber sleepers: affordable and DIY-friendly, but they rot in 10 to 15 years depending on climate and treatment.
- Stacked dry stone: excellent look, very long-lasting, but labor-intensive and requires masonry skill for taller walls.
- Interlocking concrete block: a strong middle ground, engineered drainage built into most systems, moderate cost, good DIY range up to 3 to 4 feet.
- Gabion baskets: wire cages filled with stone, tolerate movement and drainage well, good on steep or unstable ground, distinct industrial look.
- Poured concrete: the most durable and expensive option, best reserved for tall or load-bearing walls, almost always needs a professional.
Timber is the cheapest short-term fix but the shortest-lived. Gabions and interlocking block split the difference on cost and lifespan. Poured concrete and cut stone cost the most upfront but can outlast the house. Climate matters too: freeze-thaw regions punish poorly drained walls regardless of material, which is why choosing the right retaining wall material matters as much as the wall’s height.
How Do You Build a Retaining Wall on a Sloped Yard?
A retaining wall fails almost always for the same reason: water. Build in this order and you avoid the vast majority of DIY mistakes.
- Evaluate the site and mark your wall line.
- Excavate a trench below the frost line where required.
- Compact a gravel base pad, leveled front to back and side to side.
- Bury your first course partially in the trench, it anchors everything above it.
- Install perforated drain pipe behind the wall, sloped toward a daylight outlet.
- Backfill with clean, crushed gravel, never soil, directly behind the wall.
- Stack subsequent courses, checking level constantly.
- Cap the wall and grade the soil above it to shed water away from the structure.
Drainage isn’t optional trim; it’s structural. Every wall needs clean gravel backfill, a geotextile fabric barrier, and a drainpipe that actually reaches daylight rather than dead-ending underground.
Know your limits. Guides consistently suggest walls under 4 feet are achievable for experienced DIYers, while anything taller needs engineered plans and often a permit, because lateral soil pressure increases sharply with height. If you’re terracing with multiple independent walls, keep the upper wall at least twice the lower wall’s height away from it so the walls don’t load each other.
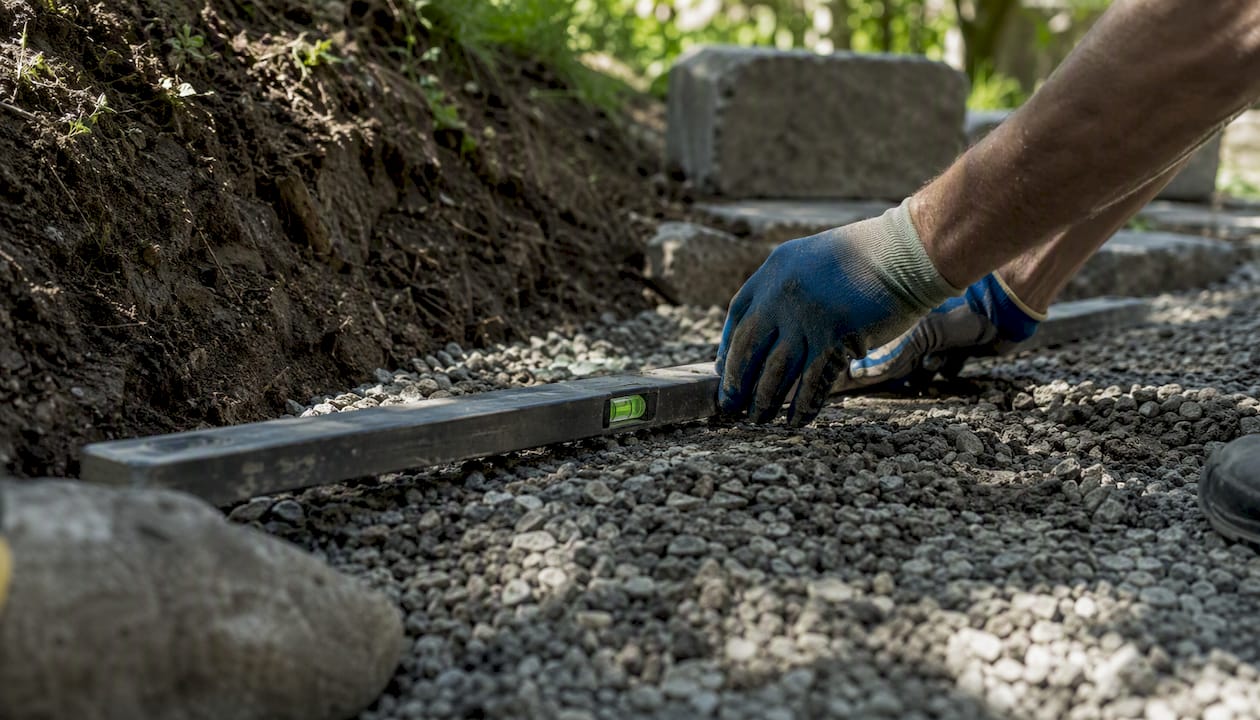
Pro Tip: The single most common DIY failure isn’t the wall face, it’s a blocked or missing drain outlet. Check yours with a garden hose before you backfill, not after.
The mistakes that sink most DIY walls: skipping compaction, backfilling with native soil instead of gravel, and burying the drain outlet under landscaping so it can’t discharge. Understanding why retaining walls fail before you build is cheaper than learning it after.
What Plants Work Best on a Sloped Yard?
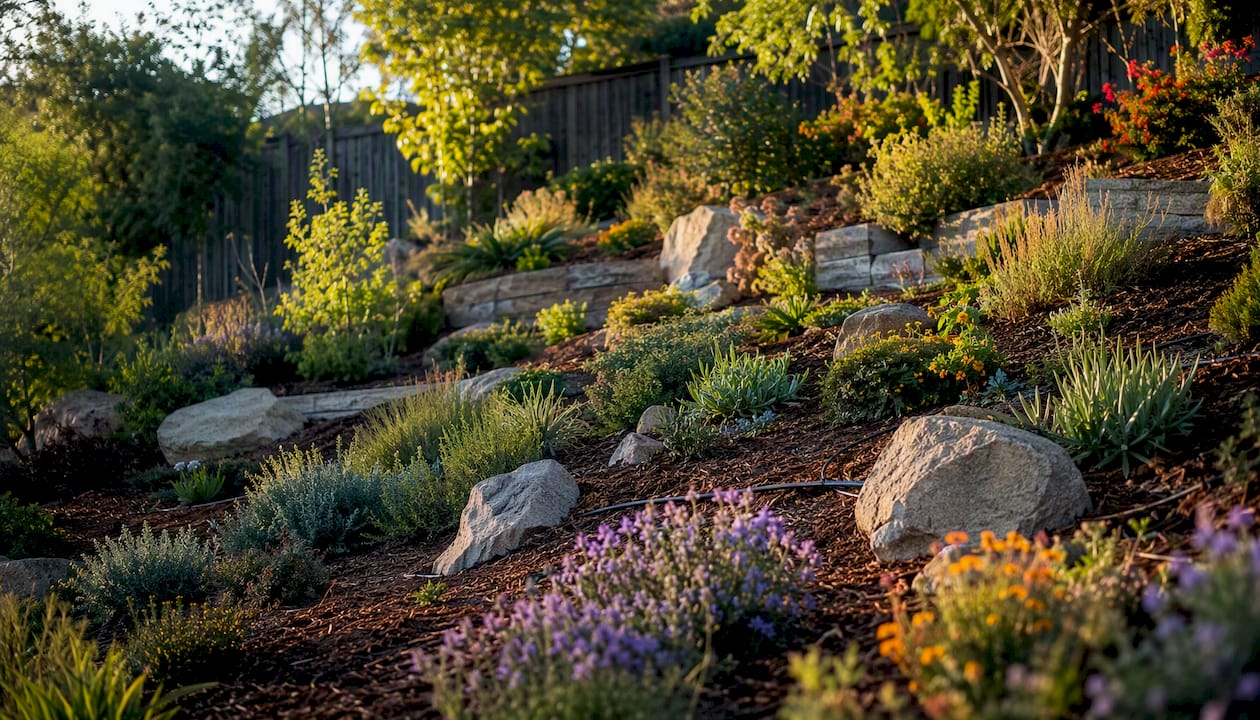
Match plants to the specific microclimate of each terrace, not a single blanket solution for the whole slope.
- Sunny, dry terraces: ornamental grasses, creeping juniper, sedum, and other drought-tolerant groundcovers.
- Moist, shaded terraces: ferns, hostas, and native woodland groundcovers that tolerate lower light.
- Windy, exposed edges: low shrubs and grasses with flexible stems rather than rigid, top-heavy plants.
Plant on the contour, meaning rows run across the slope rather than up and down, so each row acts as a small check against water flow. Position root balls so the crown sits level with the surrounding grade; a buried crown rots, an exposed one dries out. Stagger plants in a diamond pattern rather than straight rows to slow runoff further.
Drip irrigation or soaker hoses outperform sprinklers on slopes because sprinklers waste water to runoff before it soaks in. Water new transplants slowly and deeply rather than briefly and often. Favor native species with varied, deep root structures over a single groundcover species. Layered root systems from groundcovers up through boulders hold soil far better than any one plant type alone, and mixing screening shrubs into terrace edges can double as backyard privacy.
What’s the Best Way to Stop Erosion on a Slope?
Fixes range from a weekend job to a permanent structure, and you should think of them in that order.
Immediate (days): straw wattles or coir logs staked across the slope, fresh mulch over bare soil.
Medium-term (weeks to months): small check dams in drainage paths, native planting pockets established between wattles.
Permanent: terraces, French drains, and engineered retaining walls.
- Stake wattles or coir logs perpendicular to water flow, spaced down the slope.
- Dig French drains with enough slope, roughly 1% minimum, to move water to a daylight outlet.
- Add a gravel-and-fabric drain trench behind every retaining wall, not just tall ones.
Don’t ignore surface water sources above the slope. Divert roof runoff and driveway drainage with swales before it ever reaches your terraces, since concentrated water above a wall is what overwhelms drainage designed for diffuse rainfall.
How Do You Design Safe Steps and Paths on a Terraced Slope?
Switchback paths cover distance gently and reduce erosion from foot traffic; straight stairs save space but demand more careful footing. Aim for a 6 inch riser with a 12 to 14 inch tread, gardens feel better with wider, shallower steps than interior stairs use.
- Add handrails on any run over a few steps.
- Light every landing and transition point.
- Use non-slip surfacing, exposed aggregate or textured pavers, not smooth stone.
- Include a landing every 8 to 10 steps to break up long runs.
- Guardrail any terrace edge with a meaningful drop.
Good access also protects your investment: a path that keeps foot and wheelbarrow traffic off planted terraces means less compaction and easier long-term maintenance.
How Much Does It Cost to Terrace a Sloped Yard?
Budget tiers roughly break down by material and complexity:
- Low-cost: planted earthen terraces and timber sleeper tiers, the most DIY-accessible route.
- Mid-range: interlocking concrete block or gabion walls, better drainage engineering built in.
- High-end: cut stone masonry, poured concrete, and fully engineered multi-terrace systems.
Timber wins on upfront cost but loses on lifespan. Gabions cost more than timber but tolerate ground movement and drainage issues that would crack a rigid wall. Planted terraces cost the least of all, if you have the patience to let roots do the stabilizing work.
Call a professional when any of these apply: your wall will exceed roughly 4 feet, you’re seeing active soil movement, your project could redirect water onto a neighbor’s property, your jurisdiction requires a permit, or your site sits in a designated environmentally critical area. A licensed hardscape contractor typically delivers a site survey, engineered plans, a drainage plan, permit handling, construction, and a workmanship warranty, coverage a DIY build simply can’t offer.
How Do You Maintain a Terraced Slope Over Time?
New plantings need consistent moisture for their first 6 to 8 weeks, then a deep weekly watering through their first growing season while roots establish. Mulch bare soil immediately after planting to buy time before roots take hold.
Once a year, walk the whole system and check for:
- Wall bulging, leaning, or gapping joints
- Clogged weep holes or drain outlets
- Fresh erosion channels forming above or below terraces
- Groundcovers turning invasive and choking out other species
In freeze-thaw climates, expect more visible wall movement each spring and inspect immediately after the ground thaws. In dry summers, exposed terrace soil needs supplemental watering even on established plantings, bare soil erodes fastest when it’s driest.
What Do Landscaping Pros Know That Homeowners Often Miss?
Drainage and terracing aren’t two separate decisions, they’re one decision. A gorgeous stone terrace with a clogged drain outlet fails just as fast as no wall at all, and I’ve seen far more walls fail from water than from bad stacking.
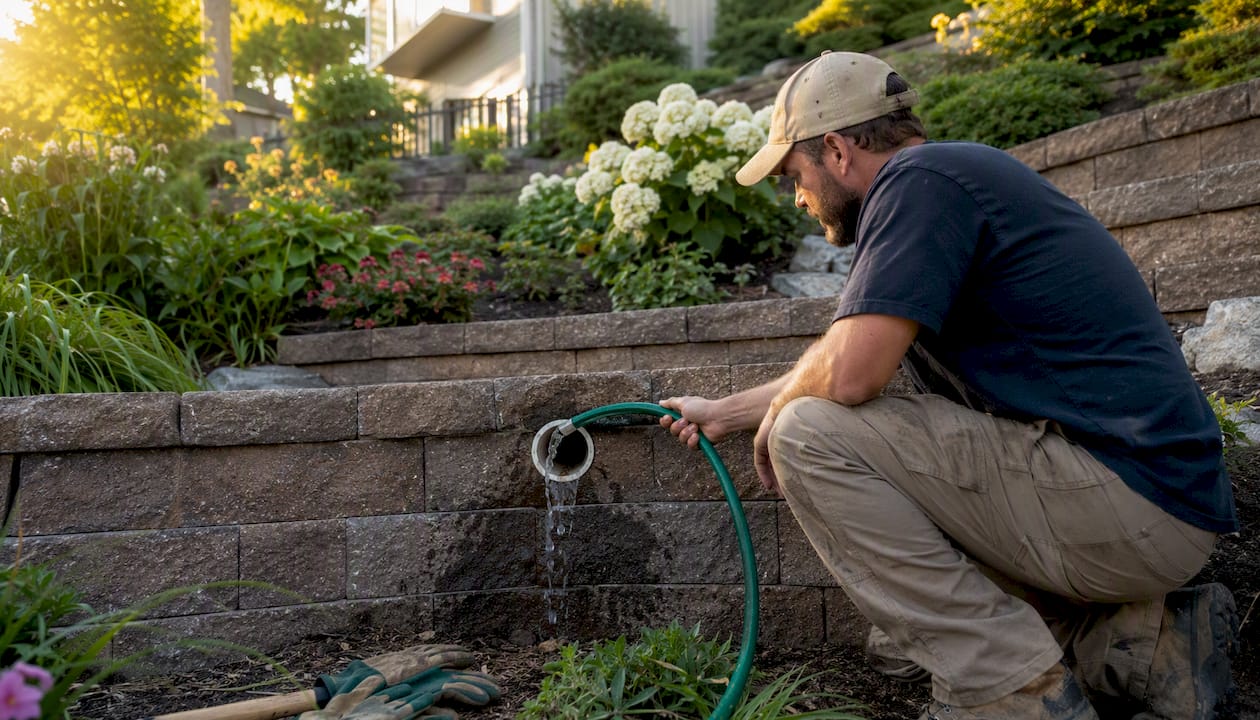
The detail that separates a wall that lasts twenty years from one that lasts five is almost never visible once the project’s done: a properly buried first course and a drain outlet that actually reaches daylight, checked with a hose before backfilling, not assumed to work afterward.
Get Professional Help Terracing Your Sloped Yard
DIY terracing works well for gentle grades, timber tiers, and planted banks under a few feet of rise. Once your slope demands walls over 4 feet, engineered drainage plans, or permit paperwork, Divinelandscapingllc handles the parts of a terracing project that carry real structural risk, at a fraction of the trial-and-error cost of a failed DIY wall.

An initial consultation typically includes a site survey, a grading and drainage assessment, and a design concept showing how your terraces, paths, and plantings fit together. From there, Divinelandscapingllc handles engineered retaining wall design, permitting where required, and full construction with a workmanship warranty. If your slope sits near your home’s foundation, that assessment also covers safe grading around the structure so water moves away from your house, not toward it.
Browse the project gallery to see finished terraced yards, or request an estimate through Divine Landscaping’s design services to get a firm scope and cost for your specific slope.
Frequently Asked Questions
What is the cheapest way to terrace a sloped yard?
Planted earthen terraces and timber sleeper tiers cost the least upfront, though timber needs replacement in 10 to 15 years while planted banks require patience for roots to fully stabilize the soil.
How steep does a yard need to be before you must terrace it?
Grades above roughly 20% are considered too steep for standard planting and typically need terracing or engineered structures rather than plants alone.
Do I need a permit to build a retaining wall on a sloped yard?
It depends on your local jurisdiction and the wall’s height, but walls over roughly 4 feet commonly trigger permit and engineering requirements, so check with your local building department before you dig.
Can I terrace a slope myself, or do I need a professional?
Gentle to moderate slopes with walls under 4 feet are often manageable for experienced DIYers, but active erosion, taller walls, or drainage that affects a neighbor’s property call for a professional.
What plants stabilize a slope best?
A layered mix of groundcovers, grasses, shrubs, and boulders anchoring the base outperforms any single plant type because varied, deep root systems hold soil at multiple depths.
Sources
- Gardening slopes and hillsides — Iowa State University Extension
- BEL20-218 Shelton Wall Install Guide — Belgard (installation guide PDF)
- How to build a retaining wall on a slope — BuildCalc Pro