
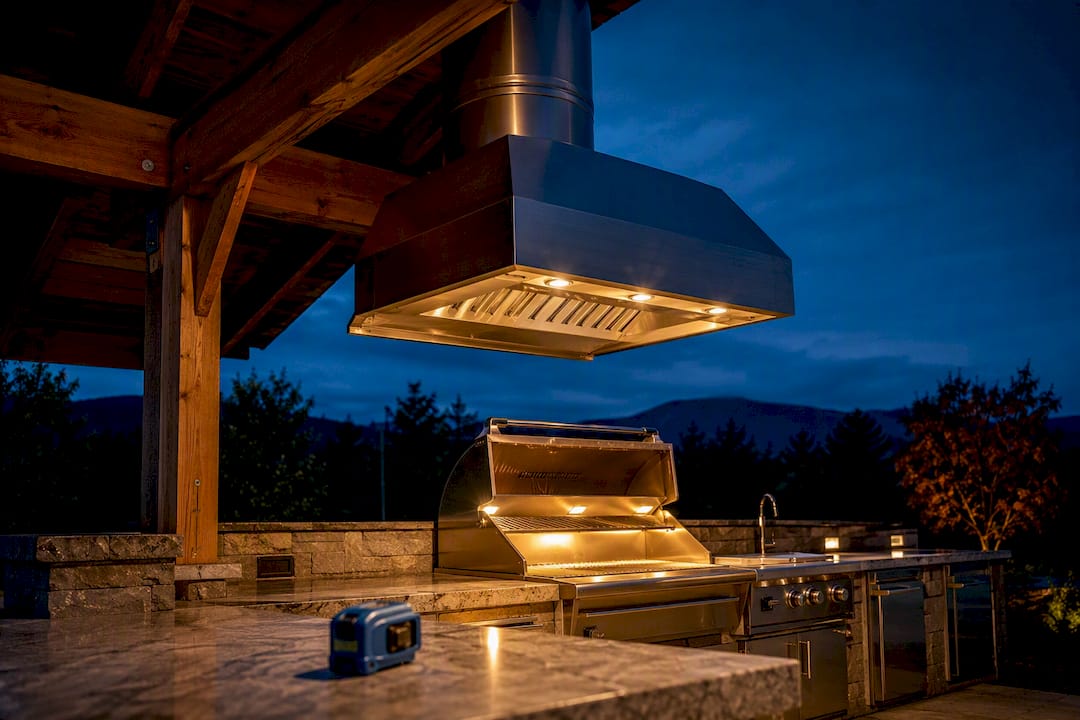
Every outdoor kitchen needs fuel-appropriate island vents and, for any covered cook zone, an outdoor-rated hood sized to the grill’s BTU output and ducted with the right diameter. Outdoor kitchen ventilation isn’t optional trim. It’s a safety system that keeps gas from pooling in enclosed cabinets and keeps smoke from ruining your ceiling, cabinetry, and appliances. Get the vent placement, hood sizing, and ducting right before the cabinetry goes in, because retrofitting any of it later is expensive.
TL;DR:
- Proper placement of vents is crucial, with propane vents positioned low near the floor and natural gas vents high on opposing walls for effective gas dispersion.
- A minimum of 1,200 CFM is recommended for outdoor hoods, with coverage extending roughly three inches beyond the grill on each side, especially for high BTU appliances.
- Ducts must match blower specifications exactly, with straight runs preferred; installation mistakes like undersized duct diameter or wrong vent height significantly reduce performance.
- Heavy-gauge stainless steel (304) and sealed, welded ductwork resist corrosion and moisture damage in outdoor environments, ensuring long-term reliability.
- Regular inspections, at least annually, are essential to maintain system safety and efficiency, particularly if heavy wood or charcoal cooking is involved.
Table of Contents
- Why Ventilation Matters for Safety and Asset Protection
- Island Vent Panels: Sizing and Placement Rules by Fuel Type
- When to Add a Vent Hood and How to Size It
- Ducting, Blower Placement, and Make-Up Air
- Materials, Corrosion Resistance, and Placement Details
- Codes, Manufacturer Instructions, and a Homeowner Compliance Checklist
- Maintenance and Inspection Schedule and Tips
- How Professionals Plan Ventilation on Real Projects
- Types of Outdoor Kitchen Ventilation Systems
- Effects of Local Building Codes on Ventilation Requirements
- Impact of Environmental Factors on Ventilation Performance
- Noise Considerations and Solutions
- Installer Perspective: Common Mistakes and How to Avoid Them
- Getting Ventilation Right in Your Outdoor Kitchen Build
- Sources
- FAQ
Why Ventilation Matters for Safety and Asset Protection
An enclosed grill island is essentially a sealed box wrapped around a gas appliance. Without proper openings, propane and natural gas behave very differently, and both create real danger if they’re allowed to accumulate. Propane is heavier than air and settles low inside the cabinet; natural gas is lighter and rises toward the top. If vents are missing, undersized, or placed on the wrong wall for the fuel type, gas can pool instead of escaping, raising the risk of poisoning or ignition.
Smoke and grease pose a slower but equally destructive problem. Under a covered patio or pergola, smoke plumes don’t dissipate the way they do in open air. They roll along the ceiling, staining wood, discoloring stucco, and coating cabinet hardware and light fixtures in a sticky film that’s nearly impossible to fully remove once it sets.
Recent CPSC recalls involving outdoor kitchen components confirm these aren’t theoretical concerns. Fire and burn hazards tied to poor installation and ventilation show up in real product safety actions, not just cautionary anecdotes.
What proper ventilation actually prevents:
- Gas accumulation inside enclosed cabinets that raises fire and poisoning risk
- Permanent smoke staining on ceilings, stone, and wood surfaces
- Corrosion of appliance components exposed to trapped moisture and grease
- A covered kitchen that becomes unusable every time you fire up the grill
A well-placed hood does more than protect surfaces. It’s the difference between a covered kitchen you actually use and one that fills with smoke every time you sear a steak.
Island Vent Panels: Sizing and Placement Rules by Fuel Type
Getting vent panels right comes down to three variables: how many you need, where you put them, and how you match them to your fuel source. Most manufacturers and installation guides point to a simple ratio: one vent panel for roughly every 4 feet of island length, with the total vent area split according to the specific grill’s manufacturer instructions.
Here’s how to apply that rule on a real project:
- Measure your island length and divide by 4 to estimate the minimum number of vent panels needed.
- Check your grill’s manual for the appliance’s specific required vent area in square inches. This number can vary meaningfully between models even at similar BTU ratings.
- Place vents on opposing walls, never on the same side. Cross ventilation is what actually moves air through the cabinet instead of letting it stagnate in a corner.
- Position propane vents low, within about 6 inches of the cabinet floor, because propane is heavier than air and pools near the ground.
- Position natural gas vents high, near the top of opposing walls, since natural gas rises and needs an escape route above the appliance.
- Verify against manufacturer and NFPA-aligned guidance before finalizing cabinet framing, since vent requirements differ by island length and grill BTU.
This isn’t a detail you can eyeball. Gas density dictates vent height, and getting the vertical placement wrong for the fuel type undermines the entire point of venting the enclosure.
Pro Tip: Before you order cabinetry, tape off where each vent panel will sit and walk the layout with your grill’s spec sheet in hand. It’s a five-minute check that catches mismatched vent counts before they’re baked into stone or stucco.
When to Add a Vent Hood and How to Size It
A hood becomes necessary the moment your cook zone sits under a fixed roof, pergola with solid panels, or any structure that restricts natural airflow. Open-air grills on an uncovered patio generally don’t need motorized extraction. Wind and open sky handle dispersal well enough on their own. Once you add a roof, that natural escape route disappears, and smoke has nowhere to go but sideways into your seating area.
Sizing a hood starts with your grill’s BTU rating. A practical shorthand many designers use is about 100 CFM for every 10,000 BTU of cooking power, though exact numbers vary by model and guideline, but real-world guidance pushes higher. Many outdoor hood manufacturers and design guides recommend a practical minimum of roughly 1,200 CFM for typical outdoor cooking loads, since outdoor smoke plumes are larger and less contained than indoor ones.
Coverage and mounting height matter as much as raw CFM. Rules worth following:
- Extend the hood roughly 3 inches beyond each side of the grill’s cooking surface for adequate capture width.
- Mount at the height specified in the manufacturer’s installation manual. Too high sacrifices capture; too low creates a clearance and heat problem.
- Raise your CFM target if your pavilion has a high or vaulted ceiling, since smoke has more room to drift laterally before reaching the hood.
- Add capacity for wood or charcoal cooking, which produces denser, more persistent smoke than gas grilling alone.
Skimping on CFM to save on equipment cost is one of the most common regrets homeowners report after their covered kitchen is finished. If you plan to see this space in a layout with an island, size the hood at the same time you finalize the footprint, not after.
Ducting, Blower Placement, and Make-Up Air
A correctly sized hood can still underperform badly if the ducting behind it is wrong. Duct diameter has to match the blower’s specification exactly. Undersizing the duct even slightly creates friction that quietly eats into your rated CFM, and every elbow in the run compounds that loss further.
Straight, vertical runs preserve airflow far better than horizontal paths with multiple turns. If your design forces a long or bent duct route, expect a real drop in delivered performance unless you compensate with a larger diameter or a stronger blower.
Blower placement affects both performance and daily livability:
- Internal blowers, mounted directly behind the hood, work fine for short, simple duct runs but sit closer to heat and grease, which shortens their service life.
- Remote or in-line blowers, mounted higher in the duct or near the roofline, pull the same volume of air with noticeably less noise at the cook station and keep the motor away from grease exposure.
- For larger pavilions or tall-ceiling builds, remote blowers are almost always the better long-term choice despite the higher upfront installation cost.
Exterior termination needs a backdraft damper to stop wind from pushing exhaust back into the duct. If you’re extracting significant air volume from a semi-enclosed structure, plan for make-up air too. A hood that pulls air out without a way to replace it will fight itself, starving the blower and reducing real-world capture no matter how high the rated CFM.
Pro Tip: If your covered kitchen has walls on three sides, ask your installer specifically how make-up air will enter the space. This gets overlooked constantly, and it’s a big reason some “properly sized” hoods still underperform.
Materials, Corrosion Resistance, and Placement Details
Outdoor exposure is brutal on ventilation hardware, and cutting corners on materials shows up within a few seasons, not decades. For hoods, specify heavy-gauge 304 stainless steel, especially in coastal or high-humidity regions where lighter-gauge material or lower-grade stainless corrodes far faster.
Ductwork deserves the same standard. Welded and sealed stainless duct resists both grease buildup and moisture intrusion better than snap-together sections, which tend to develop gaps that leak grease-laden condensate over time.
A few placement details protect the investment further:
- Install waterproof flashing at every roof penetration where duct passes through, since a poorly flashed opening invites water damage long before the ventilation itself fails.
- Add a wind hood cover on exterior terminations to reduce downdraft and keep moisture from working its way back into the duct run.
- Follow the appliance manufacturer’s clearance specifications exactly. Combustibles need to sit at the specified distance from the grill and hood regardless of how the rest of the layout is designed.
If your outdoor kitchen sits on an elevated structure, ventilation and moisture management on a deck introduce additional considerations around penetrations and drainage that a ground-level patio doesn’t face.
Codes, Manufacturer Instructions, and a Homeowner Compliance Checklist
Gas-safety rules for outdoor kitchens trace back to NFPA 54 and NFPA 58, the standards that govern fuel gas code and LP-gas installation respectively. These set the baseline, but your specific grill’s manufacturer manual can require larger vent openings or tighter clearances than the general code minimum, and when that happens, the manual wins.
One rule has zero flexibility: grease-laden exhaust can never terminate into a concealed cavity, attic space, or soffit. It has to exit to open exterior air, full stop. Ducting a hood into a wall cavity to hide the exterior vent cap is a fire hazard, not a design shortcut.
Before your project moves past framing, walk through this checklist:
- Vent placement confirmed for your fuel type: propane low, natural gas high, on opposing walls.
- Hood CFM and mounting height matched to grill BTU and ceiling height, verified against the manufacturer’s spec sheet.
- Duct diameter and routing checked against blower specifications, with elbows minimized and no long horizontal runs.
- Permit and inspection status confirmed with your local building department, since gas line and structural work typically require sign-off before cabinetry closes the space in.
Given that recalls involving outdoor kitchen fire and burn hazards are a documented reality, treating code compliance as a formality rather than a safety layer is a mistake homeowners regret.
Maintenance and Inspection Schedule and Tips
At minimum, inspect the full ventilation system once a year. If you cook heavily with wood or charcoal, plan on cleaning baffle filters and duct access points more often since those fuels generate denser, stickier residue than gas grilling.
A basic annual routine covers three things:
- Remove and clean or replace baffle filters, and open duct cleanouts to check for grease accumulation along the interior walls.
- Inspect remote blower mounts for secure attachment and lubricate bearings if the manufacturer specifies it.
- Check exterior termination caps and wind covers for debris, nesting insects, or corrosion.
Watch for these warning signs between scheduled inspections: persistent smoke that lingers instead of clearing, new staining appearing on the ceiling or cabinet faces, noticeably weaker airflow at the hood, or unusual grinding or rattling noise from the blower. Any of those point to a problem worth a professional look before it gets worse.
Pro Tip: Keep a photo of your duct cleanout access points from installation day. A year later, you’ll thank yourself for not having to guess where they’re hidden behind trim.
How Professionals Plan Ventilation on Real Projects
Outdoor living spaces and outdoor kitchens are a common focus in landscaping and hardscaping projects in New Hampshire. On the ground, ventilation decisions usually come down to two tradeoffs: how far the duct run has to travel, and how much moisture exposure the site sees.
For pavilions with tall ceilings or long duct paths, remote blowers consistently win out over internal units. They cost more upfront but hold up better and run quieter at the cook station. For coastal-adjacent or high-humidity New England sites, heavier-gauge 304 stainless earns its price premium fast, since standard-grade materials show pitting within a couple of seasons in those conditions. Reviewing completed outdoor kitchen projects side by side makes these material and layout tradeoffs easier to visualize before committing to a design.
Types of Outdoor Kitchen Ventilation Systems
Two main approaches exist: overhead hoods and downdraft systems, and they solve the smoke problem in fundamentally different ways.
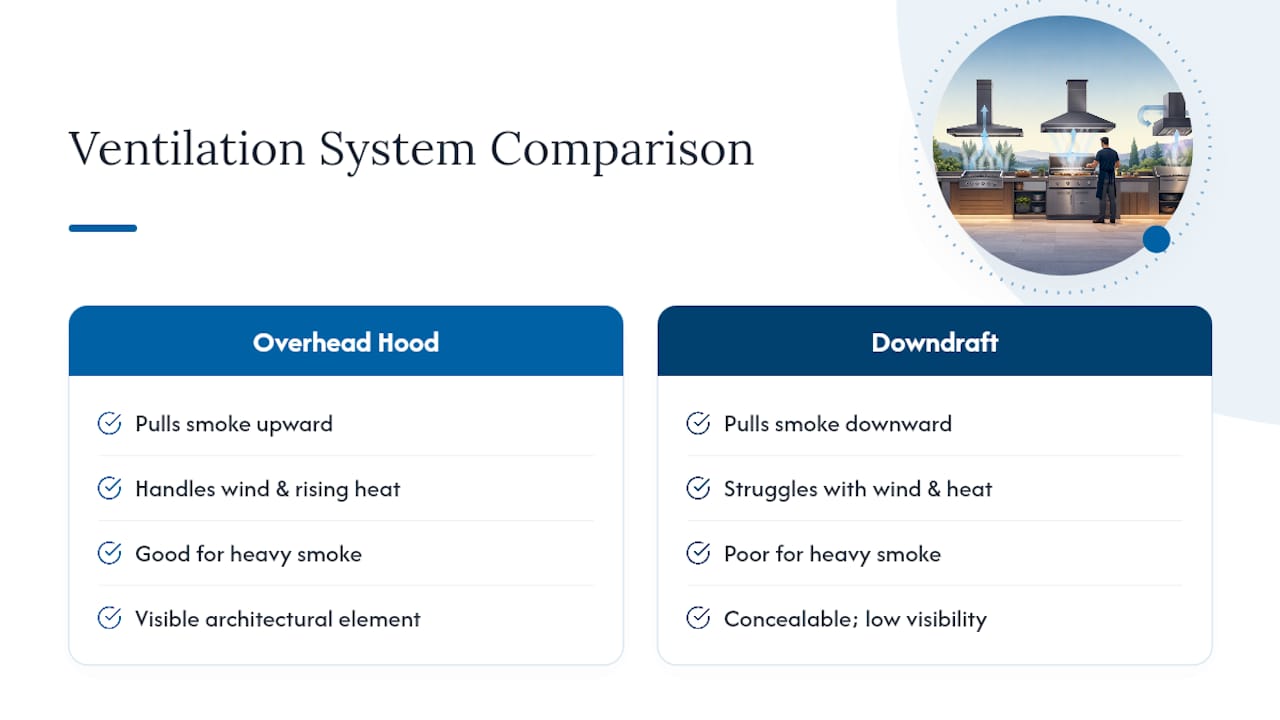
Overhead hoods sit above the cooking surface and pull smoke upward as it naturally rises. This is the more common choice for covered outdoor kitchens because it matches how smoke actually behaves, drifting up before it disperses. Overhead systems handle high-heat cooking and heavy smoke volume well, which makes them the better fit for wood or charcoal grilling. The tradeoff is visual: a hood is a visible architectural element that has to be designed into the pergola or roofline rather than hidden.
Downdraft systems, borrowed from indoor kitchen design, pull air and smoke downward and out through vents built into or behind the cooking surface. Outdoors, downdraft units struggle against wind and rising heat, which naturally fight the downward airflow. They also tend to have lower effective capture rates for high-smoke cooking styles like searing or wood-fired grilling. Downdraft can work for lower-heat outdoor cooktops in sheltered spots, but for a grill under a roof, an overhead hood is almost always the more reliable choice.
For most covered outdoor kitchens, overhead hoods remain the practical default. Downdraft is worth considering only for specific low-smoke setups where a visible hood isn’t an option architecturally.
Effects of Local Building Codes on Ventilation Requirements
Building codes vary by municipality, and that variation directly changes what your ventilation system is legally required to include. Some jurisdictions apply commercial-style exhaust requirements to any outdoor kitchen with a fixed gas line, even in a residential backyard, while others defer entirely to the manufacturer’s installation manual for equipment under a certain BTU threshold.
Permit requirements typically kick in for any project involving new gas lines, electrical runs for a blower, or structural changes like a roof or pergola addition. Skipping the permit step doesn’t just risk a fine. It can void manufacturer warranties on gas appliances and create real problems if you ever sell the property and a buyer’s inspector flags unpermitted gas work.
Local fire departments sometimes weigh in too, particularly in areas with wildfire risk or dense residential lot lines, where open-flame cooking appliances face additional siting or clearance rules beyond the standard building code. The practical move is to call your local building department before finalizing your kitchen layout, not after the concrete is poured. Requirements differ enough from one town to the next that assuming your neighbor’s setup is legal for your lot is a real risk.
Impact of Environmental Factors on Ventilation Performance
Wind is the environmental factor most likely to sabotage an otherwise well-designed system. A hood and duct sized perfectly for still air can lose significant capture efficiency on a gusty day, as crosswinds push smoke sideways before it reaches the hood’s capture zone. This is exactly why backdraft dampers on exterior terminations matter. Without one, wind can push exhaust back down the duct instead of letting it escape.
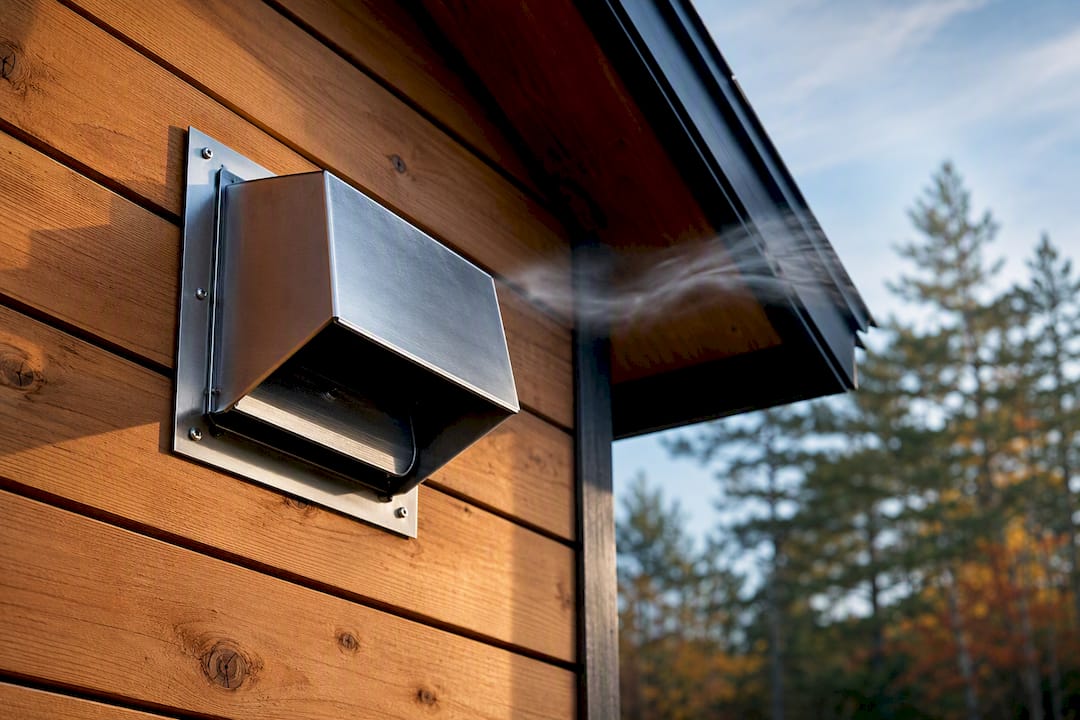
Rain and humidity affect the system differently, working on materials rather than airflow. Moisture that gets into duct seams accelerates corrosion, especially where lower-grade metals are used instead of proper stainless. Humid climates also slow how quickly grease residue dries inside ductwork, which can mean more frequent cleaning cycles compared to a dry climate.
Site orientation matters more than most homeowners expect. A cook zone positioned to catch prevailing winds head-on will perform worse than one angled to let wind pass along the side of the structure instead of straight into the hood’s capture area. This is a design consideration worth raising during the planning phase, especially if your property sits on an exposed lot or a hilltop where wind exposure is more pronounced than in a sheltered backyard.
Noise Considerations and Solutions
Motorized ventilation isn’t silent, and outdoor kitchens amplify noise complaints because they sit closer to neighboring yards and outdoor seating than an indoor range hood ever would. A high-CFM internal blower mounted directly behind the hood can run loud enough to interfere with conversation at the bar or dining table just a few feet away.
The most effective fix is blower placement rather than blower selection. Moving the motor to a remote or in-line location, higher in the duct run or near the roofline, cuts noticeable noise at the cook station while moving the same volume of air. This isn’t just a comfort upgrade. It also keeps the motor farther from heat and grease exposure, which extends its service life.
Sound-dampening duct wrap can reduce noise further on internal blower setups where relocating the motor isn’t practical. Positioning the blower away from shared property lines or neighboring patios also helps avoid complaints in denser residential areas, particularly in shared lot situations, like those Divine Landscaping LLC often navigates on multi-tenant properties, where sound travel between units is a real design constraint.
Installer Perspective: Common Mistakes and How to Avoid Them
The two mistakes I see most often on real sites are undersized duct diameter and vent panels mounted at the wrong height for the fuel type. Both are correctable if caught during the design phase, and both are expensive once cabinetry is sealed around them.
Before you sign off on a design, ask to see the hood’s blower specifications, the planned duct diameter, and exactly where the termination point will land. If those details feel vague or unconfirmed, get an on-site evaluation before any stone or cabinetry goes in. A ventilation problem caught on paper costs nothing. The same problem caught after installation costs real money to fix.
— Damian
Getting Ventilation Right in Your Outdoor Kitchen Build
Hood selection, duct routing, and weatherproofing should be handled as part of the full hardscape design process, so ventilation is planned alongside your island layout instead of added afterward. That coordination is the real advantage: you get one team thinking through gas type, hood CFM, duct path, and material grade together, rather than piecing it together between a grill retailer and a general contractor after the fact.

If you’re planning a covered cook zone, a full outdoor kitchen island, or a broader backyard renovation that includes one, review Divine Landscaping’s hardscape services to see how design and ventilation get handled as a single project. Ready to talk specifics for your property? Reach out through Divinelandscapingllc to schedule a site visit and get a design conversation started.
Sources
- Outdoor Kitchen Island Vents & Hoods Buying Guide : BBQGuys
- Covered Outdoor Kitchen Ventilation: 7 Smart, Refined Rules
- CPSC recall: Paradise Grills recalls outdoor kitchens due to fire and burn hazards
- Best Outdoor Grill Ventilation Solutions – TAGWOOD BBQ
FAQ
Do I Need a Hood for an Outdoor Kitchen?
You need a hood whenever the cook zone sits under a fixed roof or any structure that restricts natural airflow. Open-air grills on an uncovered patio usually don’t require motorized extraction.
How Do I Vent an Island for Propane vs. Natural Gas?
Propane vents belong low, within about 6 inches of the cabinet floor, since propane is heavier than air and pools near the ground. Natural gas vents belong high on opposing walls because natural gas rises.
What CFM Do I Need for an Outdoor Vent Hood?
A practical baseline is about 100 CFM per 10,000 BTU of grill output, with many outdoor guides recommending a minimum of roughly 1,200 CFM for typical grilling setups, and higher for tall ceilings or wood-fire cooking.
What Material Should Outdoor Vent Hoods and Ducting Be Made Of?
Heavy-gauge 304 stainless steel for both the hood body and welded duct sections holds up best against outdoor corrosion, especially in coastal or humid climates.
How Often Should Outdoor Kitchen Ventilation Be Inspected?
Inspect the full system at least once a year, with more frequent filter cleaning if you cook heavily with wood or charcoal, since those fuels generate denser residue than gas grilling.