
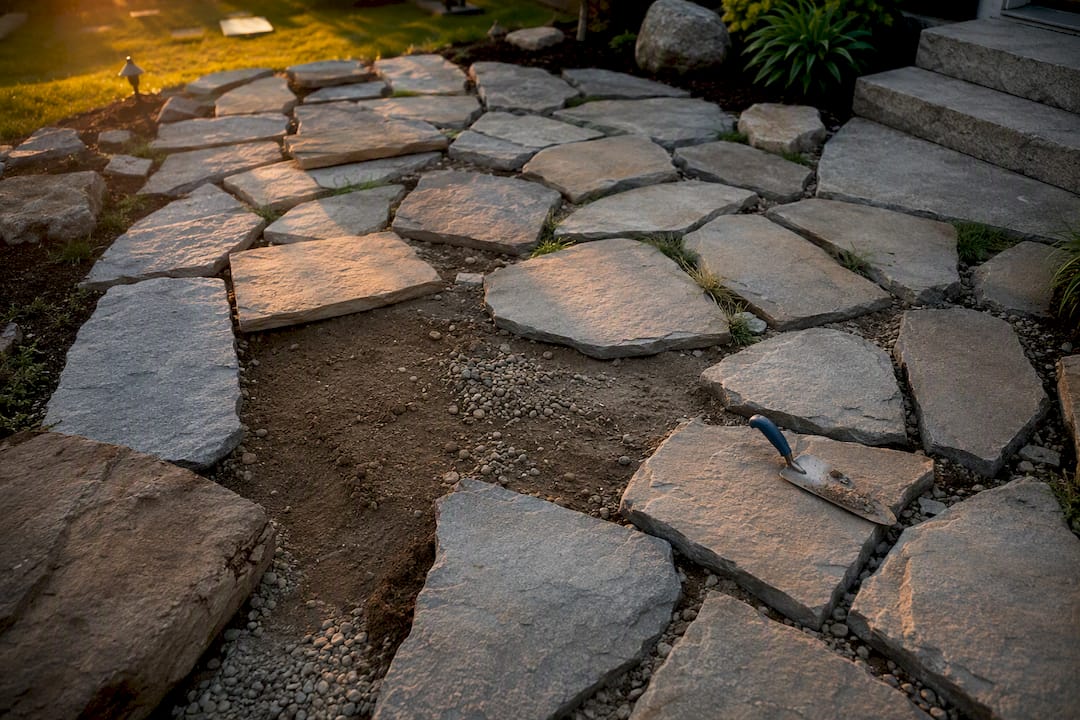
A natural stone patio is an outdoor surface built from quarried stone, cut or split into flat pieces, and set on a compacted base rather than poured or molded like concrete pavers. It’s the right choice when you want a surface that ages well, holds resale value, and can outlast most other hardscape materials by decades provided the base and drainage are built correctly.
- Benefits: Unmatched natural beauty, long lifespan, higher resale appeal than poured concrete or asphalt.
- Trade-offs: Higher upfront cost, more variability piece to piece, and installation that punishes shortcuts.
Small patios with good drainage and no structural walls are reasonable DIY projects. Anything involving steep grading, retaining structures, or large-format slabs is where you want a professional on site.
Key Takeaways
A natural stone patio built on a properly compacted, geotextile-lined base can reasonably last 50 to 100 years, making it one of the longest-lasting hardscape investments a homeowner can make.
| Point | Details |
|---|---|
| Base work determines lifespan | Compact gravel in 2 inch lifts over geotextile fabric to prevent the settling that causes most patio failures. |
| Match stone to your climate | Dense, low-porosity stone like granite or quartzite handles freeze-thaw cycles with far less maintenance than porous stone. |
| Sealing depends on stone type | Porous stones like limestone and travertine need resealing every 2 to 3 years; dense stone often needs none. |
| DIY works for simple projects | Small, flat, well-drained patios are DIY-friendly; grading, drainage, and structural work call for a professional. |
| Divine Landscaping LLC handles the complex work | Divine Landscaping LLC builds patios with proper base engineering suited to New England’s freeze-thaw conditions. |
Table of Contents
- What Makes a Patio “Natural Stone,” and Which Types Should You Consider?
- Benefits and Downsides of Choosing Natural Stone for Your Patio
- How Do You Install a Natural Stone Patio Correctly?
- What Materials and Tools Do You Need for the Job?
- Should You DIY Your Patio or Hire a Contractor?
- What Does a Natural Stone Patio Cost, and How Long Does It Last?
- How Do You Maintain and Seal a Natural Stone Patio?
- What Are the Best Layout Patterns and Design Ideas for Stone Patios?
- What Do Professional Installers Know That DIYers Often Miss?
- What’s the Environmental Impact of a Natural Stone Patio?
- How Do You Make a Stone Patio Safer and More Accessible?
- Why Beginner Guides Get One Thing Wrong About Stone Patios
- Divine Landscaping LLC Turns Stone Patio Plans Into a Built Reality
- Sources
What Makes a Patio “Natural Stone,” and Which Types Should You Consider?
Natural stone means quarried rock, not a manufactured product poured into a mold. Concrete pavers are engineered from cement, aggregate, and pigment to look uniform. Natural stone comes out of the ground with its own mineral makeup, color variation, and grain, which is exactly why no two patios made from it look identical. That variation is the whole appeal, and it’s also the reason natural stone costs more and demands more care during installation.
Stone arrives from the supplier in a few standard finishes. Cleft finish keeps the natural split face, rougher underfoot and more traditional looking. Sawn finish is cut smooth on a saw, giving a cleaner, more formal look. Calibrated stone is sawn and ground to a consistent thickness, which speeds up installation because you’re not shimming every piece to keep the surface level.
Here’s how the most common patio stones stack up against each other.
- Bluestone: Dense, fine-grained, low absorption. Common in the Northeast, holds up well through freeze-thaw cycles, and has a naturally slip-resistant texture when left with a cleft finish.
- Flagstone: A catch-all term for flat sedimentary stone (often sandstone or limestone). Beautiful in irregular patterns, but porosity varies a lot by quarry source, so ask about absorption before you buy.
- Granite: About as dense and hard as patio stone gets. Extremely low porosity, minimal staining risk, and it barely wears. Costs more and is harder to cut on site.
- Limestone: Soft, workable, and often has a warm, uniform tone. More porous than granite or bluestone, which makes sealing more important in wet or freezing climates.
- Travertine: Naturally textured with small surface pockets, popular for its light, Mediterranean look. Porous by nature, so it needs sealing and isn’t the top pick for consistently wet, cold regions.
- Quartzite: Extremely hard and dense, often confused with granite in appearance. Excellent freeze-thaw performance and very low maintenance once installed.
Denser stones like granite and quartzite generally need far less upkeep than porous options like limestone or sandstone. Much of the “high maintenance” reputation stone gets actually comes from installing a porous stone in a freeze-thaw climate without sealing it properly, not from any inherent flaw in natural stone itself.
Before you buy, do a simple water droplet test on a sample piece. If water beads and sits on the surface, the stone is dense and low-porosity. If it soaks in within a few seconds, you’re looking at a more absorbent stone that will need sealing sooner and more often. Ask the supplier which quarry the stone came from, since absorption ratings and porosity vary meaningfully even within the same stone type depending on the source.
Benefits and Downsides of Choosing Natural Stone for Your Patio
The biggest argument for natural stone is longevity paired with a look that actually improves with age. Concrete cracks and looks worse every year. Natural stone develops what’s called a patina, a softened, weathered character that most homeowners and designers consider an upgrade, not a flaw.
- Longevity: A well-installed stone patio can last decades, often outperforming poured concrete and most manufactured pavers.
- Resale value: Real estate agents and appraisers consistently list stone hardscaping as a feature that boosts curb appeal and buyer interest.
- Character: Design experts recommend treating small imperfections and color variation as desirable character rather than defects, since that’s what separates natural stone from a mass-produced surface.
Pro Tip: Walk your patio layout before installation and look at how the stone pieces relate to each other in natural light, not the harsh light of a supplier’s warehouse. Color reads differently outdoors, especially at dusk when most people actually use the space.
The downsides are real, and you should weigh them honestly. Natural stone costs more upfront than concrete or basic pavers, largely because of quarrying, cutting, and transport. No two pallets from the same quarry look exactly alike, which is a feature for some homeowners and a frustration for others who want uniformity. Stone can shift over time if the base wasn’t compacted correctly, and in shaded, consistently wet spots, moss and algae can take hold on porous stones faster than on dense granite or quartzite.
Compared against long-term value, though, stone tends to win. Concrete needs resealing, patching, and eventually full replacement within 20 to 30 years in harsh climates. A properly built stone patio, by contrast, can remain functional and attractive for generations with nothing more than routine cleaning and occasional joint maintenance.
How Do You Install a Natural Stone Patio Correctly?
There are three standard ways to set natural stone, and the right one depends on your climate, budget, and how much movement your soil sees.
- Dry-laid (sand-set or stone-dust bedded): The most DIY-friendly method. Stone sits on a compacted gravel base topped with a bedding layer of sand or stone dust, with no mortar holding it in place. This approach is common for patios and walkways where some flexibility in the surface is acceptable.
- Mortar-set (wet-set): Stone is bonded to a concrete or existing masonry base with mortar joints. This gives a rigid, formal surface but is far less forgiving of ground movement and generally needs professional-grade concrete work underneath.
- Slab-over-concrete: Thin stone slabs are adhered directly to an existing concrete pad. Good for renovating an old concrete patio without a full tear-out, but only works if that slab is already sound and properly sloped.
Whichever method you choose, the base work underneath decides whether the patio lasts decades or fails in a few seasons. Excavate deep enough to account for stone thickness plus base material plus your bedding layer. Recommended stone thickness for dry-set installations is generally in the range commonly advised by professional guides, and most dry-laid patios call for a compacted base of 4 to 6 inches of crushed gravel, with some manufacturer guidance recommending even deeper base sections than most DIYers expect for reliable freeze-thaw stability.
Lay geotextile fabric between the native soil and your gravel base before you add a single scoop of aggregate. This layer keeps subsoil from migrating up into the gravel, which is one of the most common causes of settling and uneven patios years down the road. Skipping it is the single most common mistake DIYers make, and it’s invisible until the patio starts sinking in spots.
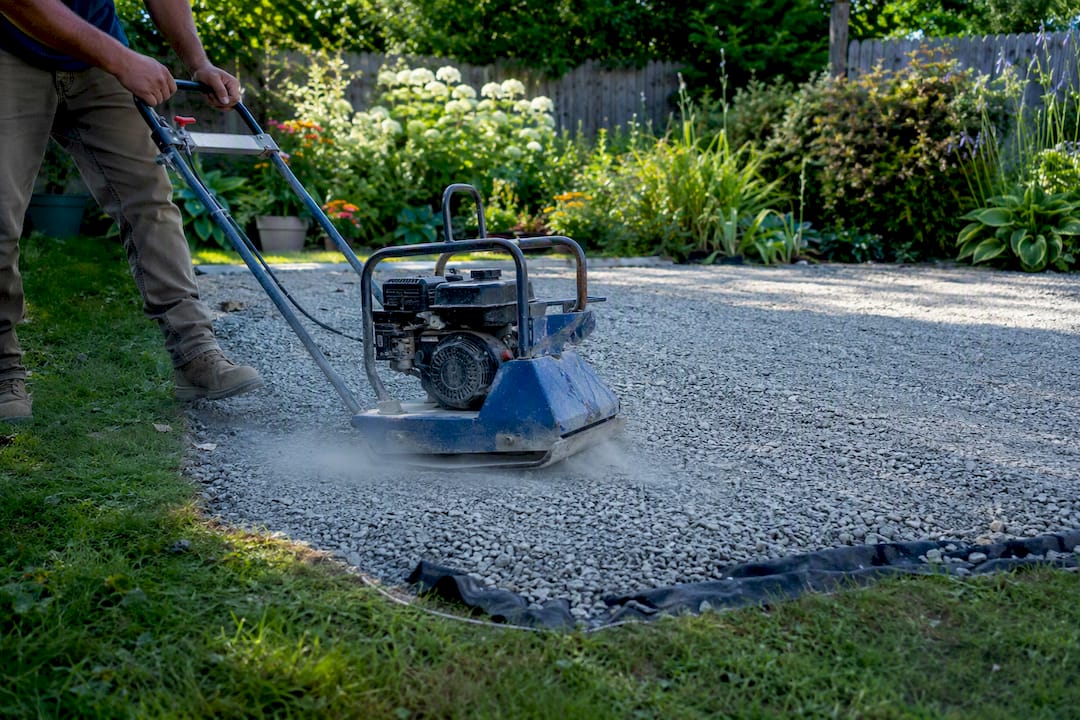
Compact your base in thin lifts, roughly 2 inches at a time, lightly moistening the gravel between passes to help it settle densely. Grade the whole patio away from your house at a slope of about 1 inch per 4 feet to keep water moving off the surface instead of pooling against your foundation. Choose an edge restraint, either a buried plastic or metal edging or a mortared stone border, to keep the perimeter stones from creeping outward over time. Fill joints with polymeric sand, stone dust, or mortar depending on your setting method and desired look.
Pro Tip: Never compact your entire gravel base in one thick pass. Compacting in one shot instead of thin lifts leaves loose pockets in the base that show up months later as dips and low spots, usually right where you least want them.
What Materials and Tools Do You Need for the Job?
Picking the right stone starts with matching its properties to your project, not just its color. Porosity determines how much sealing and winter care you’ll need. Hardness determines how well it resists chipping and scratching from furniture or foot traffic. Finish affects both looks and slip resistance. Thickness affects both your excavation depth and your budget, since thicker calibrated stone costs more per square foot but installs faster.
For the setting bed itself, you’re choosing between stone dust, sand, or mortar. Stone dust compacts tightly and drains reasonably well, making it a solid default for dry-set patios. Sand is easier to level but shifts more over time and drains faster, which can leave voids under stones in wetter soils. Mortar is the only option for a true wet-set patio and requires a properly cured concrete base underneath.
| Material or Tool | Typical Use |
|---|---|
| Crushed gravel (Class II or similar) | Compacted base layer, 4 to 6 inches for most dry-set patios |
| Stone dust or coarse sand | 1 to 2 inch bedding/leveling layer beneath the stone |
| Geotextile fabric | Separation layer between native soil and gravel base |
| Plate compactor | Compacting base material in lifts |
| Polymeric sand or mortar | Joint filling between set stones |
| Rubber mallet, level, and screed board | Setting, leveling, and screeding individual stones |
For DIYers, a plate compactor rental, a good four-foot level, and a rubber mallet cover most of what you need for a small dry-set project. A professional crew brings heavier compaction equipment, laser levels for larger or sloped sites, and wet saws for cutting stone to fit tight against structures or curves, tools that rarely make sense to buy for a one-time job.
If you’re in a region with real winters, lean toward denser stone. Granite and quartzite hold up better against freeze-thaw cycling and resist staining better than porous sandstones or limestones in wet, cold climates. Coastal properties face a different challenge: salt exposure can accelerate surface pitting on softer, more porous stones, so dense, low-absorption options are worth the upcharge near the water.
Should You DIY Your Patio or Hire a Contractor?
A small, flat dry-set patio with good existing drainage is a reasonable weekend-to-week DIY project for a homeowner comfortable with physical labor and basic tool use. Anything involving structural retaining walls, significant grading changes, drainage rerouting, or large-format and calibrated stone that requires precise, heavy handling is a job for a professional crew.
- Define your scope honestly. If your yard slopes toward the house, or you’re dealing with poor drainage, bring in a contractor before you touch a shovel.
- Ask contractor-vetting questions up front. Confirm liability insurance, ask for references from patio-specific projects, and ask exactly what base depth and materials they plan to use.
- Watch for red flags. Vague answers about base preparation, no written warranty, or reluctance to provide a detailed written estimate are all signs to keep looking.
- Compare bids on substance, not just price. The lowest bid that skips geotextile or uses a thinner base than competitors isn’t actually cheaper long term.
- Expect a real site visit. A qualified contractor should assess your soil, existing drainage, and grade before quoting a firm number, not just eyeball the space from the driveway.
A modest DIY patio (100 to 150 square feet) typically takes an able-bodied homeowner three to five full days, including excavation, base work, and setting stone, longer if you’re working solo or renting equipment on a tight schedule.
Pro Tip: If a contractor’s estimate doesn’t mention base depth, drainage slope, or geotextile fabric at all, that’s usually a sign they’re pricing the stone and skipping the details that actually determine whether your patio survives its first winter.
What Does a Natural Stone Patio Cost, and How Long Does It Last?
Costs vary widely based on stone type, patio size, site access, and how much base work your yard needs before a single stone goes down.
- Small patios (roughly 100 to 200 square feet): Expect a noticeably higher per-square-foot cost, since fixed labor and equipment costs get spread over less area.
- Medium patios (200 to 400 square feet): This is typically where per-square-foot pricing starts to improve as labor and delivery costs are spread over more area.
- Large patios (400+ square feet): Material and labor costs scale up in total but often become more efficient per square foot, assuming site access stays straightforward.
The biggest cost drivers are stone selection (granite and quartzite run higher than limestone or basic flagstone), site access (a backyard reachable only by hand-carrying material costs more than one a truck can reach directly), and how much excavation and base correction your existing soil needs.
A properly installed natural stone patio can last a very long time with reasonable maintenance, according to historical examples and practitioner longevity estimates. That’s a dramatically longer service life than concrete or most manufactured pavers, which usually need major repair or replacement within a few decades. Most stone patio failures trace back to two causes: skipped or inadequate base preparation, and freeze-thaw damage on porous stone that was never sealed.
When you compare cost per year of service rather than sticker price alone, natural stone frequently comes out ahead of cheaper alternatives that need resealing, patching, or full replacement on a shorter cycle. Before you budget, check with your town on permitting requirements for patios near property lines or over a certain size, and build in a contingency for unexpected soil conditions. Rocky or poorly draining soil found mid-excavation is one of the most common sources of a blown budget.
How Do You Maintain and Seal a Natural Stone Patio?
Whether your patio needs sealing depends almost entirely on the stone you chose; learn expert advice on how to clean and seal to keep your surface pristine with How to Clean and Seal Patio Pavers: Tips for a Pristine Finish. Dense stones like granite and quartzite can often go unsealed indefinitely. Porous stones like limestone, travertine, and many flagstones benefit from sealing every two to three years, more often in climates with real winters.
- Test before you reseal. Pour a small amount of water on the surface. If it soaks in within a minute or two instead of beading, it’s time to reapply sealer.
- Clean routinely with mild methods. A soft brush, mild dish soap, and a garden hose handle most dirt and organic buildup without stressing the stone.
- Avoid pressure washing on porous stone. High-pressure water can drive moisture and grit deep into porous stone and erode joint fill, which is why most professionals discourage it as a routine cleaning method.
- Skip rock salt and calcium chloride de-icers on porous stone. These products can accelerate surface pitting and staining. A calcium magnesium acetate product or plain sand for traction is a safer choice.
- Re-set shifted stones as needed. Lift the stone, add or remove bedding material to level it, and reset it rather than leaving a trip hazard in place.
- Replenish joint sand or stone dust annually. Joints lose material to weather and foot traffic, and topping them off keeps stones from rocking or shifting.
Pro Tip: Keep a small bag of matching stone dust or polymeric sand left over from installation. Touching up a few joints each spring takes fifteen minutes and prevents the slow creep that eventually turns into stones working loose.
Anything beyond surface-level repair, a large section that has heaved, a drainage problem that’s developed since installation, or persistent moss that keeps returning after cleaning, is worth a call to a professional rather than a repeated DIY fix.
What Are the Best Layout Patterns and Design Ideas for Stone Patios?
Pattern choice shapes the whole feel of a patio more than almost any other decision. Irregular flagstone laid in a random pattern reads relaxed and organic, well suited to cottage-style or naturalistic landscapes. Coursed stone, cut into consistent rectangular pieces and laid in straight rows, reads formal and modern. Modular patterns mix a few fixed stone sizes in a repeating layout, giving you some of that organic feel with easier, faster installation than true random flagstone.
- Match stone scale to your space: large-format stone suits bigger, open patios, while smaller pieces work better in tighter courtyards or alongside curved planting beds.
- Use a border of contrasting stone or a different pattern to visually frame the patio and signal a clean transition to lawn or garden beds.
- Combine stone with gravel, wood decking, or pavers to break up large areas and create defined zones for dining, seating, or a fire feature.
- Add functional elements like a seat wall or shallow steps where grade changes, turning a transition into a design feature instead of an afterthought.
- Keep furniture scale in mind before finalizing size. A patio that looks generous empty can feel cramped once a dining set and grill are in place.
If you’re planning layout on paper first, sketch your patio at scale with furniture footprints included, since proportion mistakes are one of the most common regrets homeowners report after installation. For regional design inspiration suited to colder climates and shorter outdoor seasons, New Hampshire homeowners have found particular design approaches work best for year-round use.
What Do Professional Installers Know That DIYers Often Miss?
Pros treat geotextile and lift-based compaction as non-negotiable, not optional upgrades. Skipping the fabric layer between soil and gravel is the single most common cause of the settling and shifting Divine Landscaping LLC gets called to fix on patios installed by previous owners or other crews. The fix almost always means pulling stones, correcting the base, and starting the layering over, which costs far more than doing it right the first time.
For New England properties specifically, material selection has to account for real freeze-thaw cycling every winter. Dense stones with low absorption hold up dramatically better here than softer, porous options, and a professional material assessment for the region should weigh climate exposure alongside appearance.
A standard professional estimate should include a site visit, soil and drainage assessment, specified base depth and materials, stone selection with sourcing, and a written timeline.
Most of the repair calls we get aren’t about the stone itself. They’re about a base that was never compacted correctly or a drainage slope that was never built in. The stone on top can be beautiful and still fail if what’s underneath wasn’t done right.
What’s the Environmental Impact of a Natural Stone Patio?
Quarried stone carries an environmental footprint tied mainly to extraction and transport, not manufacturing. Unlike concrete pavers, which require energy-intensive cement production, natural stone is cut and shaped from material that already exists, with no chemical curing process involved.
Sourcing matters more than most homeowners realize. Stone quarried closer to your region travels a shorter distance, cutting transport emissions compared to imported material shipped from overseas quarries. Ask your supplier where the stone originates, since regional bluestone or granite often has a smaller footprint than imported travertine or exotic marble.
Natural stone’s biggest sustainability advantage is durability itself. A material that lasts 50 to 100 years replaces the need for repeated manufacturing, shipping, and disposal cycles that shorter-lived materials require. A concrete patio that needs full replacement every 20 to 30 years generates far more long-term waste than a stone patio built once and maintained properly.
Permeable jointing choices, using sand or gravel joints instead of solid mortar, also allow rainwater to filter back into the soil rather than running off into storm drains, reducing runoff strain on local drainage systems. Homeowners interested in broader sustainable landscaping practices can find additional guidance on certified sustainable design approaches that pair well with a stone hardscape.
How Do You Make a Stone Patio Safer and More Accessible?
Slip resistance starts with finish choice. Cleft-finished stone, left with its natural split texture, provides meaningfully better grip underfoot than a highly polished sawn finish, especially when wet. If your patio surrounds a pool or sits in a spot that collects rain, prioritize a textured finish over a smooth one, even if the smooth version looks more refined in photos.
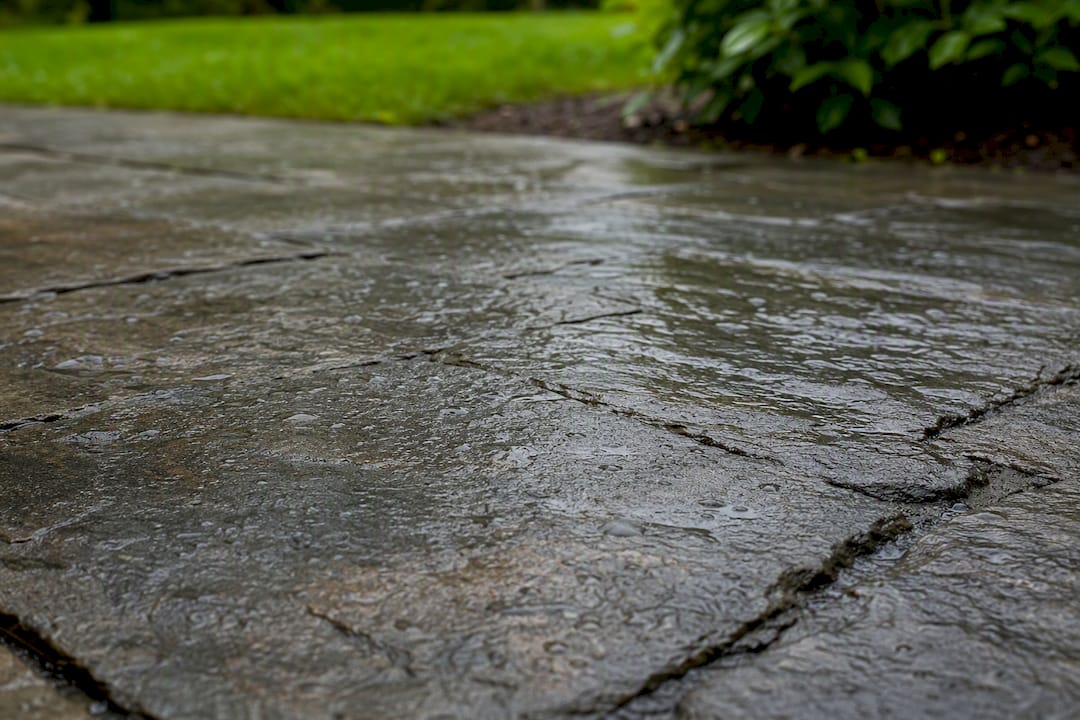
Joint width and consistency matter for anyone using a cane, walker, or wheelchair. Tighter, evenly filled joints reduce the chance of a wheel or cane tip catching and create a more predictable surface. Wide, uneven joints filled with loose gravel look rustic but create real tripping hazards for anyone with mobility concerns.
Grade transitions deserve extra attention. Where a patio meets a lawn, driveway, or step down to a lower level, a gentle ramped transition or a clearly marked, well-lit step is far safer than an abrupt, unmarked height change. Low-voltage path lighting along the patio’s edge helps mark these transitions after dark, which matters most in the months when daylight is shortest.
Finally, consider standing water. A patio that pools water near entry points or walking paths becomes an ice hazard in winter and a fall risk anytime. Getting your slope and drainage right during installation isn’t just about protecting the stone, it directly protects the people using it.
Why Beginner Guides Get One Thing Wrong About Stone Patios
Most guides to natural stone patios treat installation like a weekend tutorial: dig, compact, lay stone, done. That framing undersells the one variable that actually determines success, which is what happens below the surface before a single stone gets placed. The stone itself is almost never the point of failure. The base is.
Conventional DIY advice tends to treat geotextile fabric and lift-based compaction as optional refinements for the extra-cautious. They’re not. They’re the difference between a patio that settles evenly for decades and one that develops dips within two winters. If you take one thing from this guide, prioritize learning to compact a base correctly before you spend a dollar on stone selection.
I’d also push back on the idea that DIY versus hiring a pro is purely about skill level. It’s really about risk tolerance for what’s underground. A flat, well-drained yard forgives mistakes. A sloped or poorly draining one does not, and that’s exactly where a professional site assessment earns its cost.
— Damian
Divine Landscaping LLC Turns Stone Patio Plans Into a Built Reality
If you’ve read this far and you’re weighing whether to tackle a stone patio yourself or bring in a crew, the deciding factor usually isn’t the stone. It’s the base work, drainage, and grading that a DIY project can get wrong in ways that don’t show up until a year or two later.

Divine Landscaping LLC designs and builds custom patios across New Hampshire and Massachusetts, with base engineering specifically built for the region’s freeze-thaw winters, not a generic national template. That regional focus is the real advantage: a patio designed for a milder climate and installed here is exactly the kind of project that ends up settling or heaving within a few seasons. Divine Landscaping LLC’s crews handle the excavation, geotextile placement, lift-by-lift compaction, and drainage grading that separate a patio that lasts decades from one that needs repair work by year three.
If your project involves structural walls, significant grading, or a scale beyond a weekend DIY job, request a quote for your patio project and get a site visit that assesses your soil, drainage, and stone options before any work begins.
Sources
- Natural Stone Patios: Materials, Installation & Sealing – Dynamic Stone Tools
- A Beginner’s Guide to Natural Stone Patios — Houzz
- How to lay a stone patio — This Old House